...
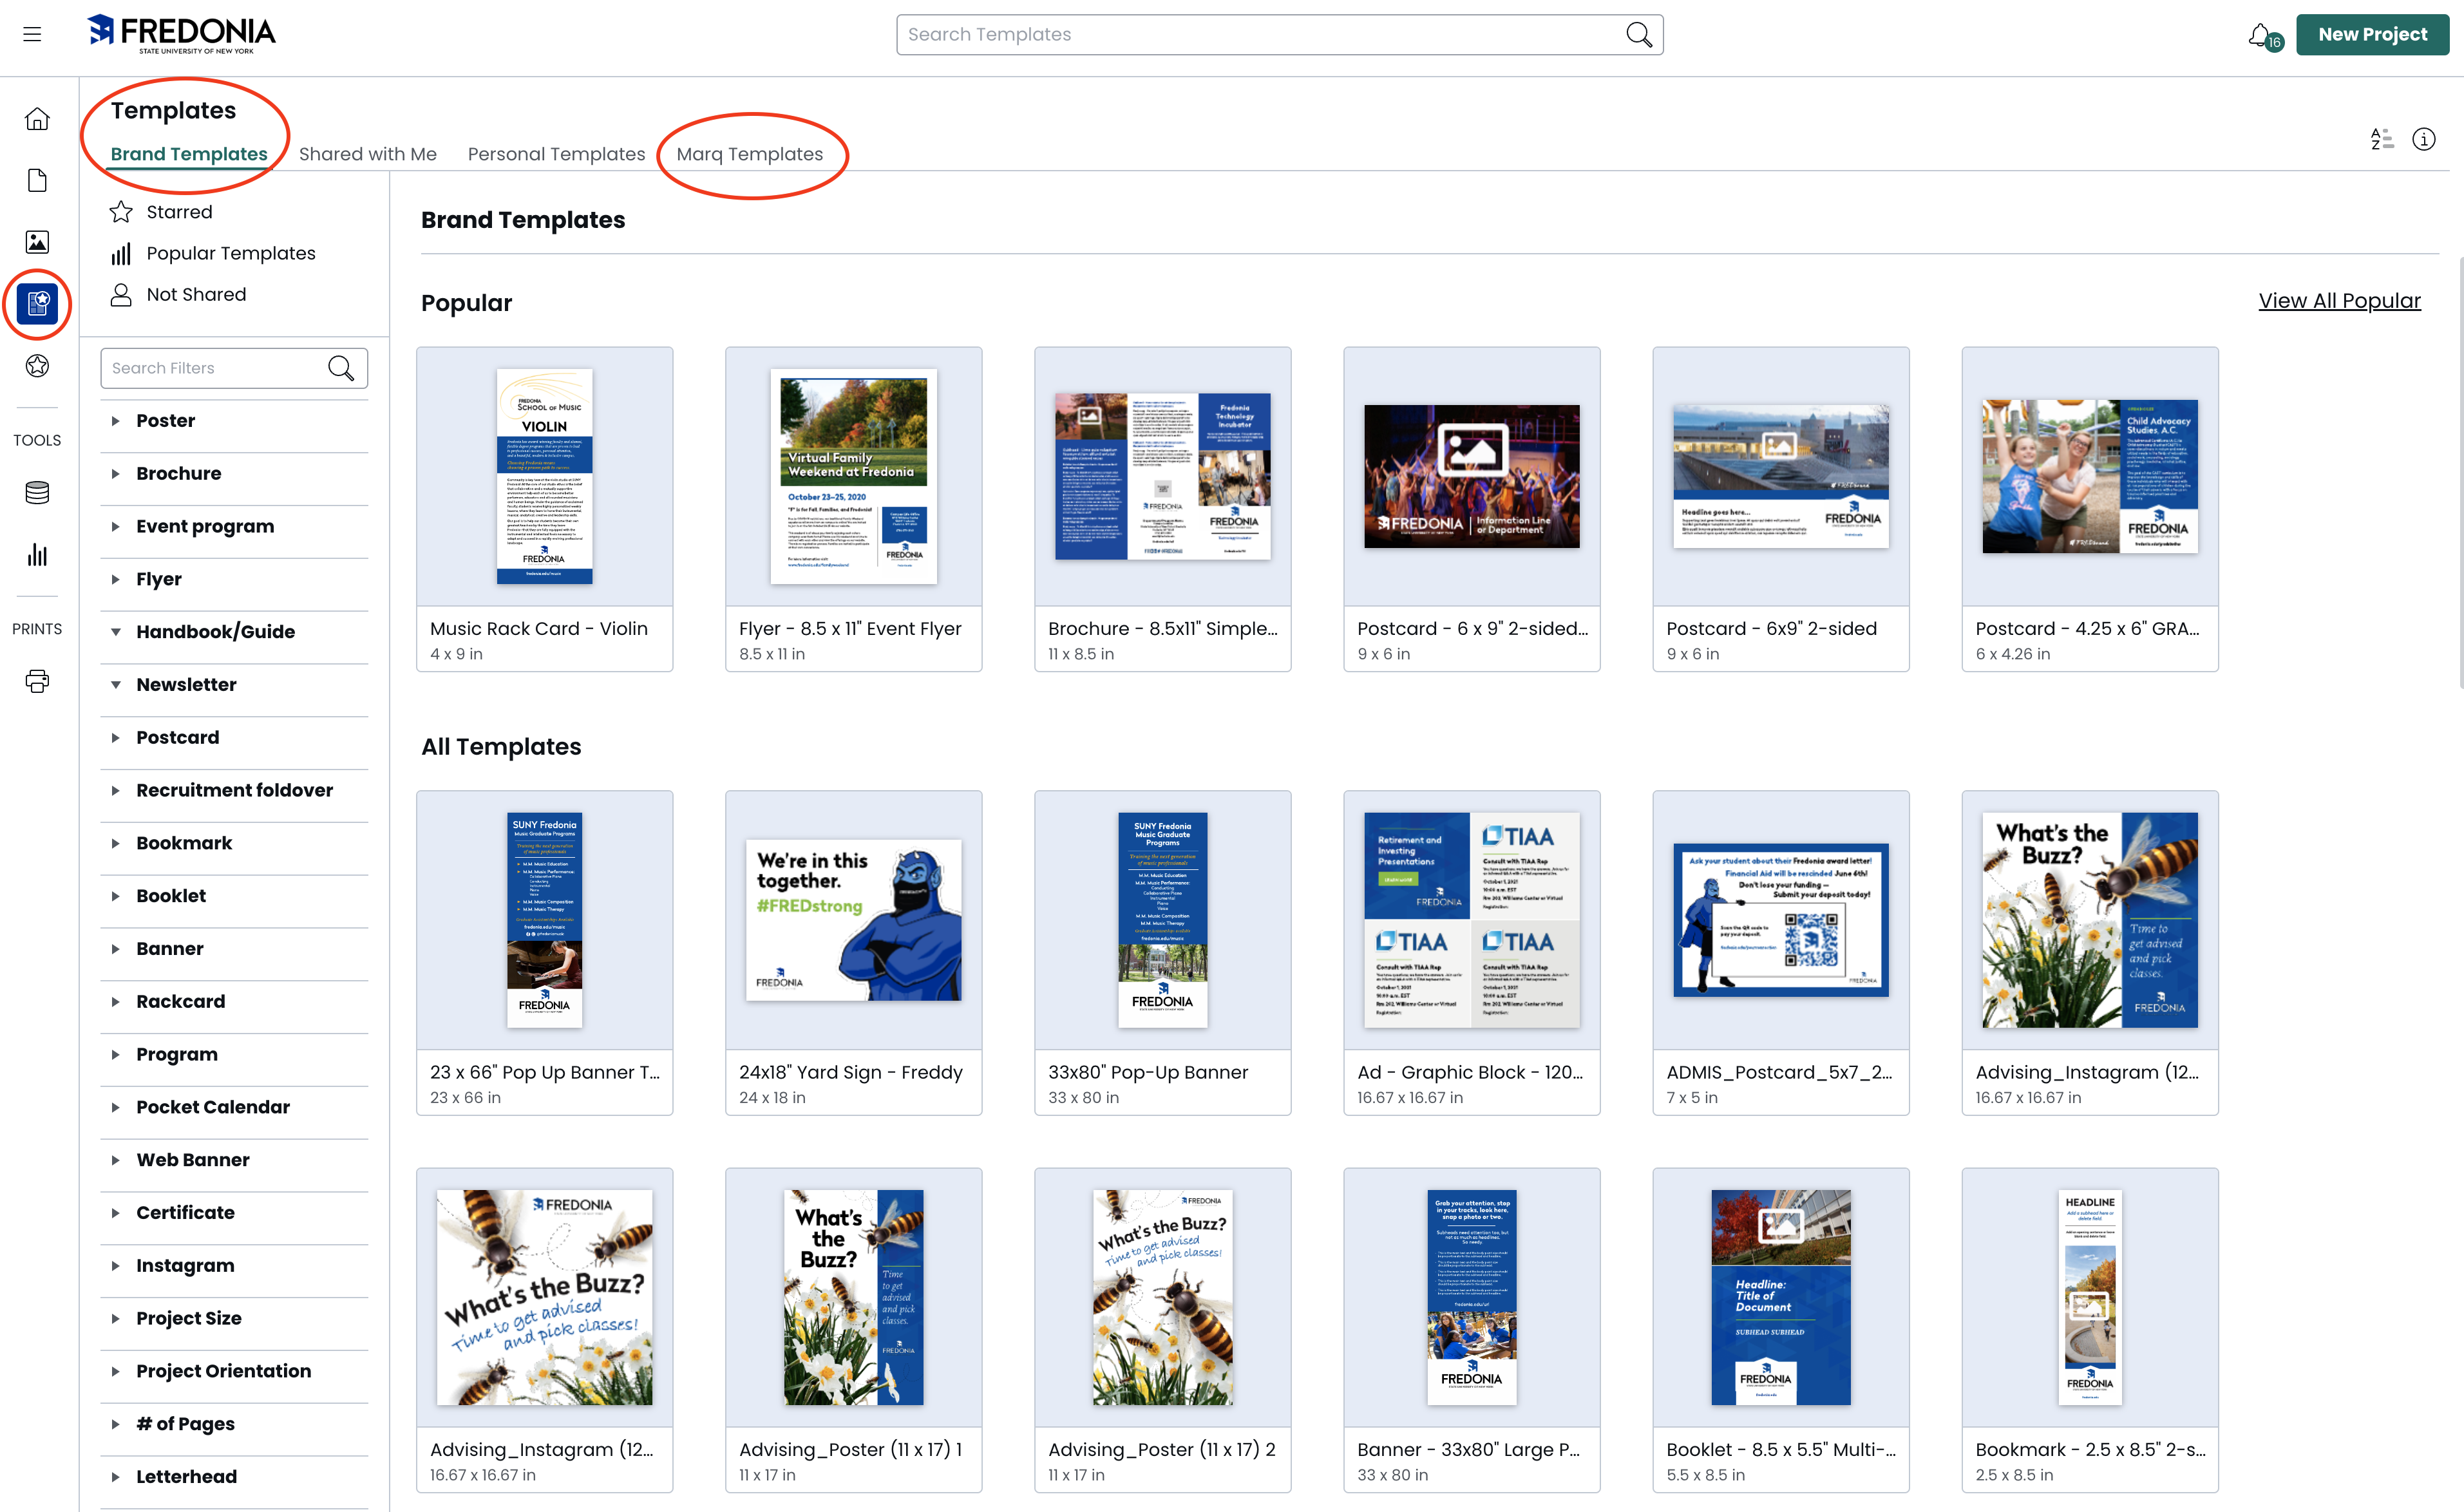
Choose a Fredonia template, or browse the Marq Library of templates to find a document to start from.
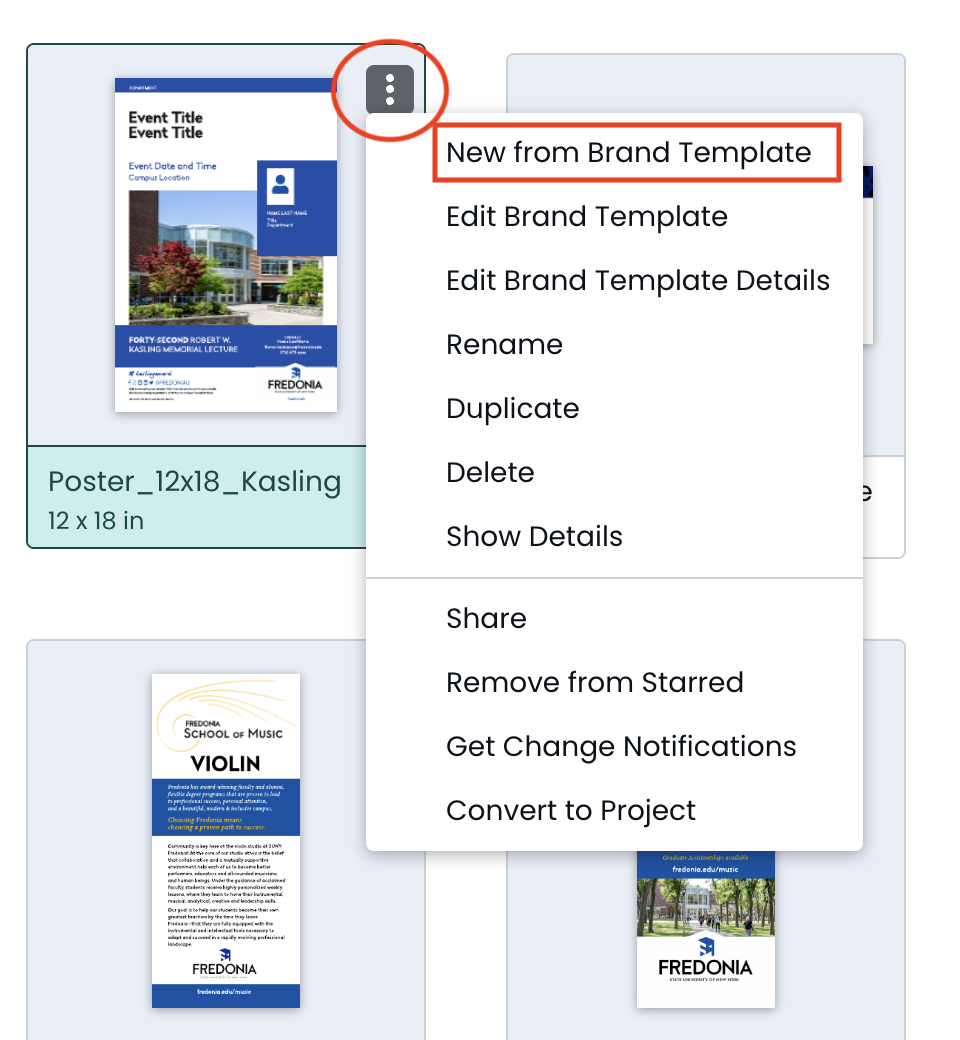
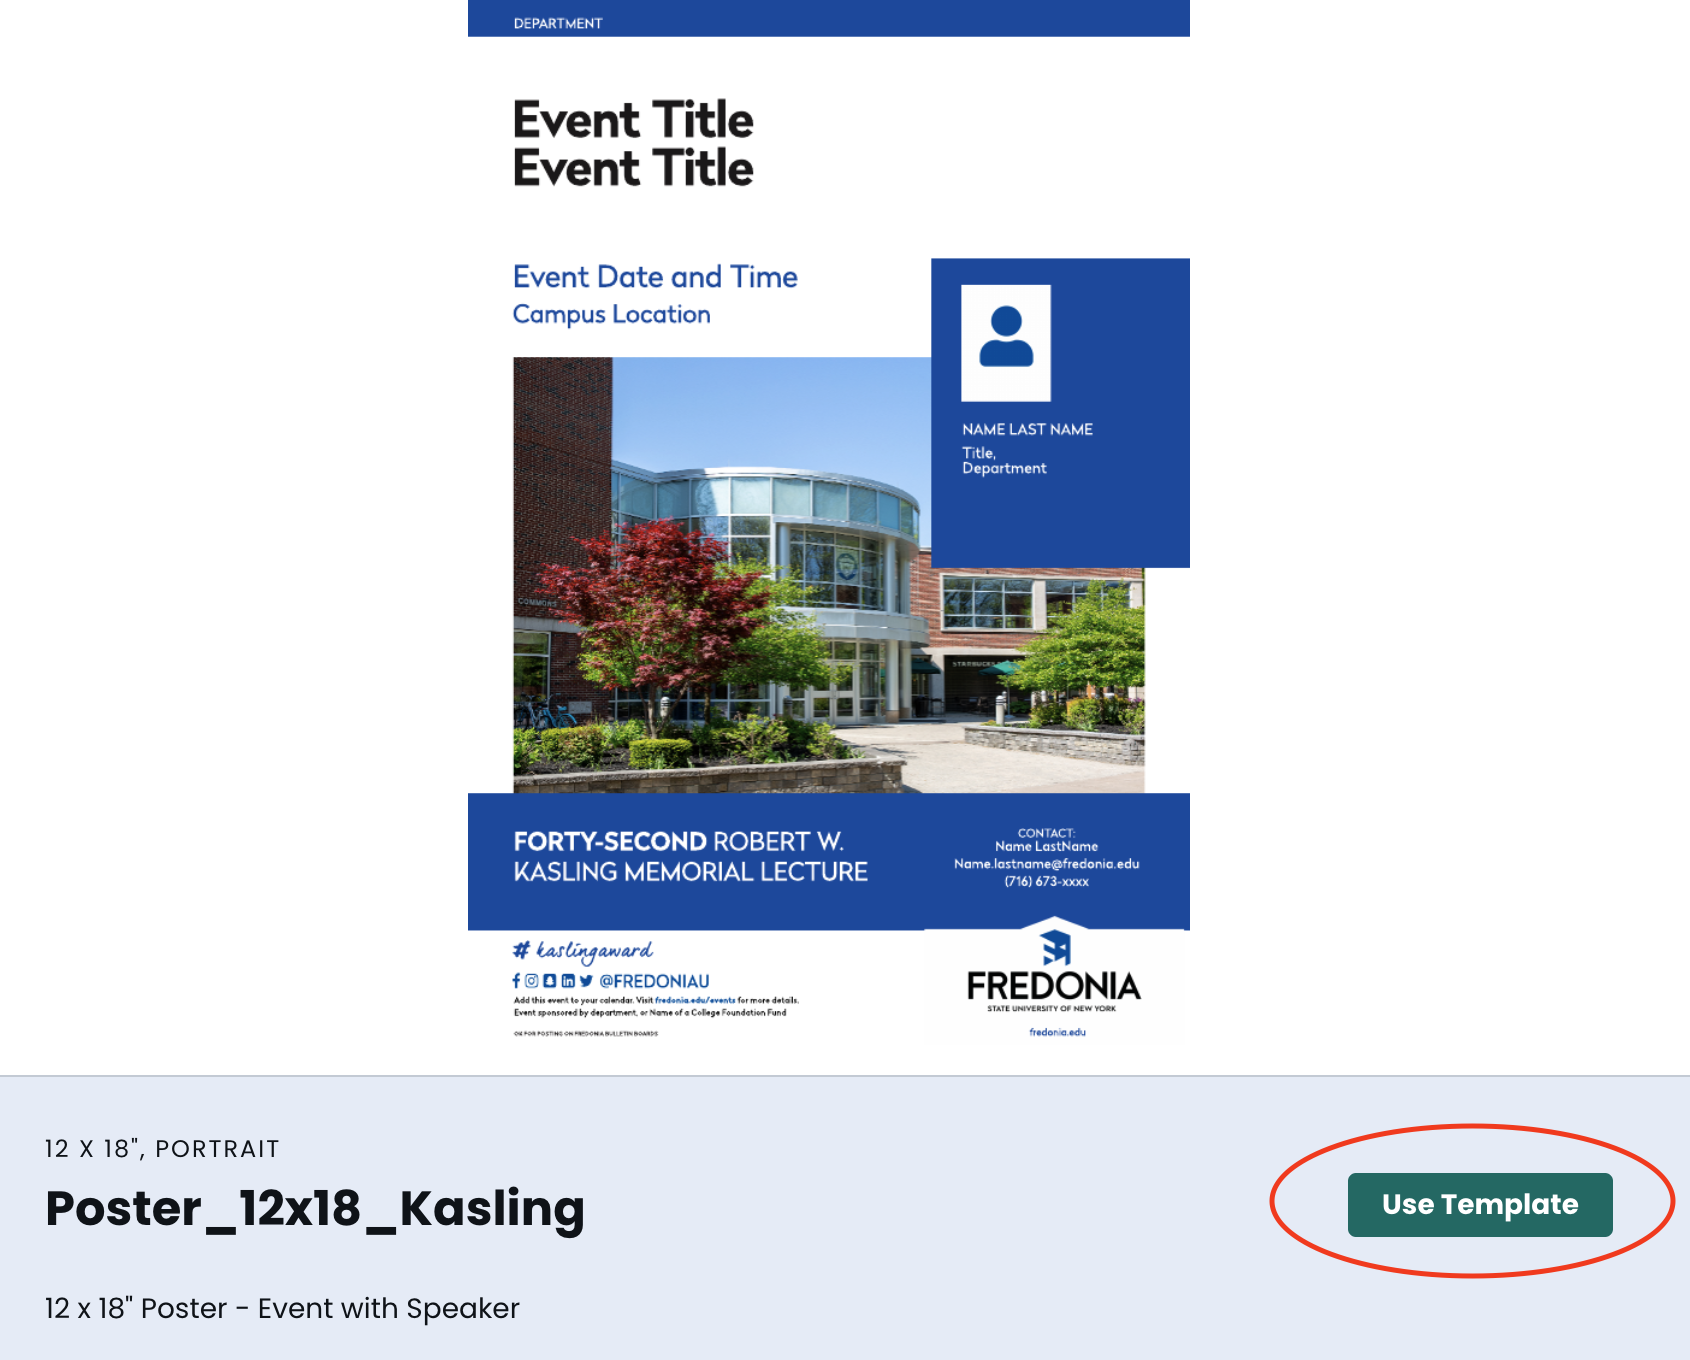
Click on the 3 dots at the top right of the selected template window and choose “New from Brand Template” or simply click on the template image and a window will pop up with a green “Use Template”
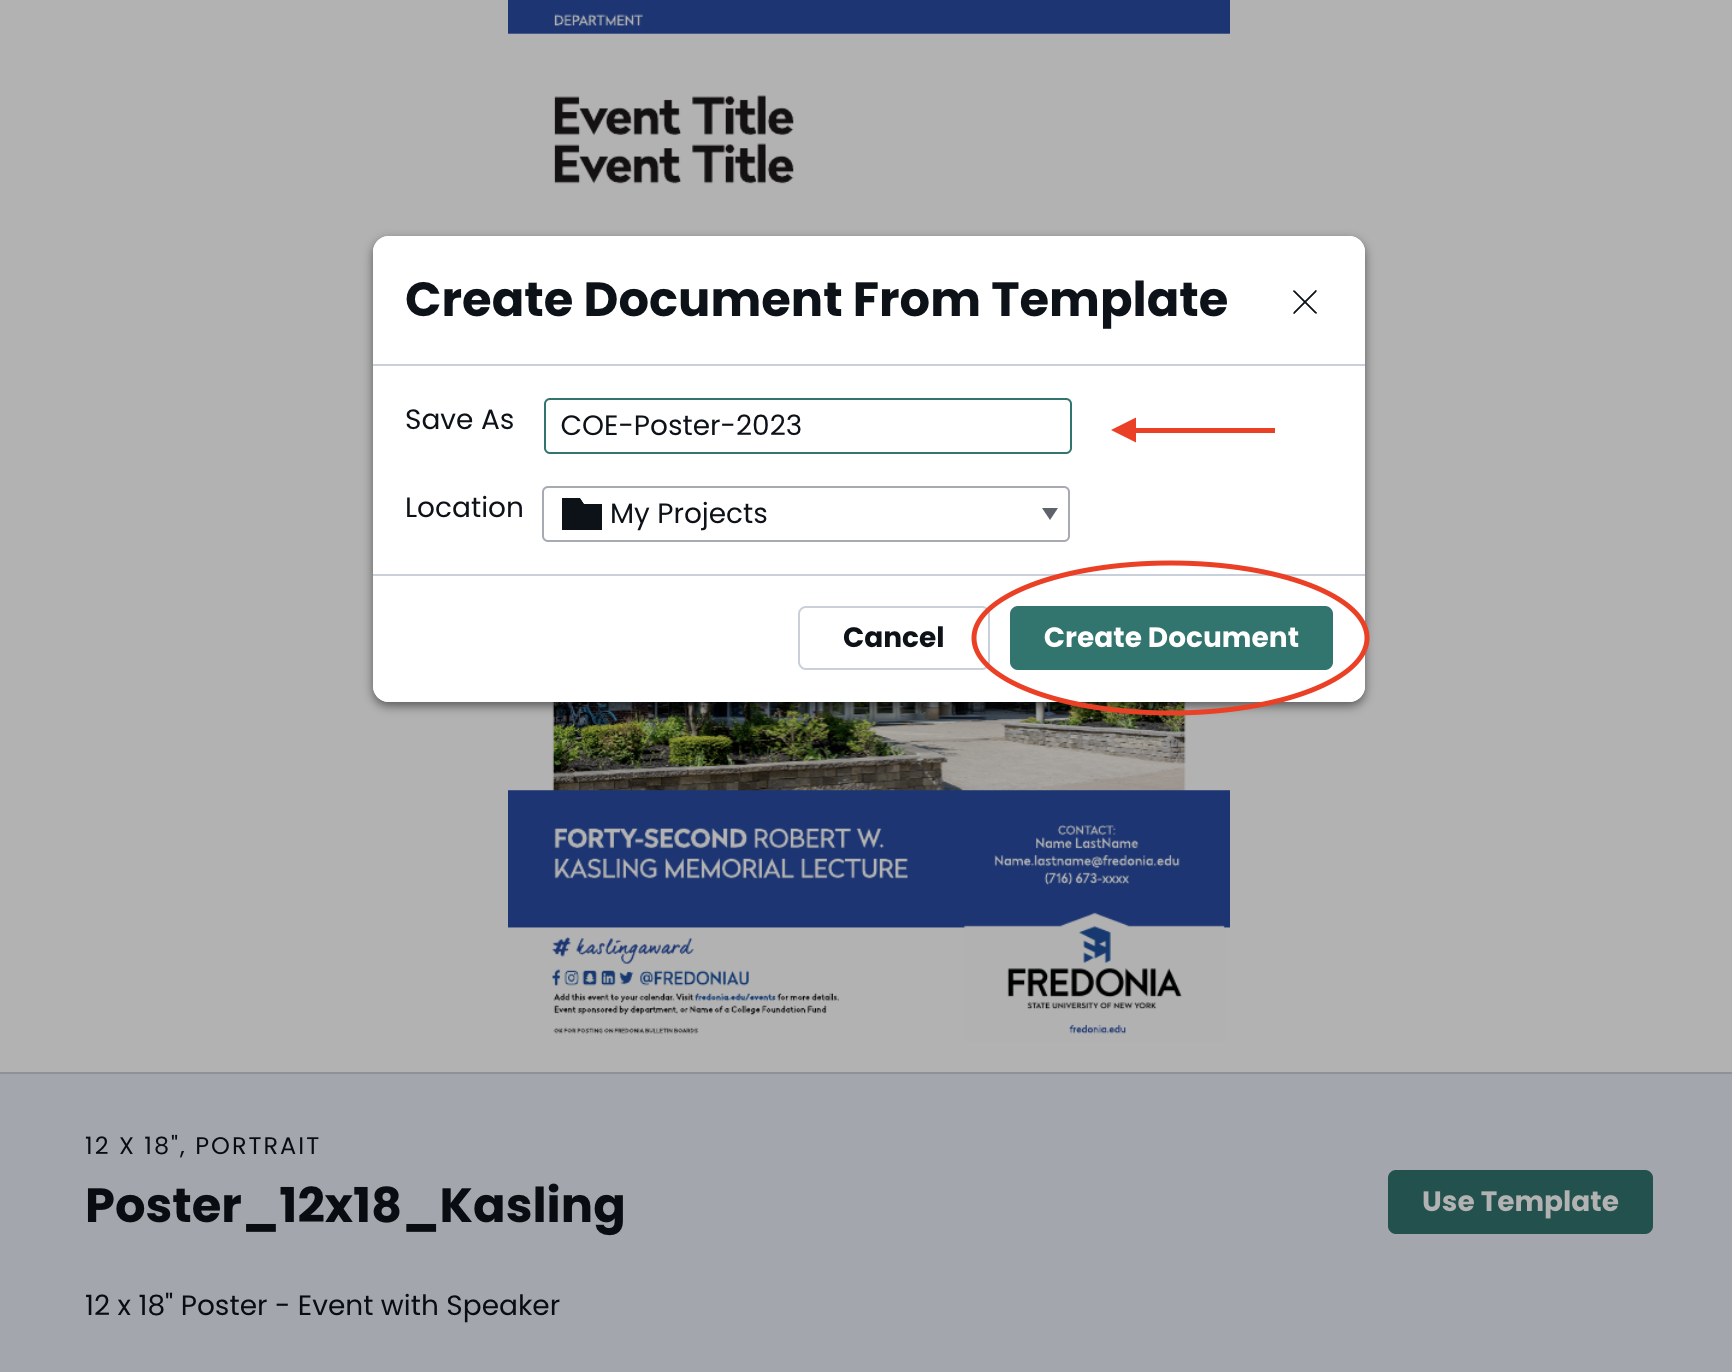
A pop up window will open: “Create Document from Template”
Give your document a name.
It is important to name your document a unique name that will identify:
Department the document is being created for
Type of document it is (brochure, flyer, poster, ad, etc.)
Date (For example a brochure for the President’s Office might be named “PRES-Office-Brochure-2023” or a flyer for the College of Education might be named “ COE-recruitment-flyer-2023”)
Click “Create Document”
The project window will load the document template. You may begin editing the document by double-clicking on text boxes to enter your content. When you click on a text box, the right column menu will show the editing options for the text block.
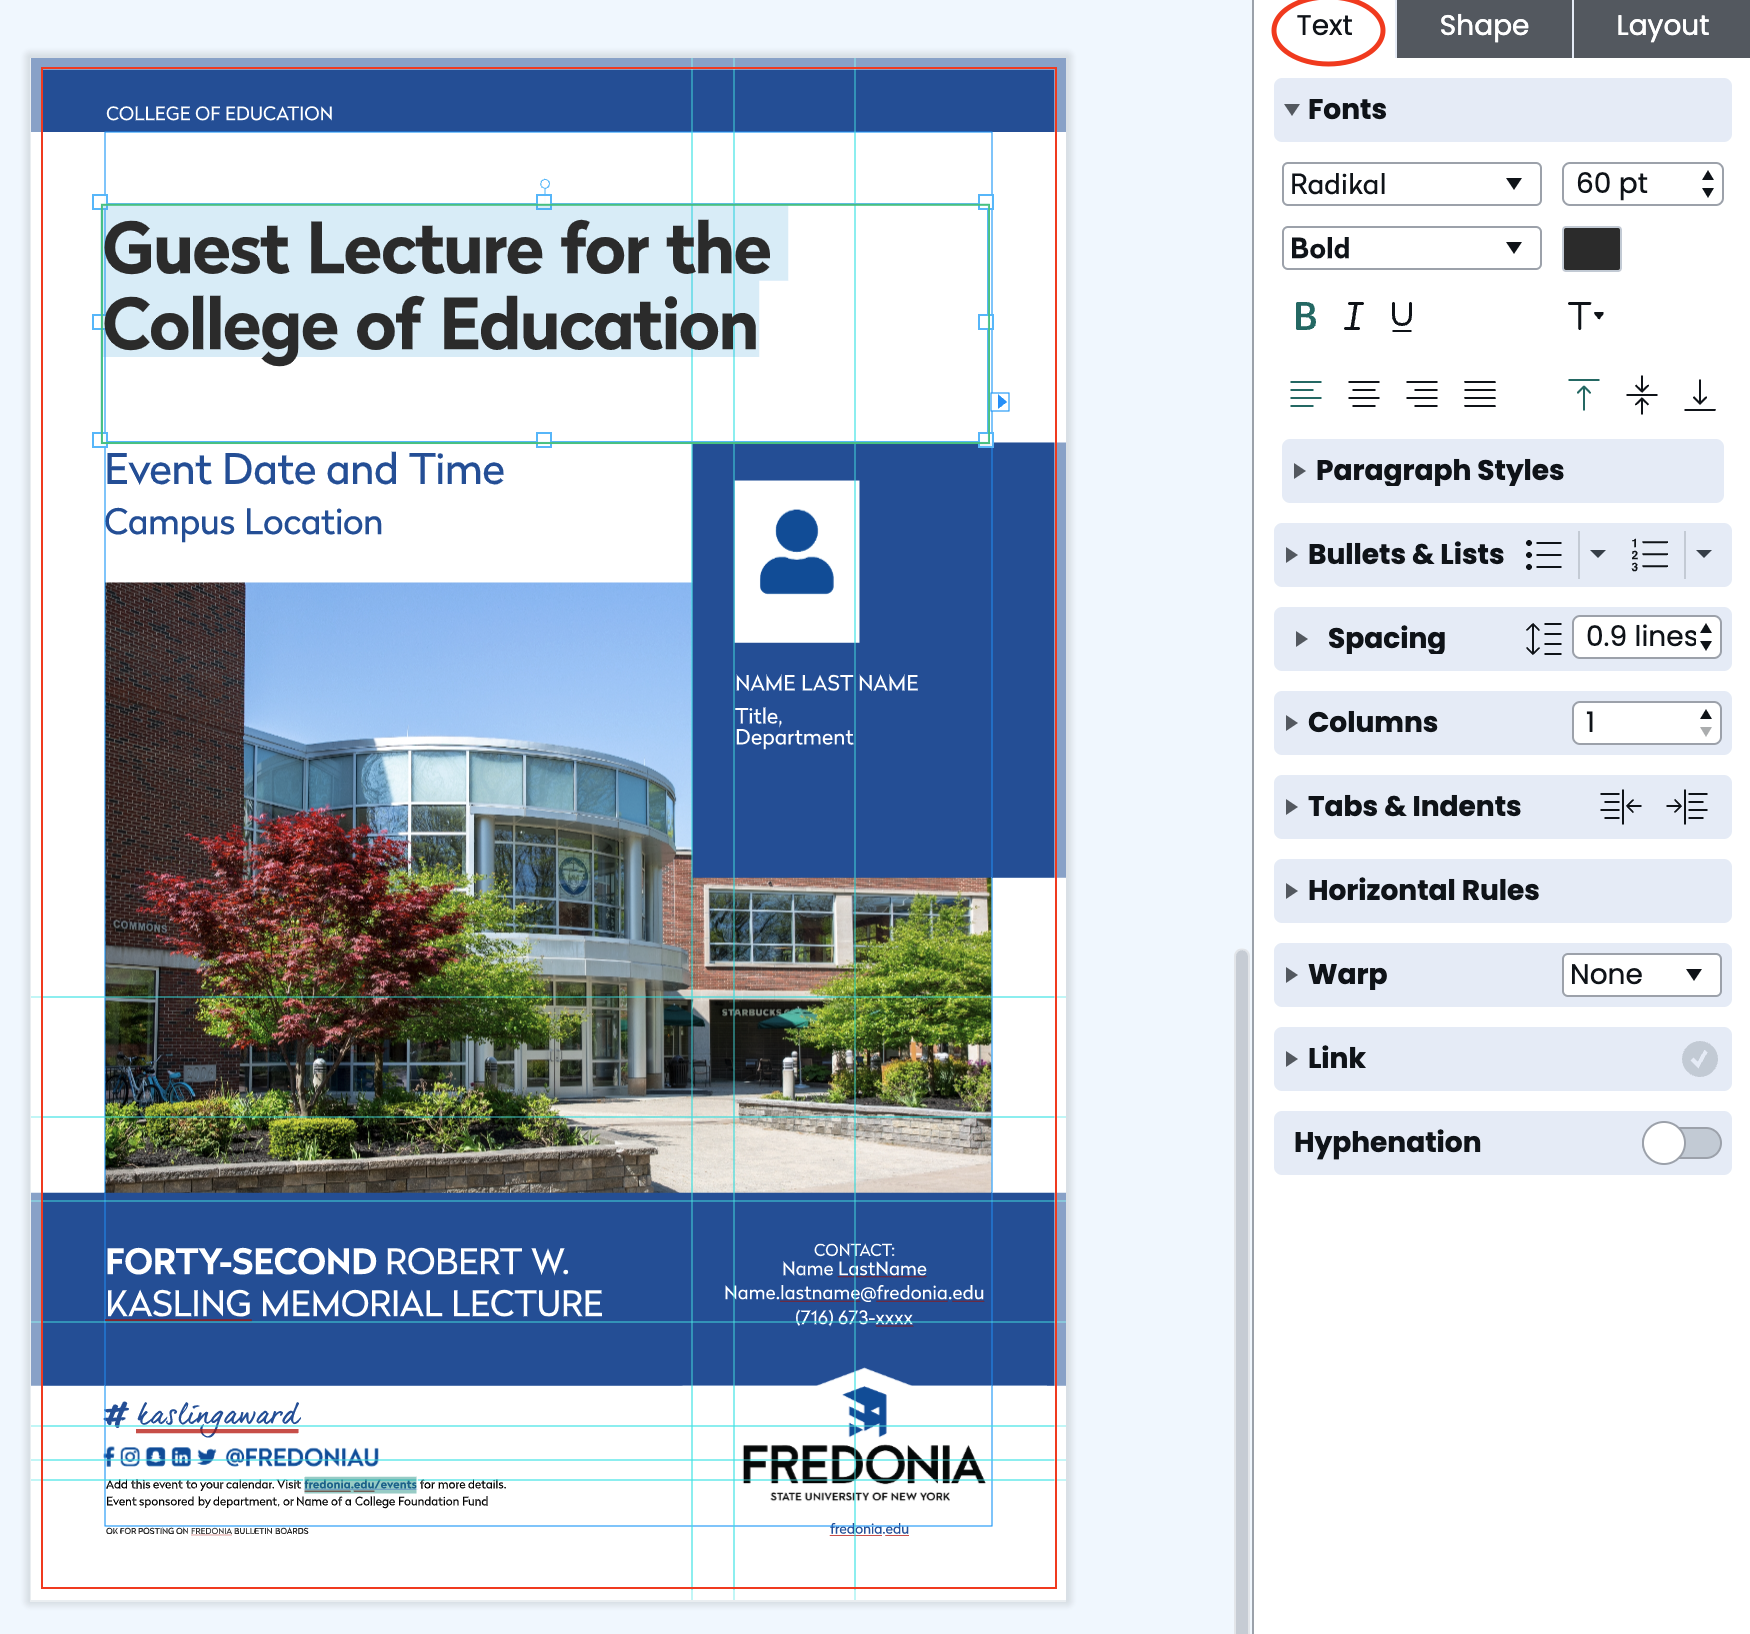
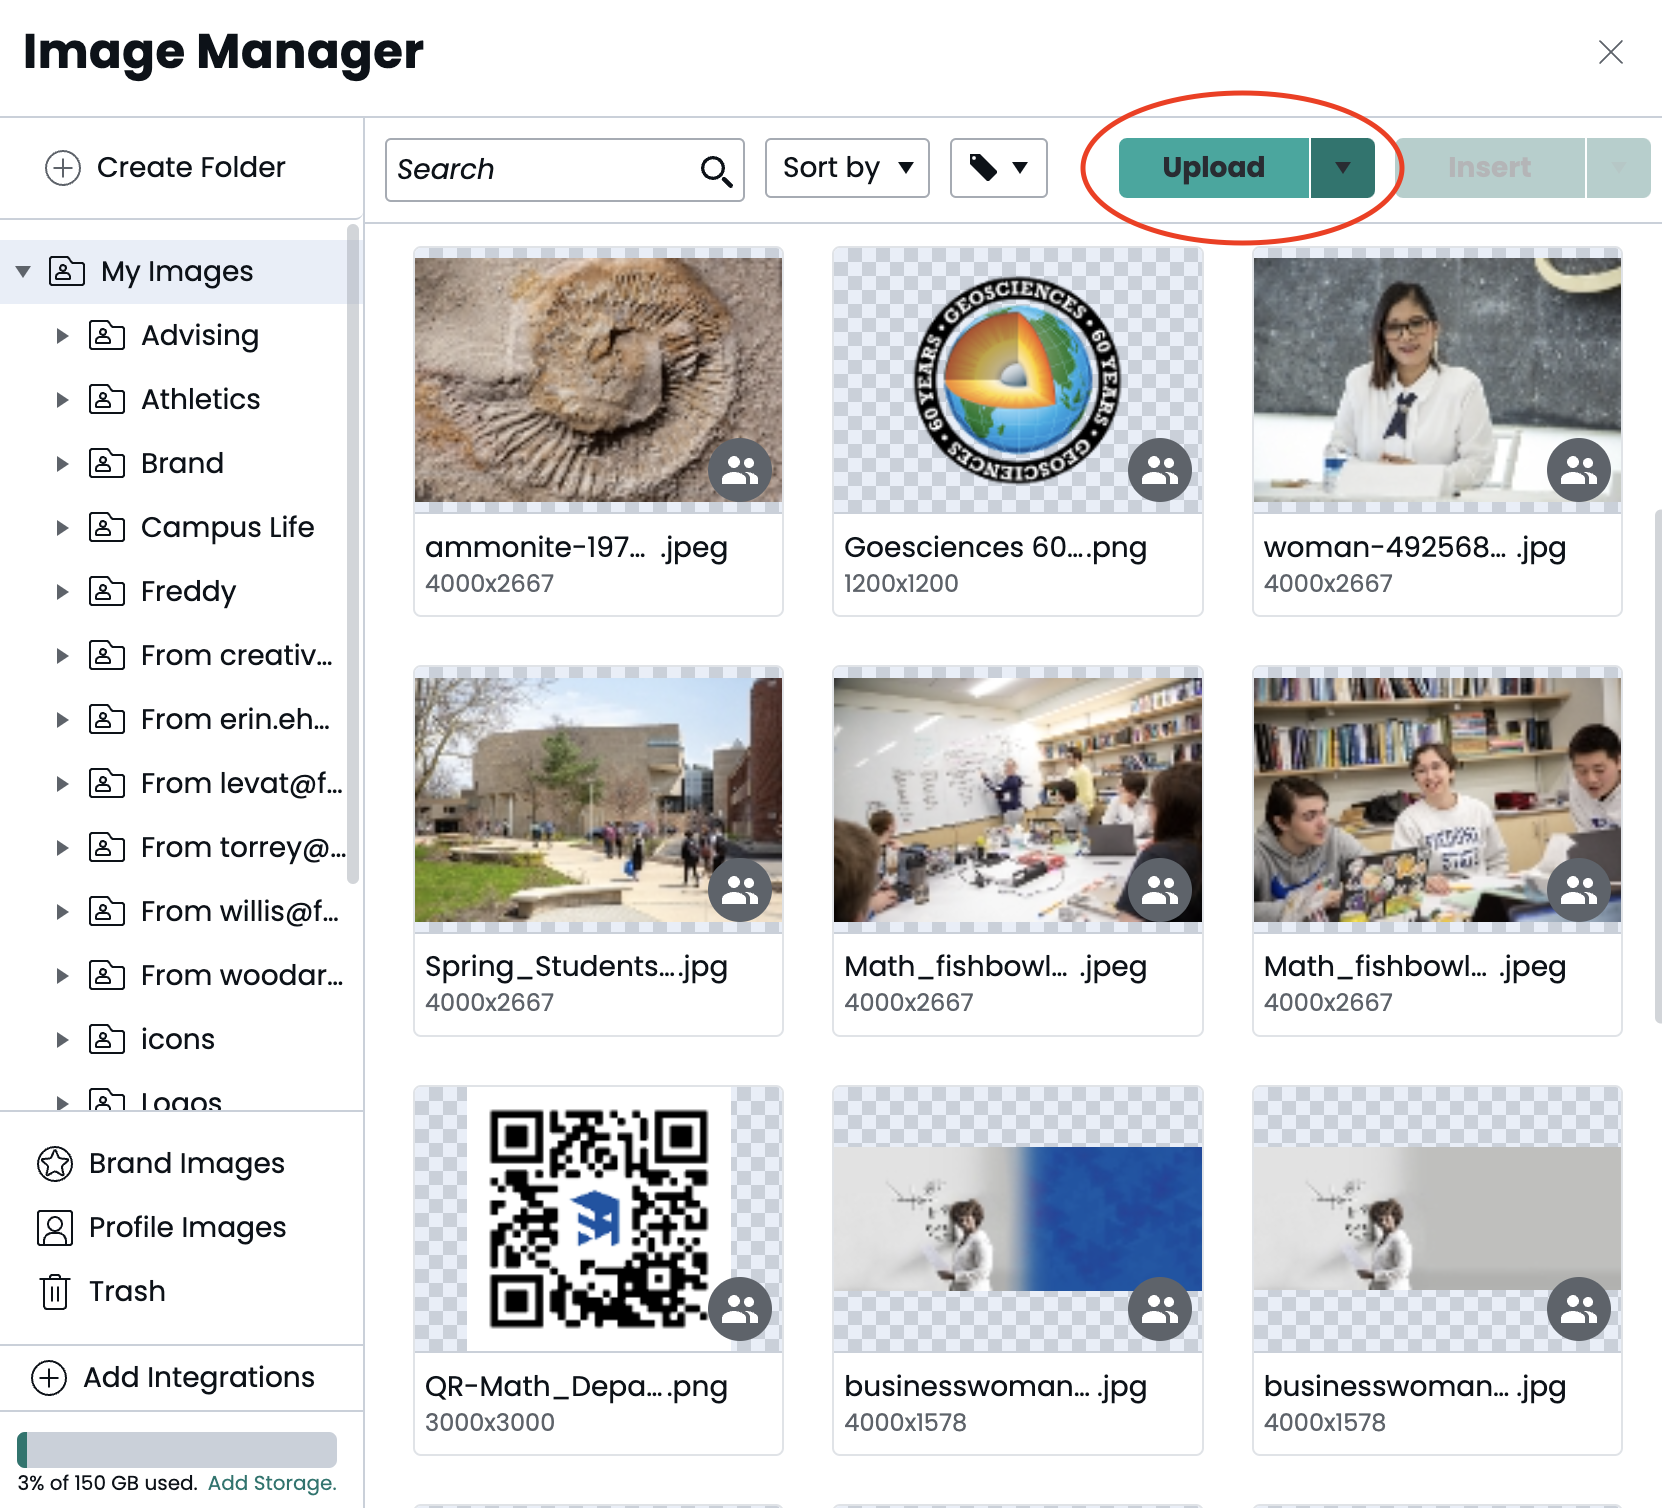
Double-click on an image to open the image manager window. Upload the image you want to use from your computer. Once the image is uploaded, choose “select” and the image will be placed into your document. (Print quality images should be 300 dpi resolution, CMYK color space.)

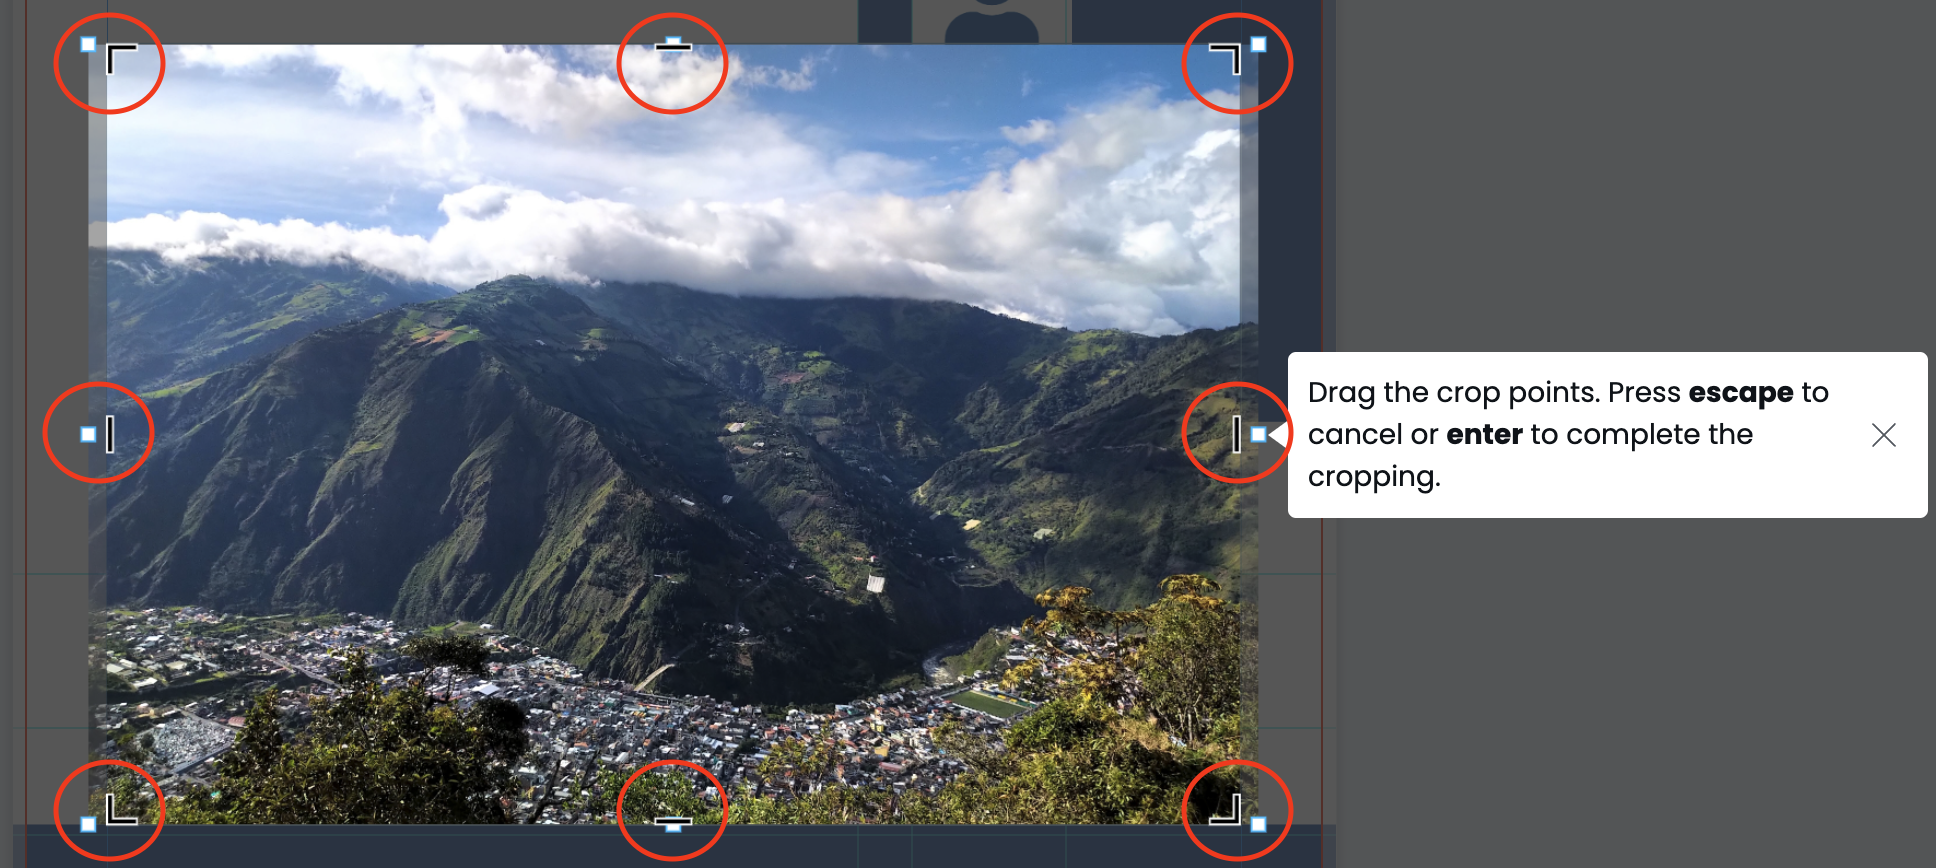
If you need to scale or crop an image, right click on the image to access the short menu and choose “crop photo”. A pop up window will appear that will allow you to scale and crop the image.
If you need access to Fredonia’s Image Library, please visit fredonia.edu/photos. If you have not logged into the Photo Library before, you will need to request access and a member of the design team will email you a login. A help page with instructions can be found at www.fredonia.edu/photos/help.
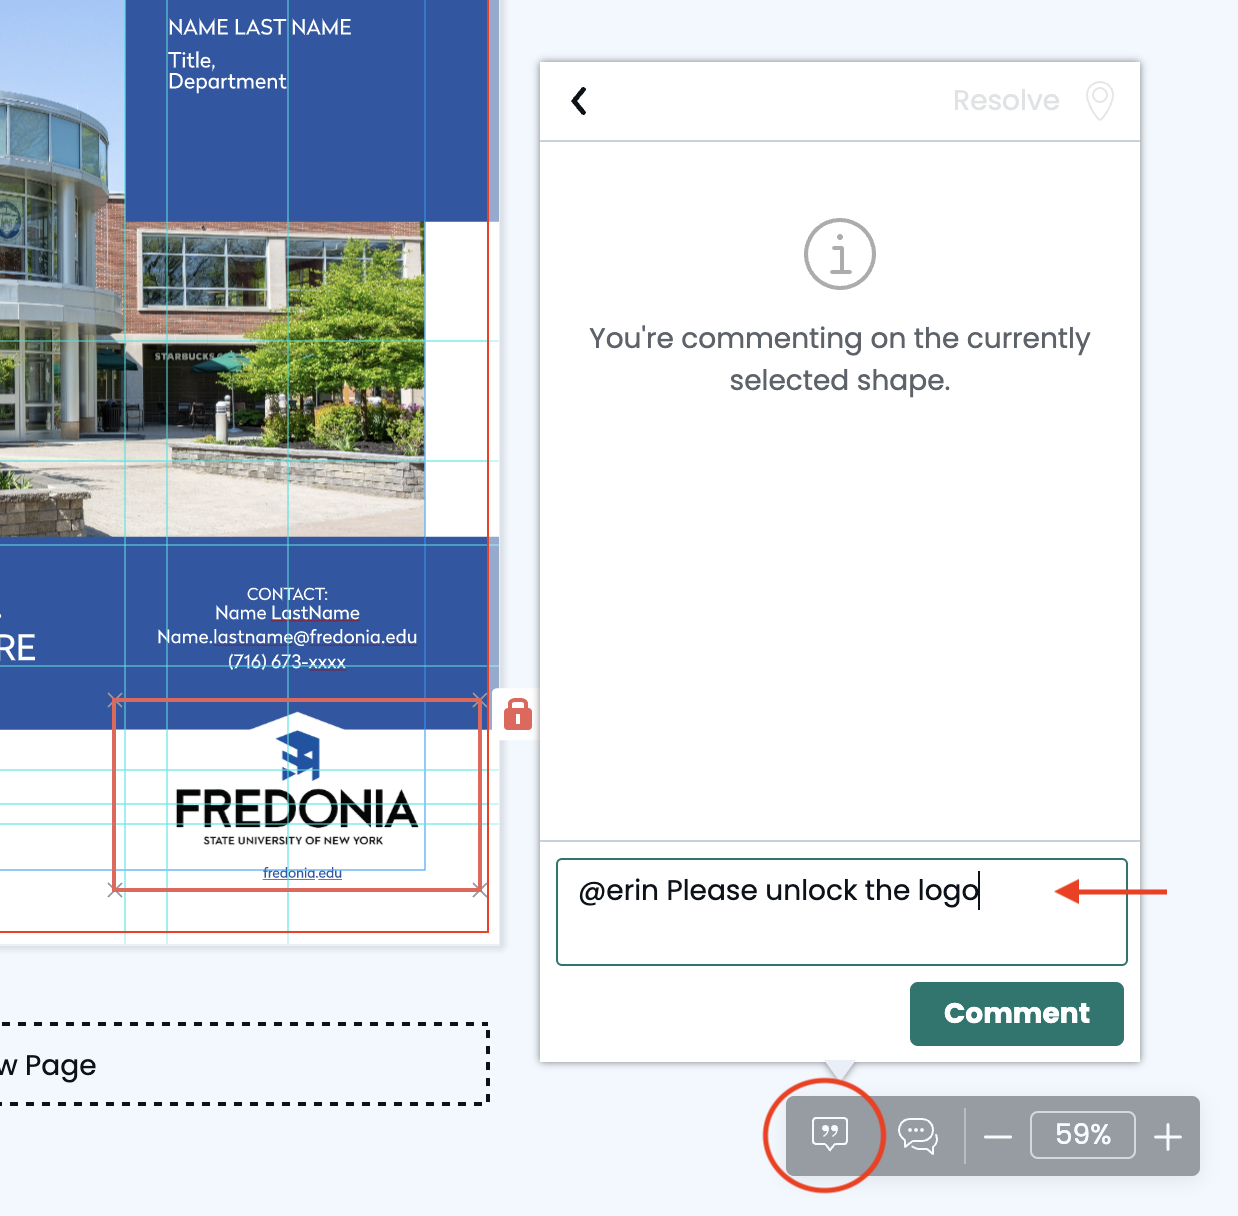
Any item that appears outlined with a RED box when clicked is locked and can not be edited. (If you need to make changes to any locked item, send a comment to your Design Team member by using the comment feature.)
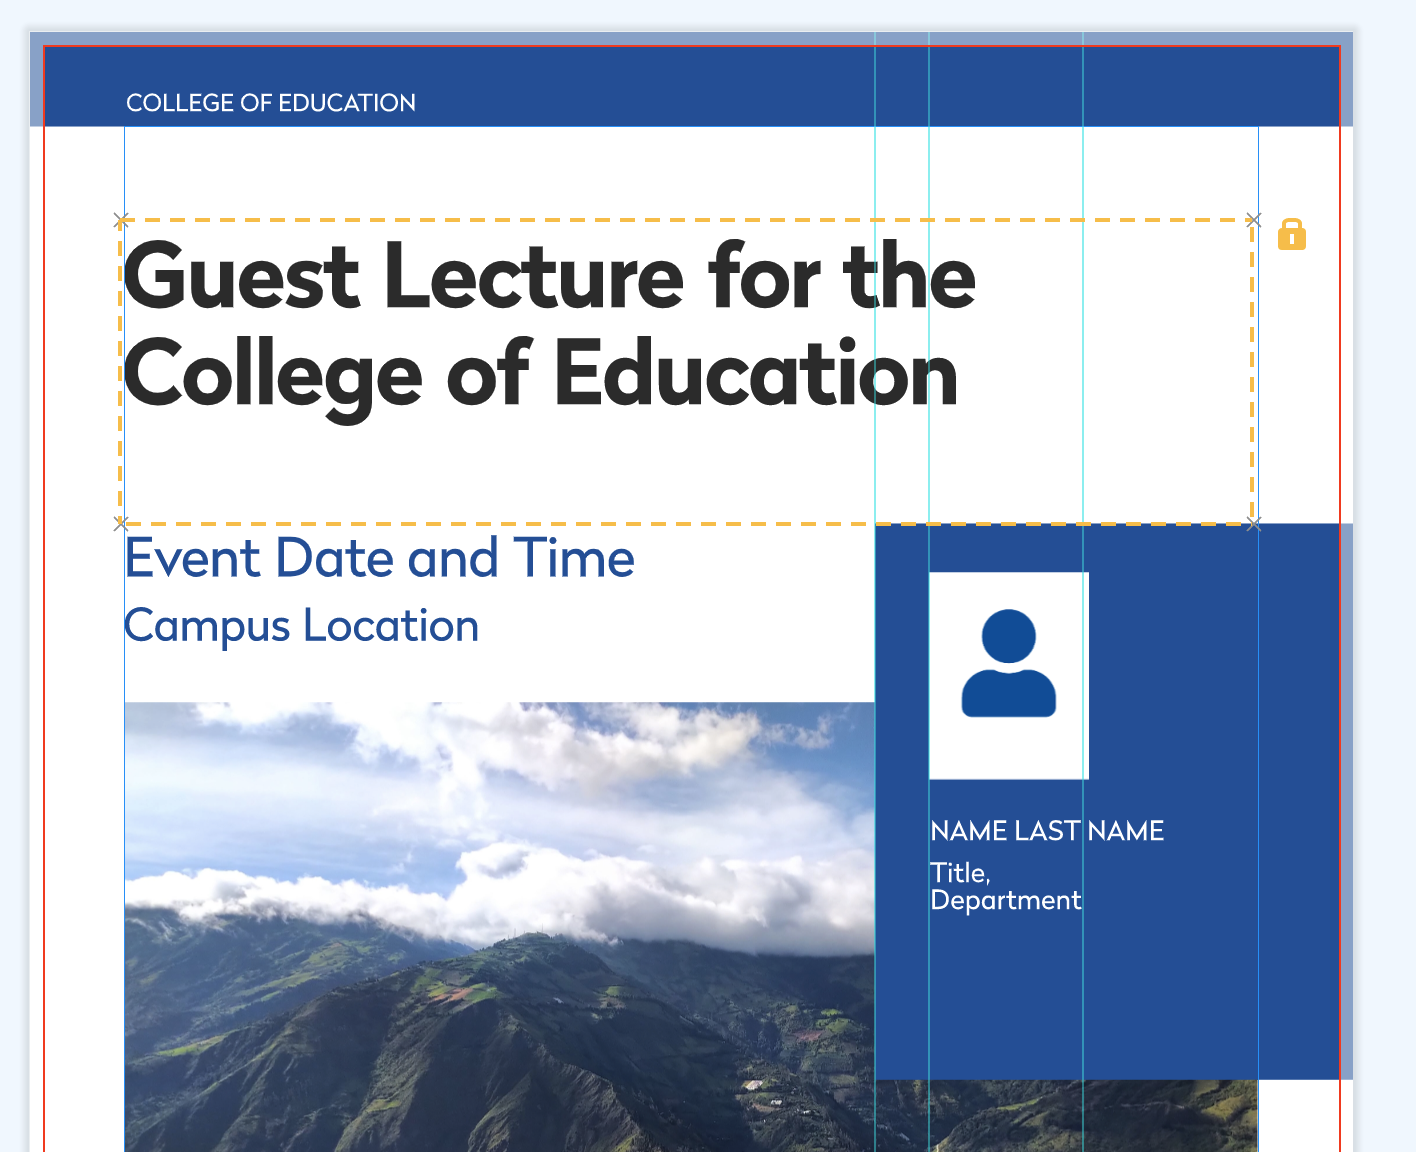
Any item that appears outlined with a YELLOW dashed box is semi-locked, usually a text box, that allows the user to edit the text but not the style. (If you need to make changes to any locked item, send a comment to your Design Team member by using the comment feature.)
Be sure to review all the content in the document to make sure you have made it your own.
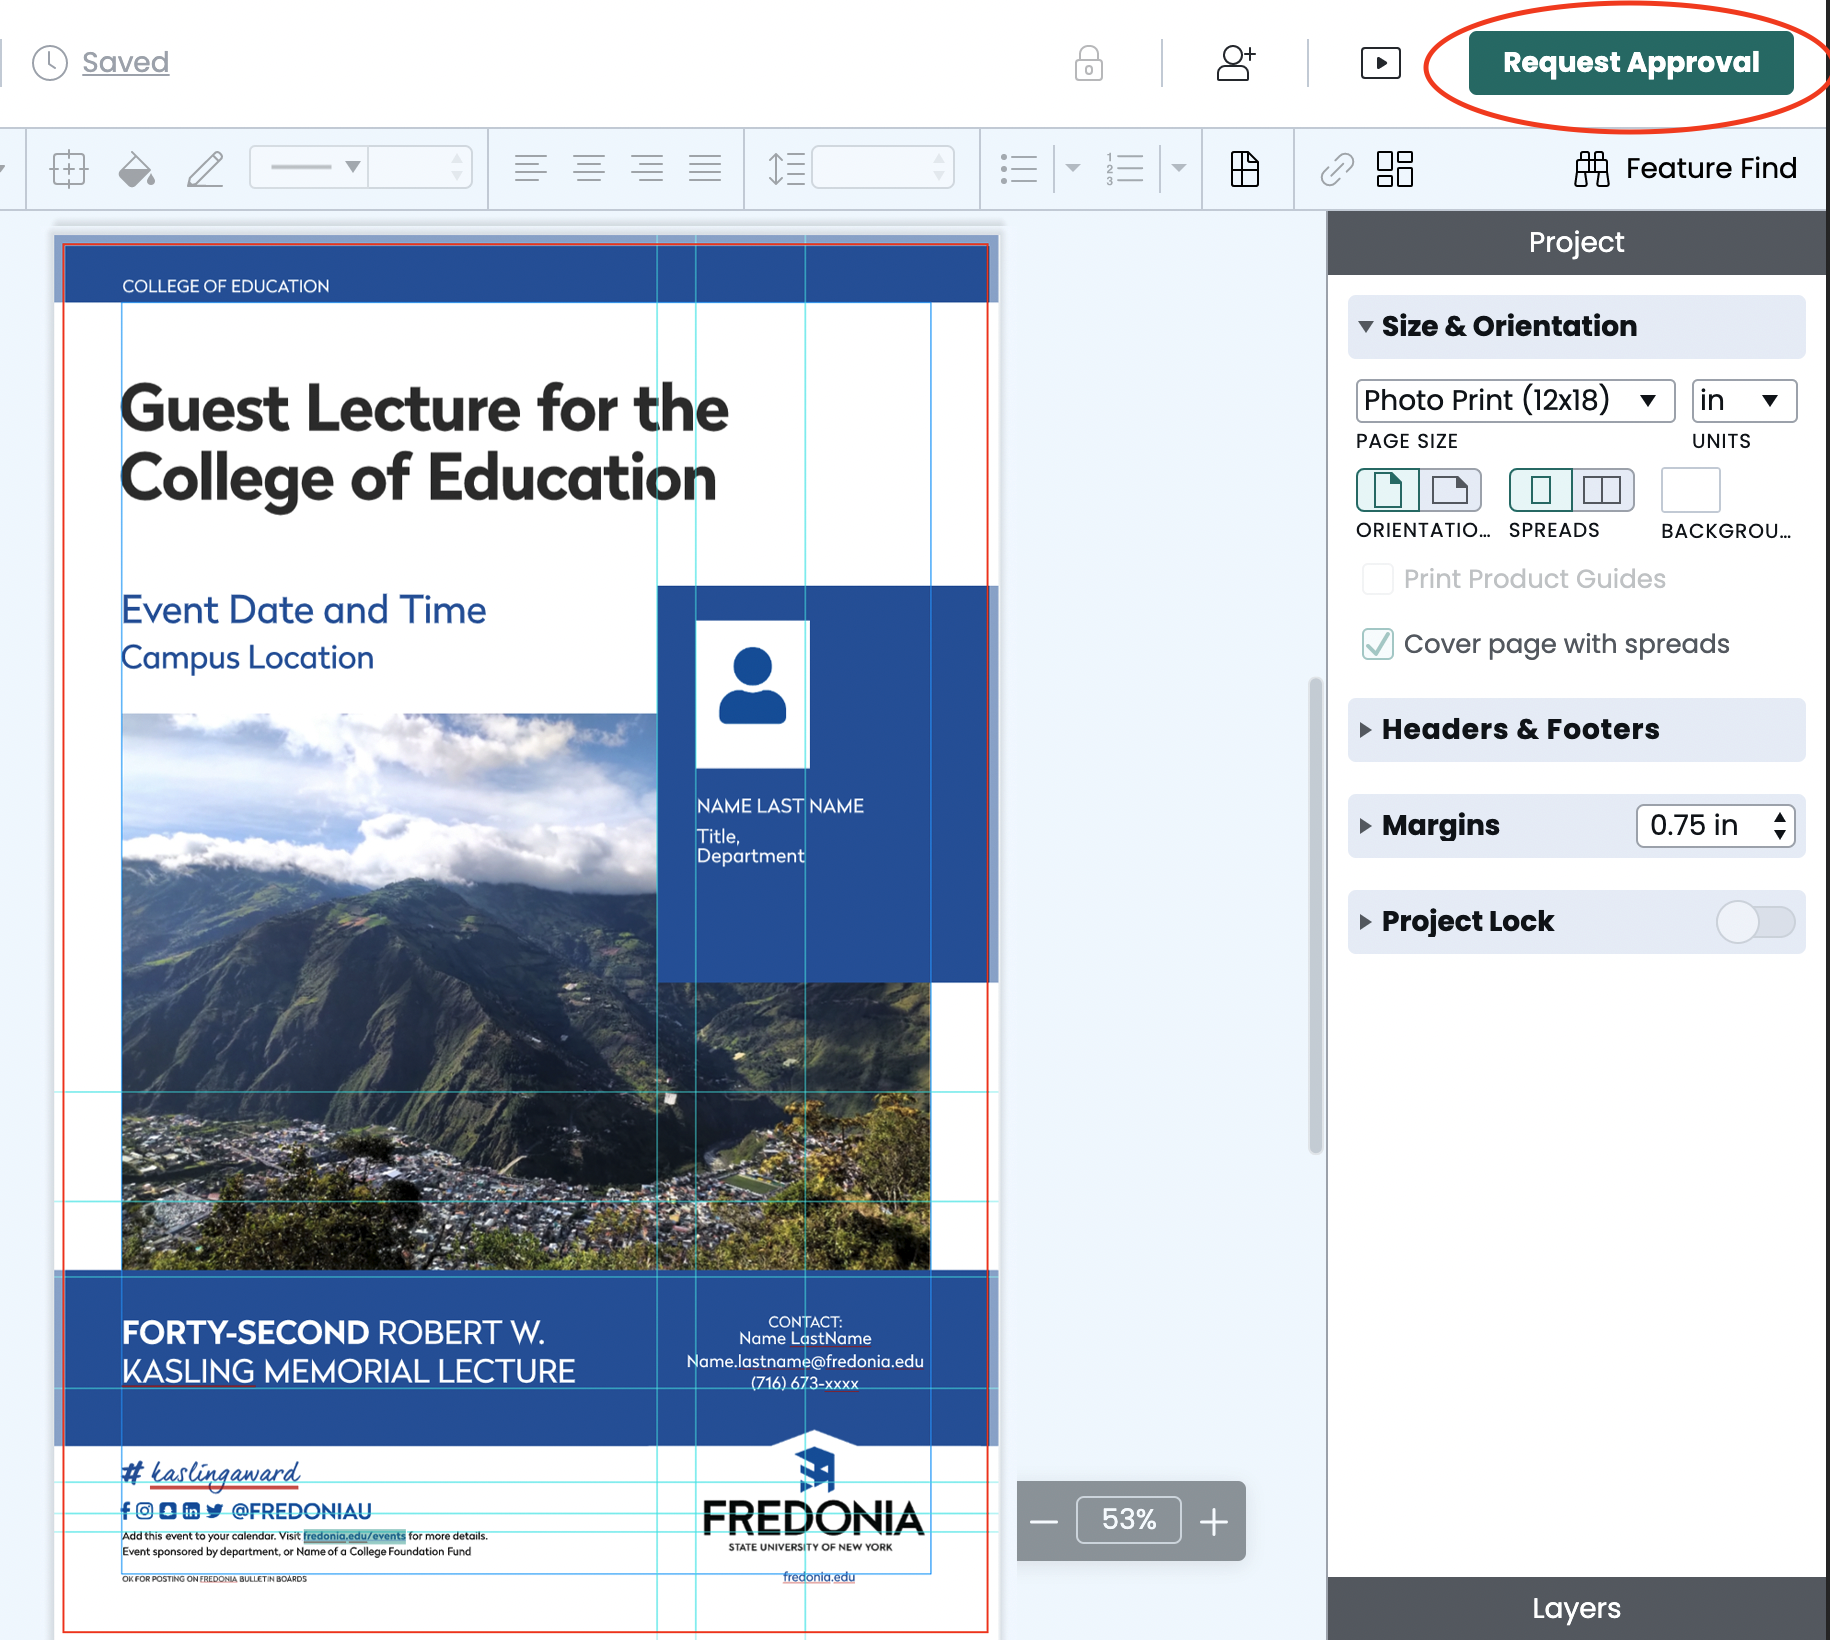
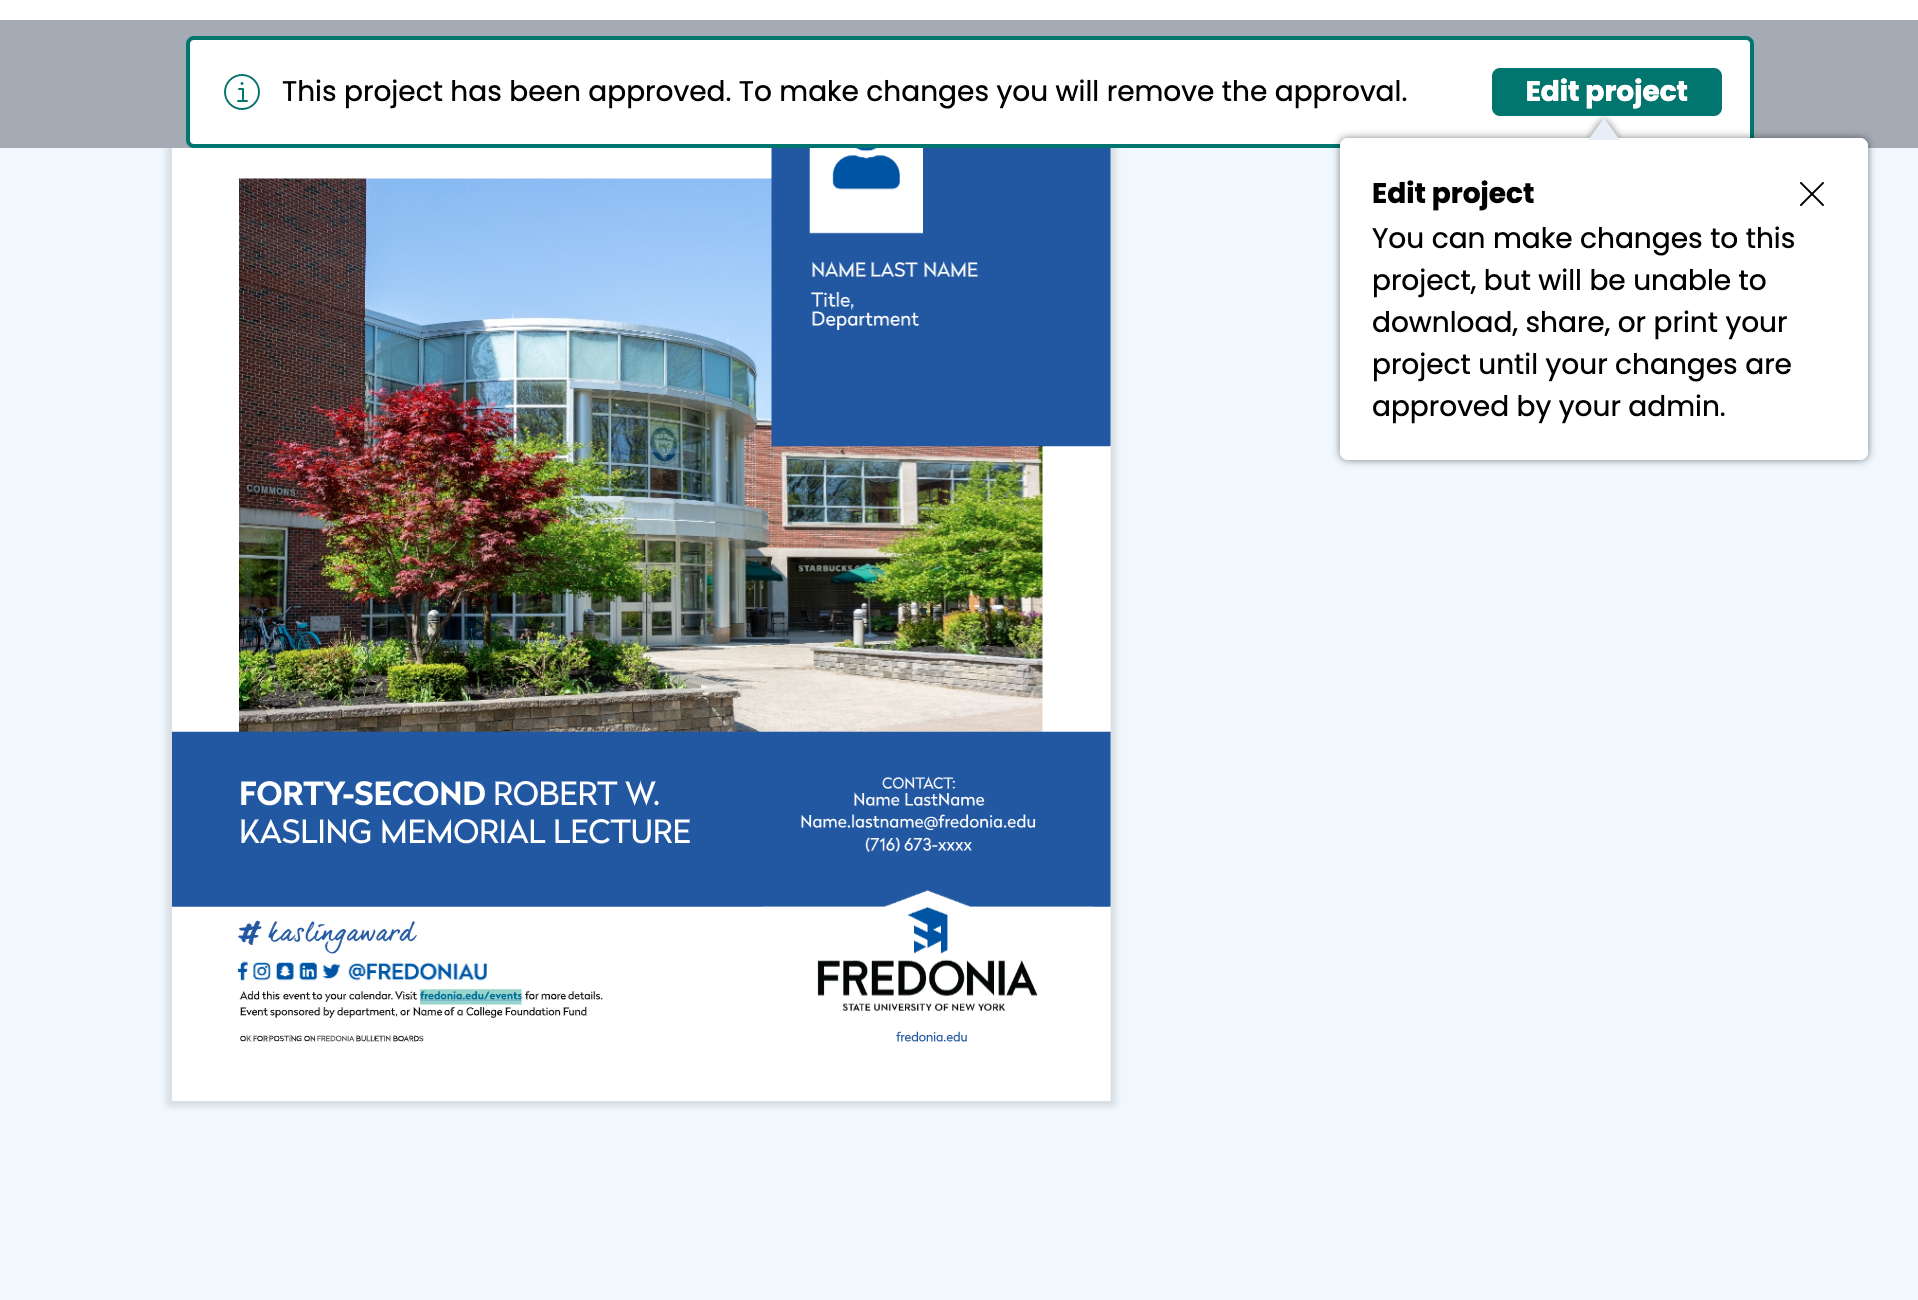
After you have completed your document, use the upper right “Request Approval” button to unlock the document for printing and downloading.
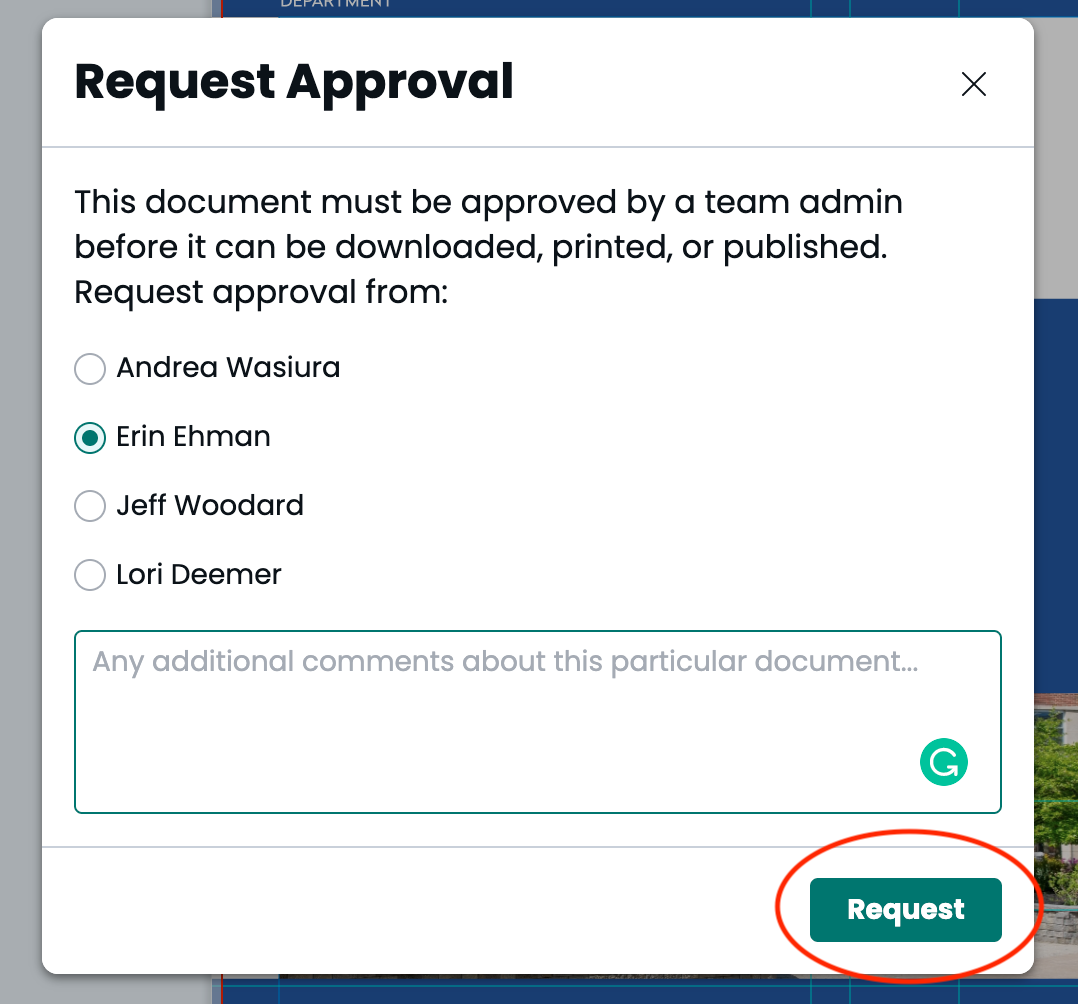
Choose the name of the Design Team member you would like to send the approval request. You may add a message if needed.
A member of the Design Team will review, assist with any adjustments and approve your document. You will receive an email notification when your document has been approved. Once the document has been approved, you may download the artwork. You may also continue to edit the document. However, once new changes have been made, another approval request must be sent before downloading is enabled.
Download a document for print
Once your document has been approved, you may download a PDF, PNG or JPG. Select the download button. The PDF format is the preferred format for print documents.

If this is your final download to send the document to a printer, choose print quality resolution of 300 dpi, check the boxes for Crop Marks and Bleed marks, the color setting should default correctly to U.S. Web Coated (SWOP) v2, and select the Print-friendly PDF option.
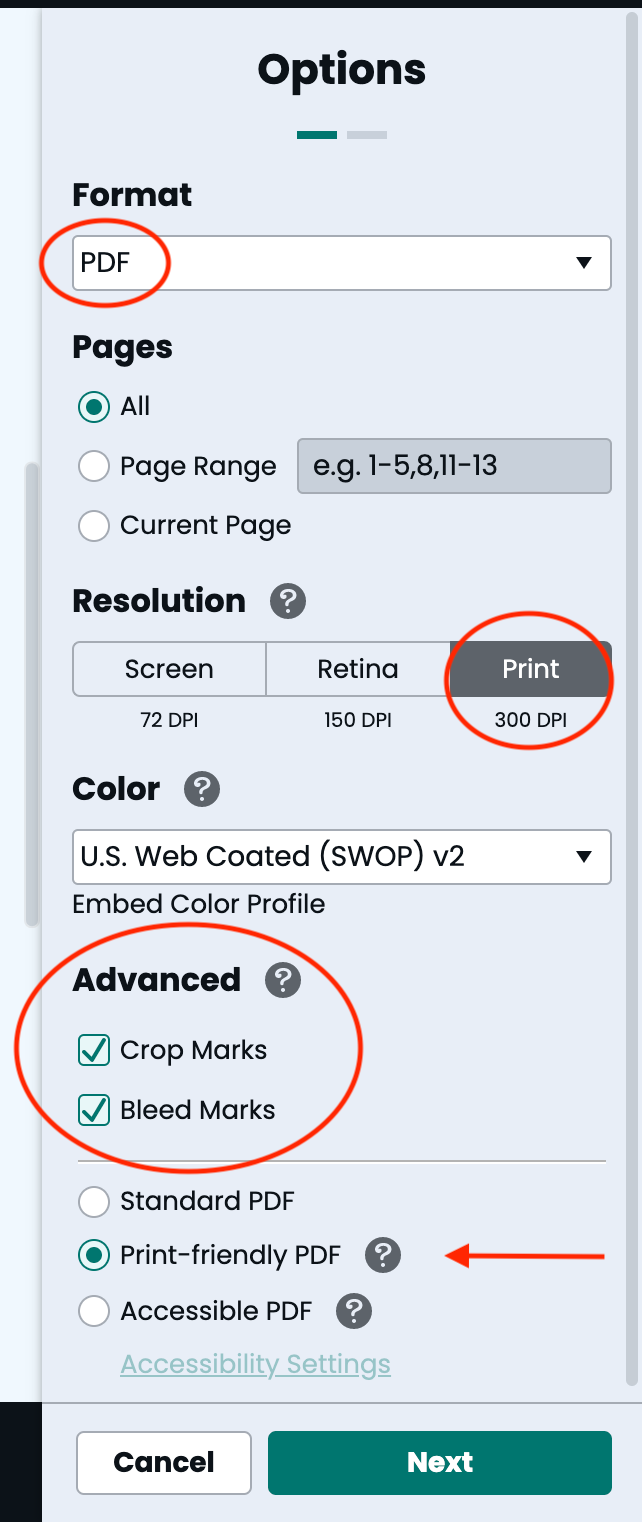
You can select “Check my document” to review for press-quality image resolution and color space accuracy. For more information please visit https://help.marq.com/color-settings-cymk/rgb
To download a digital document as JPG or PNG, simply choose that file type in the download menu, choose screen resolution of 72dpi or 150dpi, and download.
...
To download an accessible PDF, select the “Download” button in the top-right corner of the editor or select “Download As” in the file menu. In the download flow, select the “Accessible PDF” option button and then “Download”.
...
Please contact creative.design@fredonia.edu with further questions about using Marq or refer to Marq’s Help Center found at the bottom left corner of your marq homepage.
...