How do you make OnCourse elements hide or show to my students?
Step-by-step guide
A. Show/Hide individual content items
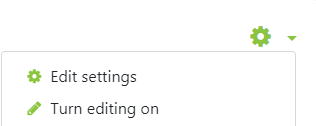
- Access the course in OnCourse and turn on editing. Locate the green gear icon on the upper right hand side of the page. From the drop-down menu select Turn editing on.
- Locate the item to show/hide and click the Edit drop-down menu associated with the item
Click the Show or Hide link
If the item is already hidden you will see "Show" in the menu. If the item is showing, you will see "hide" in the menu.
...
- Access the course in OnCourse and turn on editingon editing. Locate the green gear icon on the upper right hand side of the page. From the drop-down menu select Turn editing on.
- Locate the topic area to show/hide and click the Edit drop-down menu associated with the item
Click the Show Topic or Hide Topic link
If the item is already hidden you will see "Show" in the menu. If the item is showing, you will see "hide" in the menu.
...
- Access the course in OnCourse and turn on editing. Locate the green gear icon on the upper right hand side of the page. From the drop-down menu select Turn editing on.
- Locate the item to show/hide and click the Edit drop-down menu associated with the item
Click the "Edit Settings" link
- Scroll down and expand the "Restrict access" section by clicking on it.
- Press the "Add restrictions" button
- Press the Date button
- To hide a content item until a certain date:
- Select "From" in the first drop-down menu
- Choose the Day, Month, Year, and Time for the content item to be released.
- The time is listed in military time. For 5pm, select 17 in the hour box
- The time is listed in military time. For 5pm, select 17 in the hour box
- Press "Save and return to course."
The date restriction will be posted on the course main page for your students to see. It will say "Available from "Insert set date and time here."
...
- Access the course in OnCourse and turn on editing. Locate the green gear icon on the upper right hand side of the page. From the drop-down menu select Turn editing on.
- Locate the topic area to show/hide and click the Edit drop-down menu associated with the item
Click the "Edit Topic" link
- Scroll down and expand the "Restrict access" section by clicking on it.
- Press the "Add restrictions" button
- Press the Date button
- To hide a content item until a certain date:
- Select "From" in the first drop-down menu
- Choose the Day, Month, Year, and Time for the content item to be released.
- The time is listed in military time. For 5pm, select 17 in the hour box
- The time is listed in military time. For 5pm, select 17 in the hour box
- Press "Save and return to course."
The date restriction will be posted on the course main page for your students to see. It will say "Available from "Insert set date and time here."
| Info |
|---|
Hints:
|
Short URL to this page:
...
| Live Search | ||||||||
|---|---|---|---|---|---|---|---|---|
|
...


