(Marq was formerly called Lucid Press)
If you have your message and content ready to build a postcard, flyer, poster, brochure, or other design piece, you may use Fredonia’s self-service template portal called Marq.
Marq can help you create carefully designed Fredonia-branded print and digital content even without professional design training. Inside Marq you will find a library of templates to make the design process as simple and easy as possible. Everything is online, and in your web browser.
Gain Access to Marq
Contact the Marketing & Communications Design Team at creative.design@fredonia.edu to request an account in Marq.
In the email, provide your e-services email address (the short email). Because Marq uses single sign-on (SSO), you will use your e-services email and password to log in.
Our team will send you an email invitation to join Marq.
When you receive this email, click on the link and sign into Marq.com.
A member of the Design Team will follow up with you to schedule an introduction to the program.
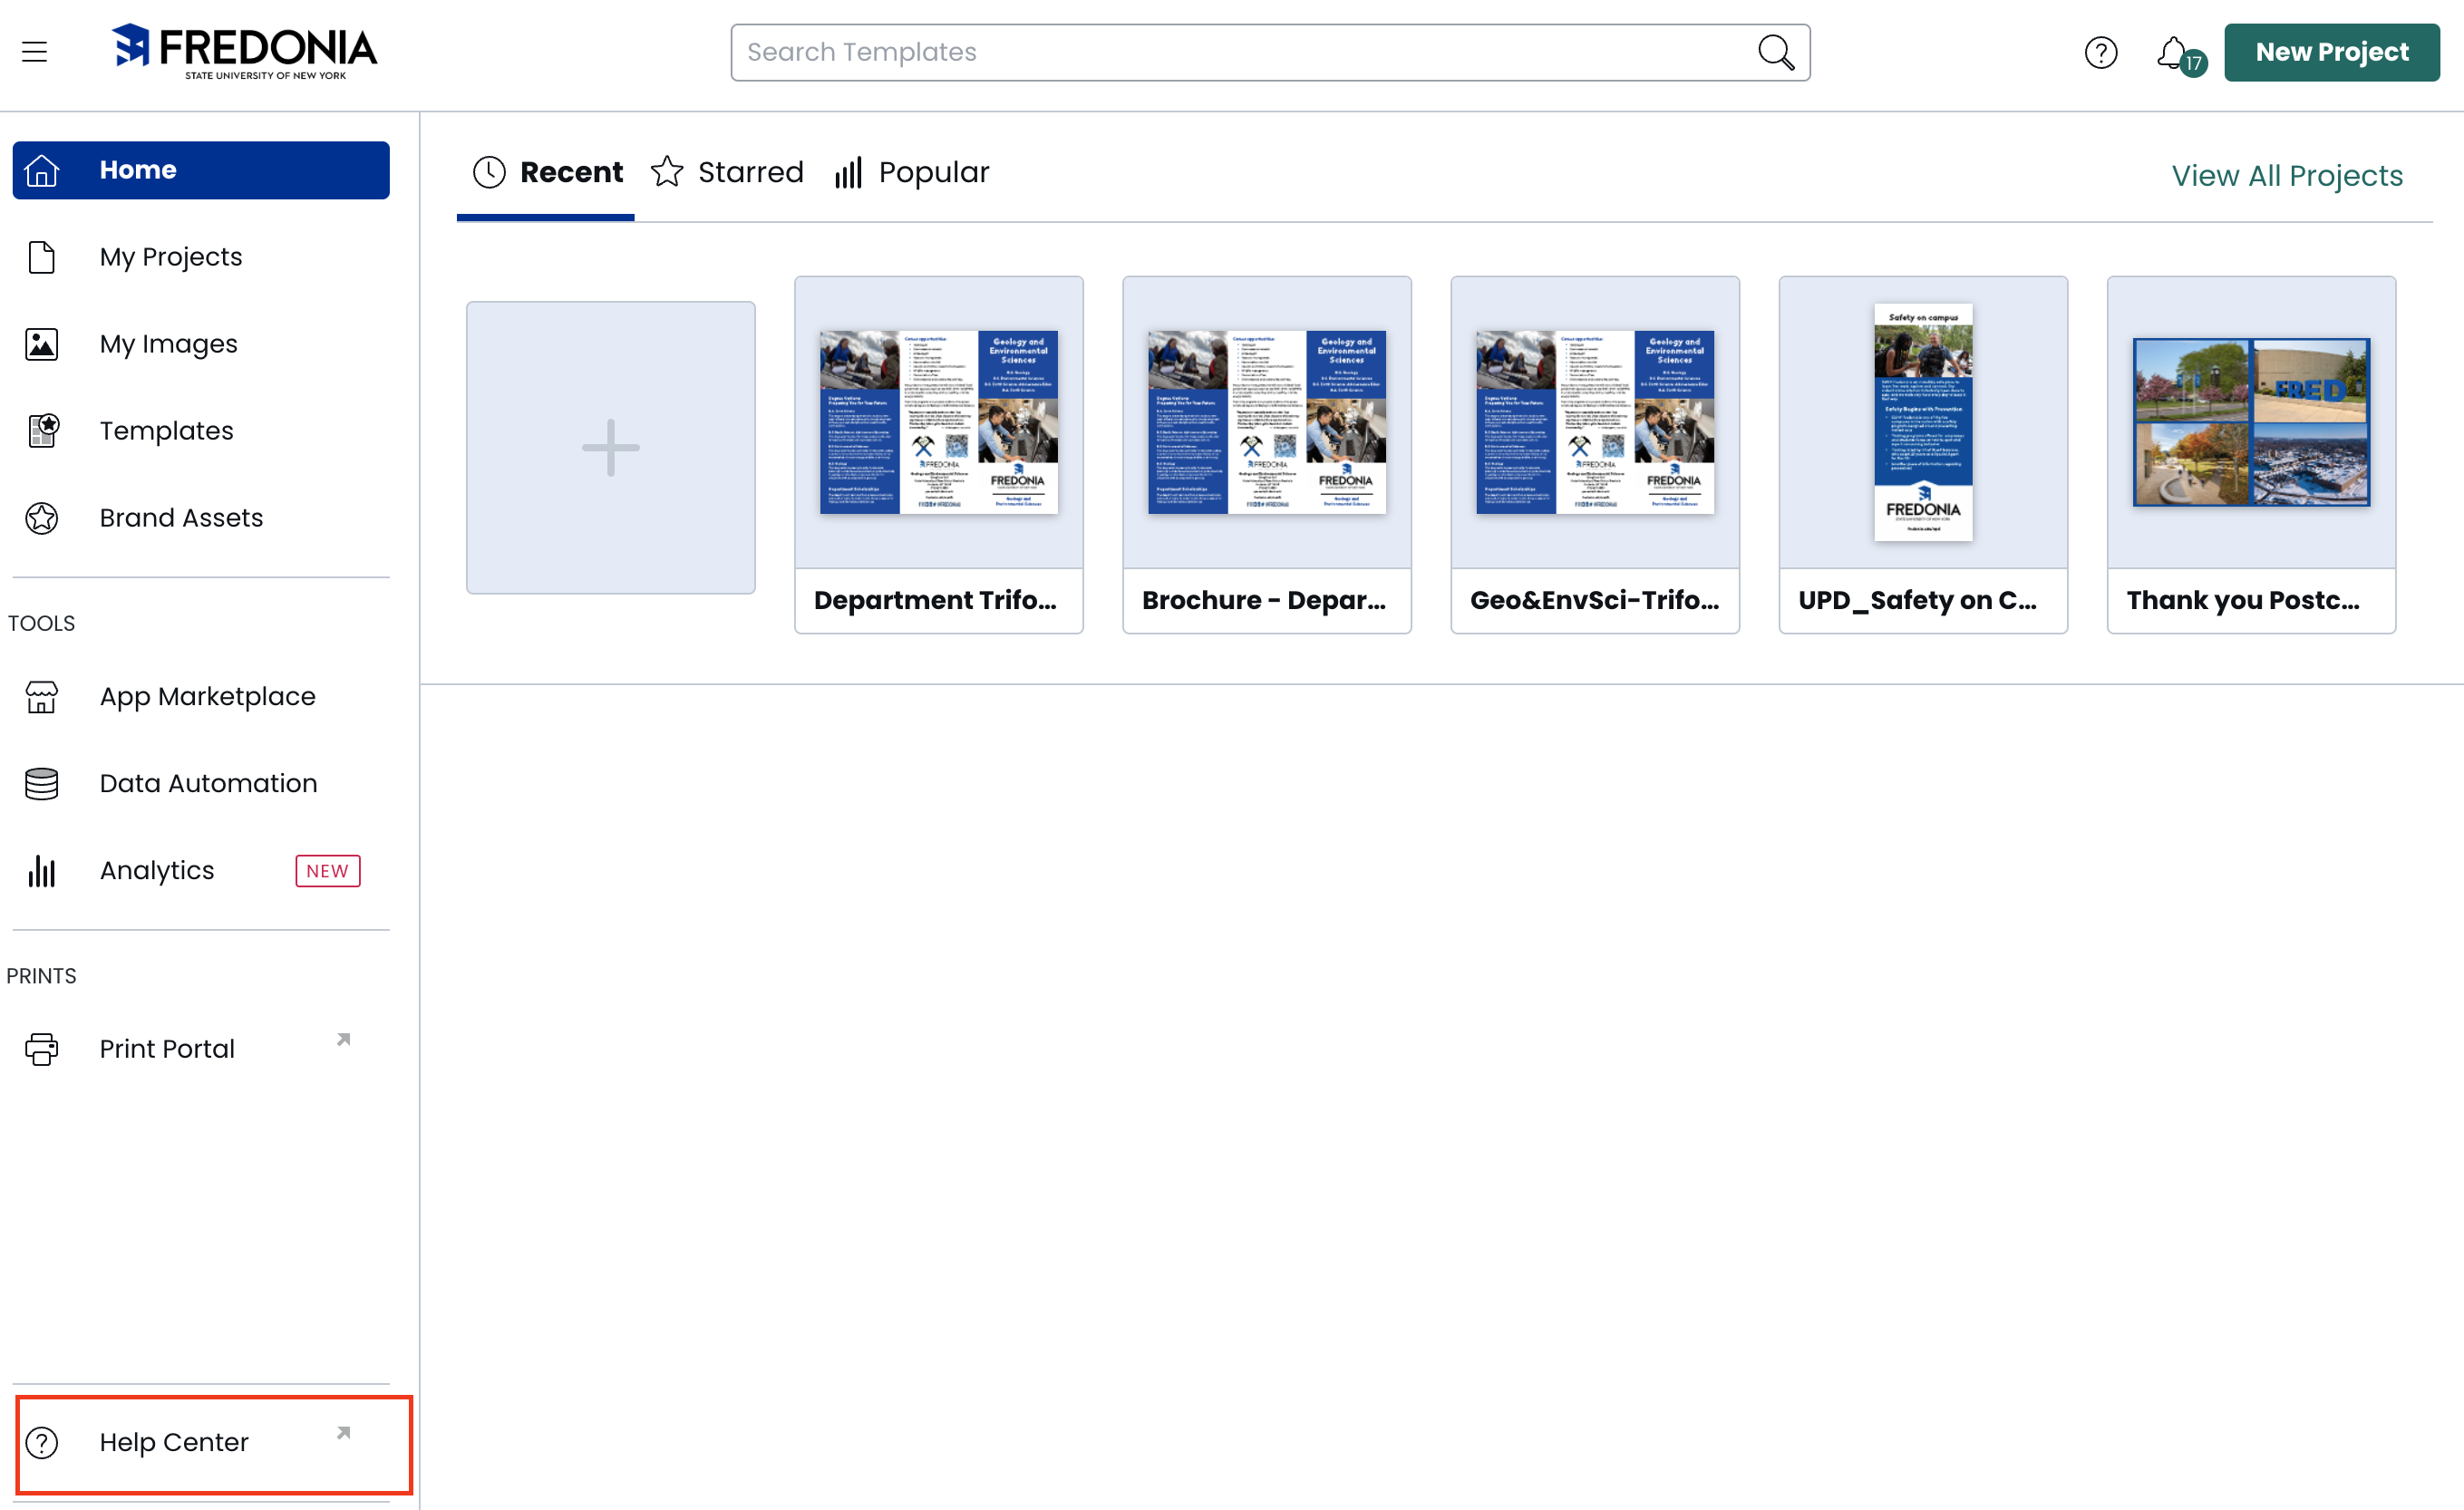
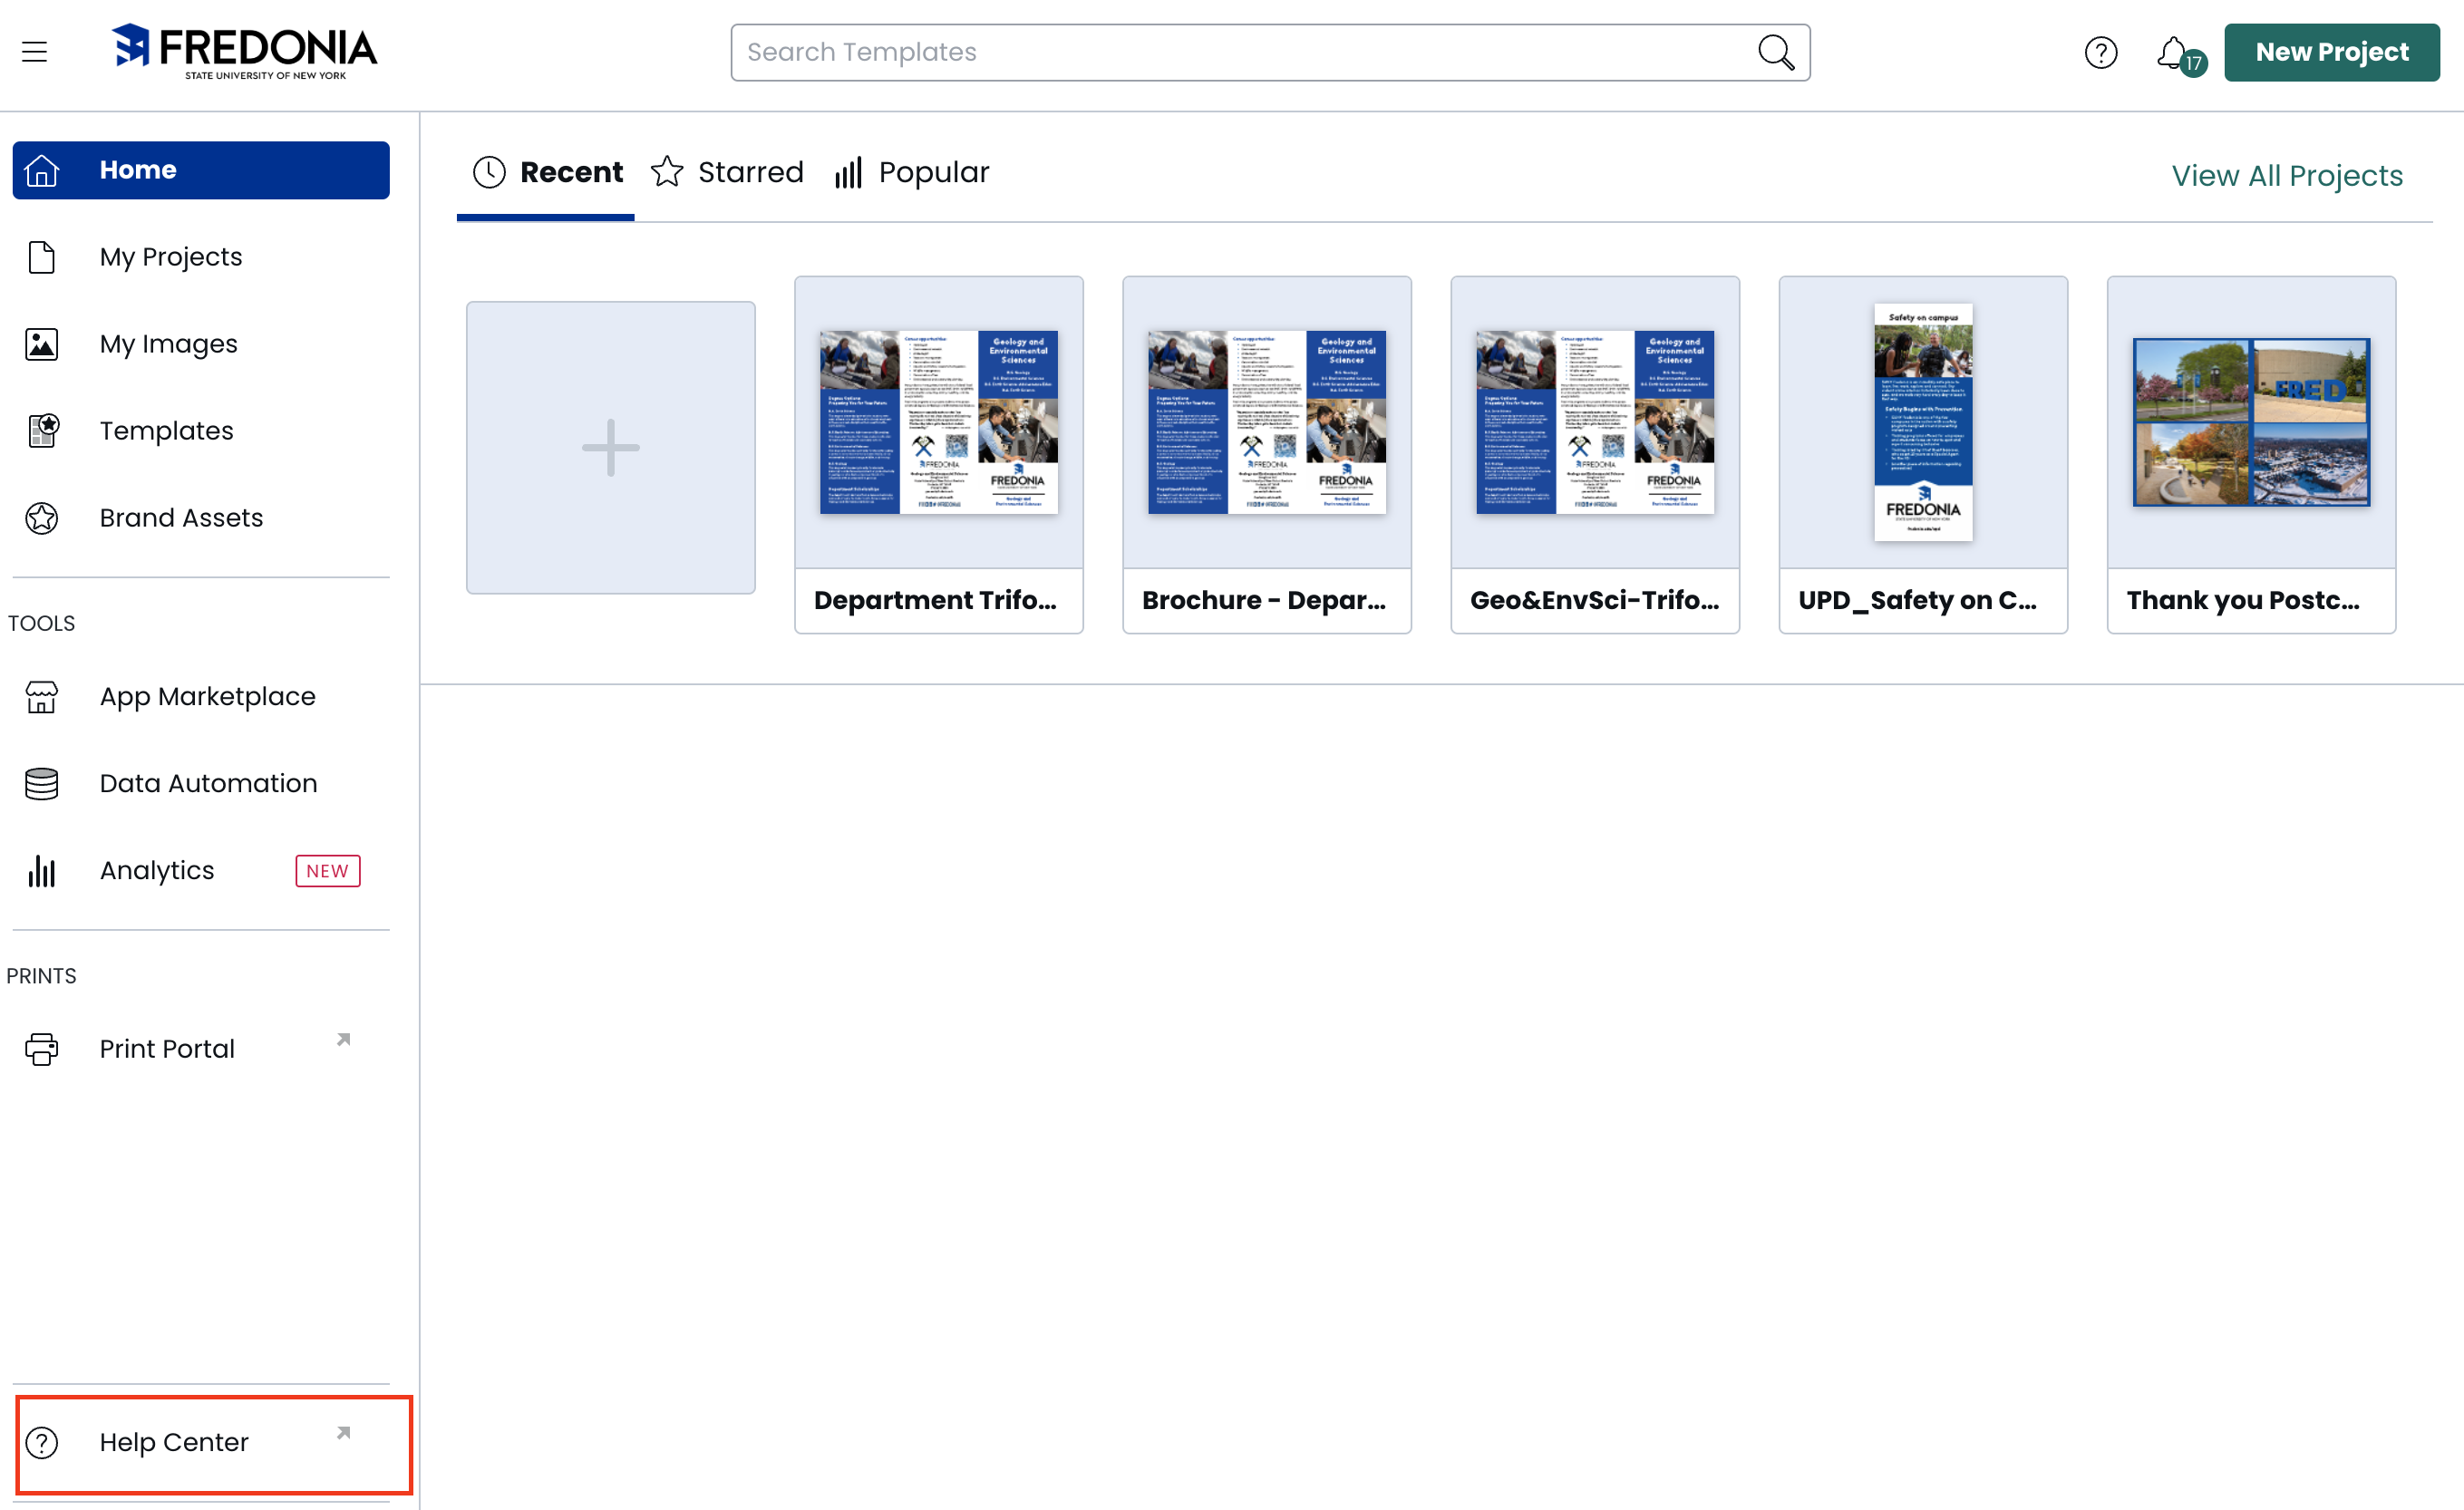
Marq offers a Help Center of documentation that summarizes all you need to know.
Marq Help Guide - Getting started
This article walks you through (1) how to set up your first Marq document and (2) the basic components of the Marq editor.Creating your Design
Learn about the editor, document and page settings, templates, images, text, shapes and graphics, layers and objects, elements, video and interactive objects, tables, locking, uploading, automation and other advanced featuresExporting and Sharing
Learn about collaborating, exporting to social media, embedding, publishing, downloading and GIFs
Marq also offers a Video Library of Tutorials to get you started. Please browse through Marq’s Help page and Video Library and use these resources to help familiarize yourself with the program.
Starting a project in Marq
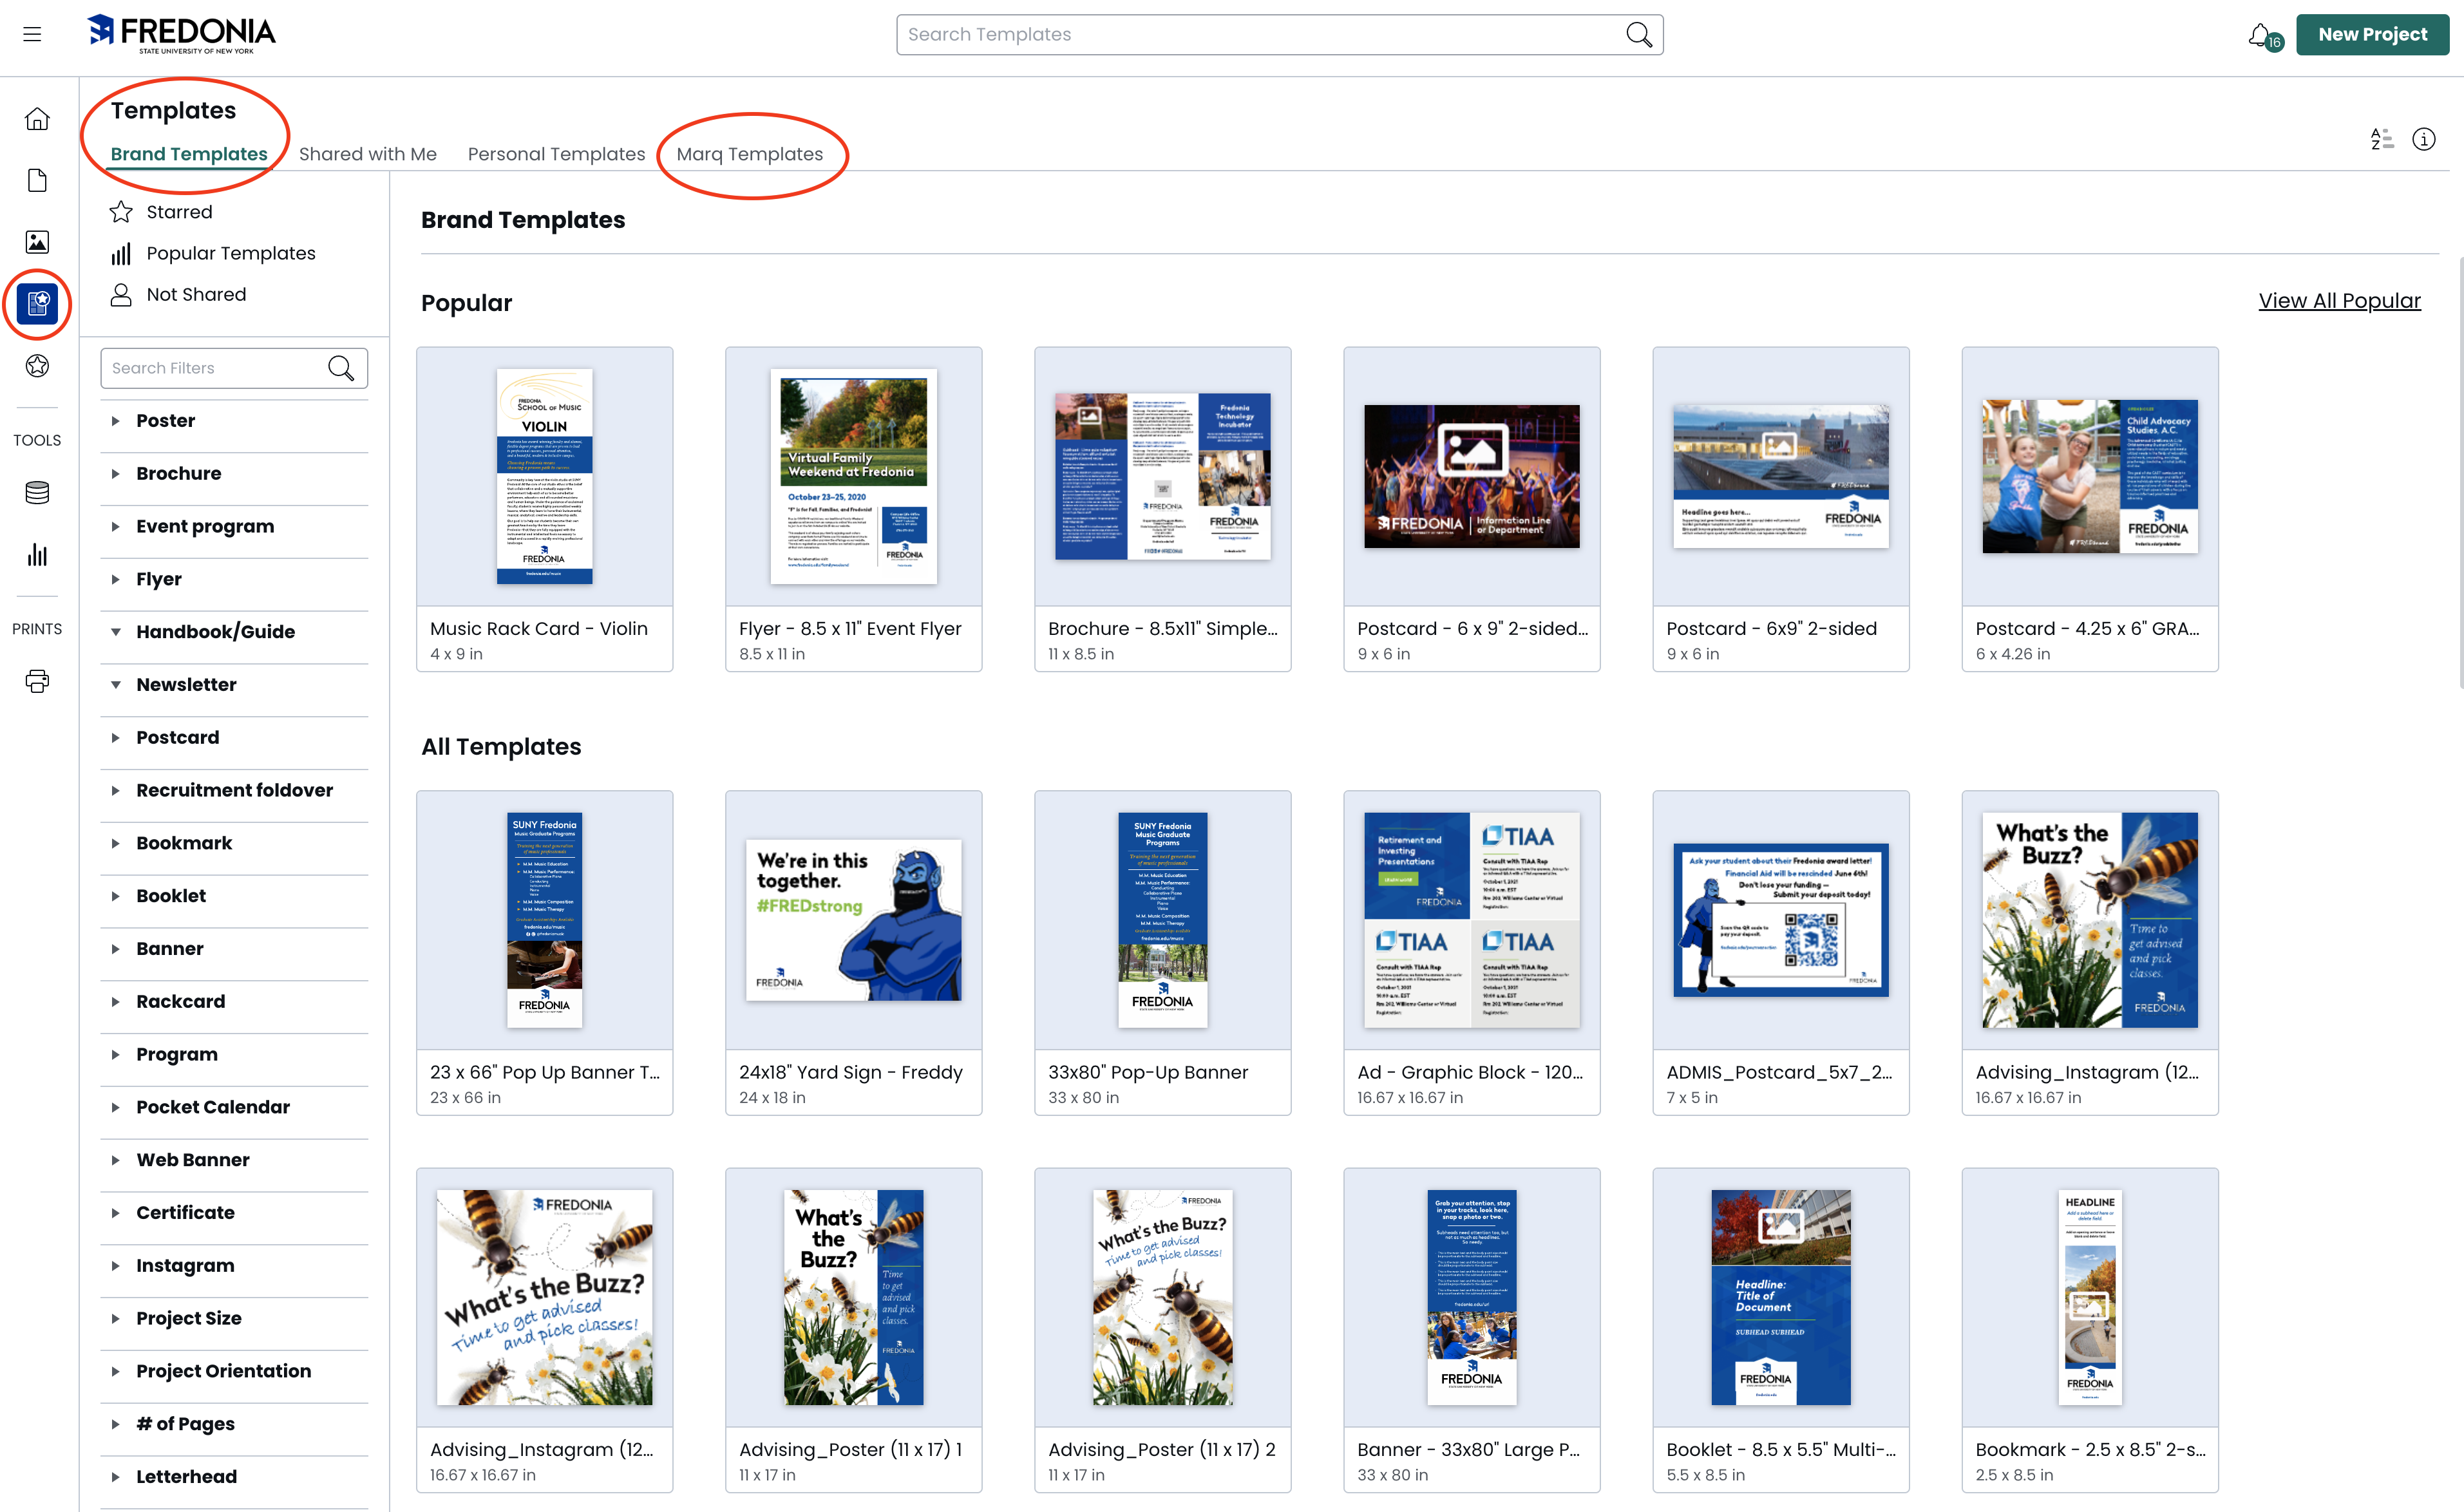
Choose a Fredonia template, or browse the Marq Library of templates to find a document to start from.
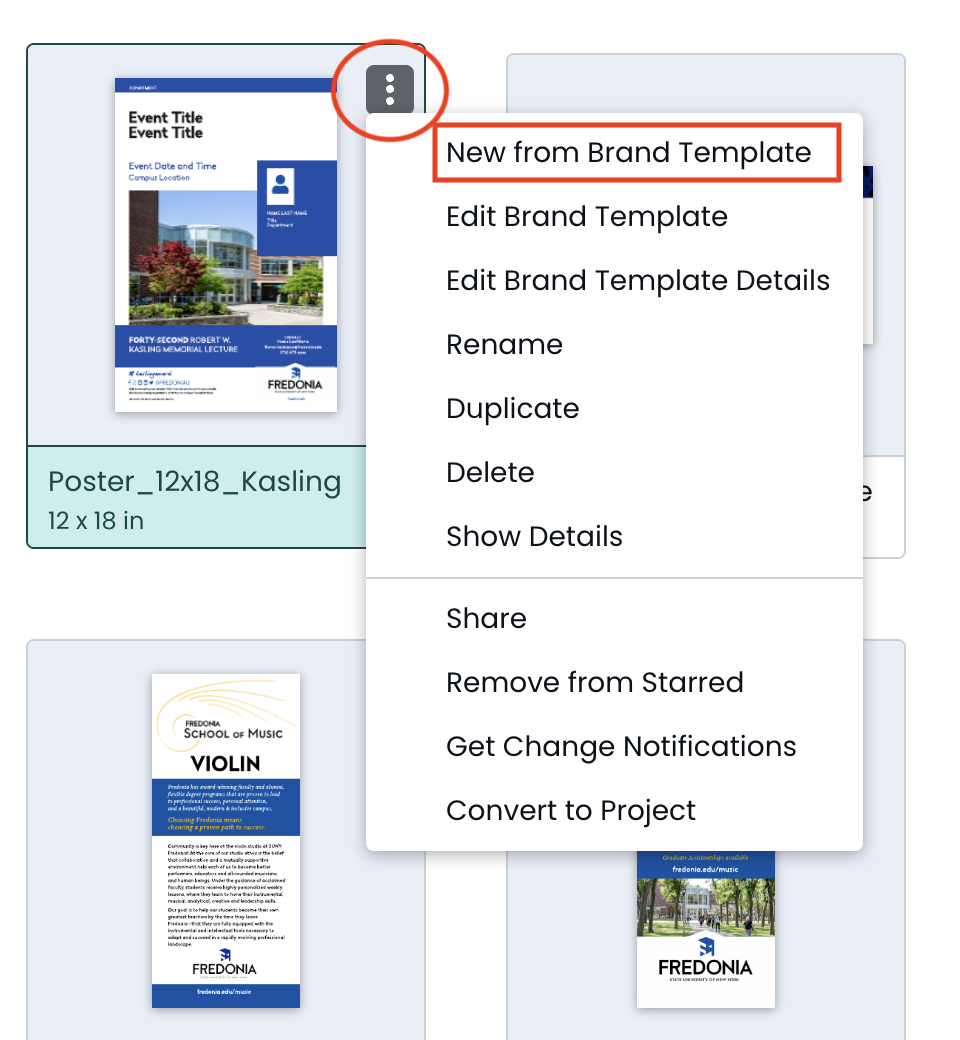
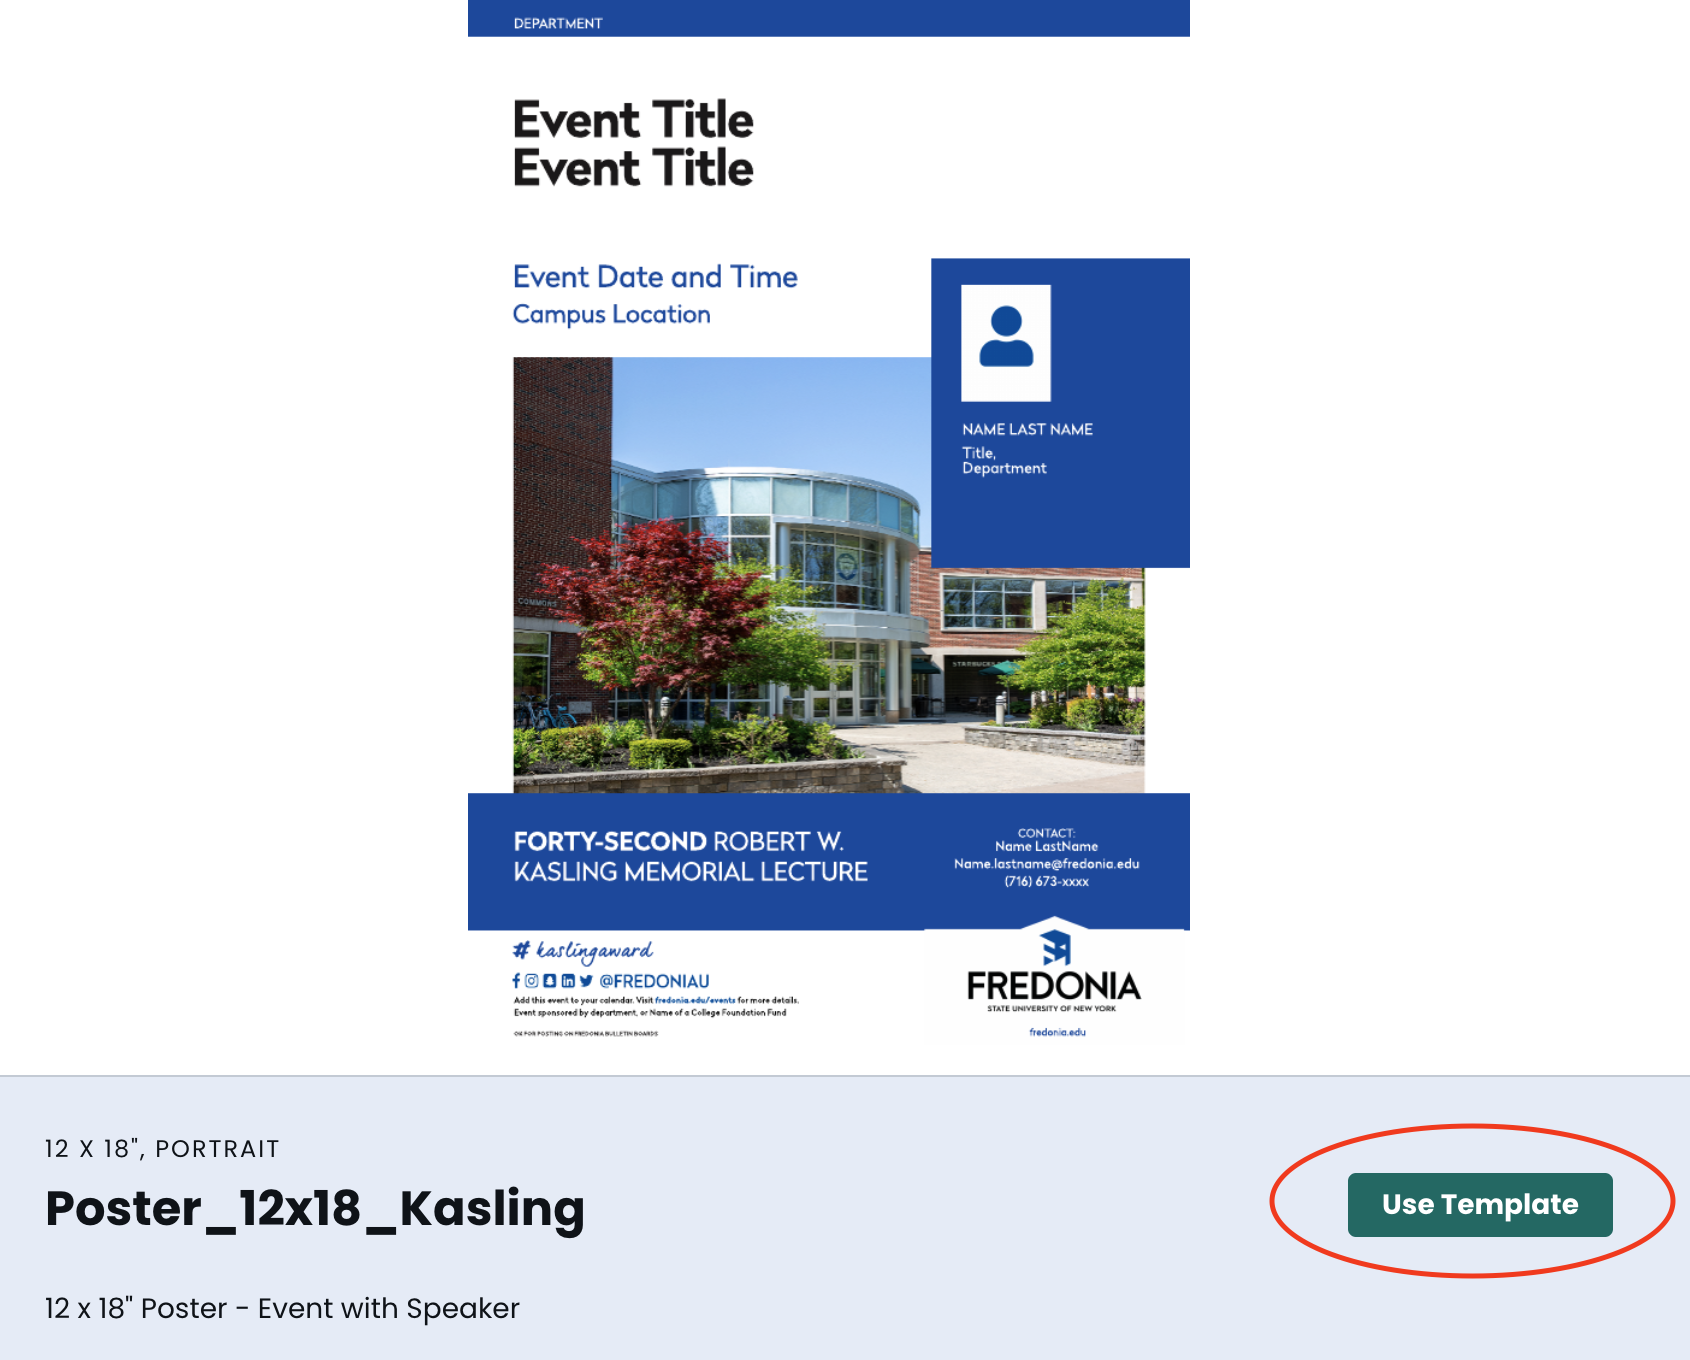
Click on the 3 dots at the top right of the selected template window and choose “New from Brand Template” or simply click on the template image and a window will pop up with a green “Use Template”
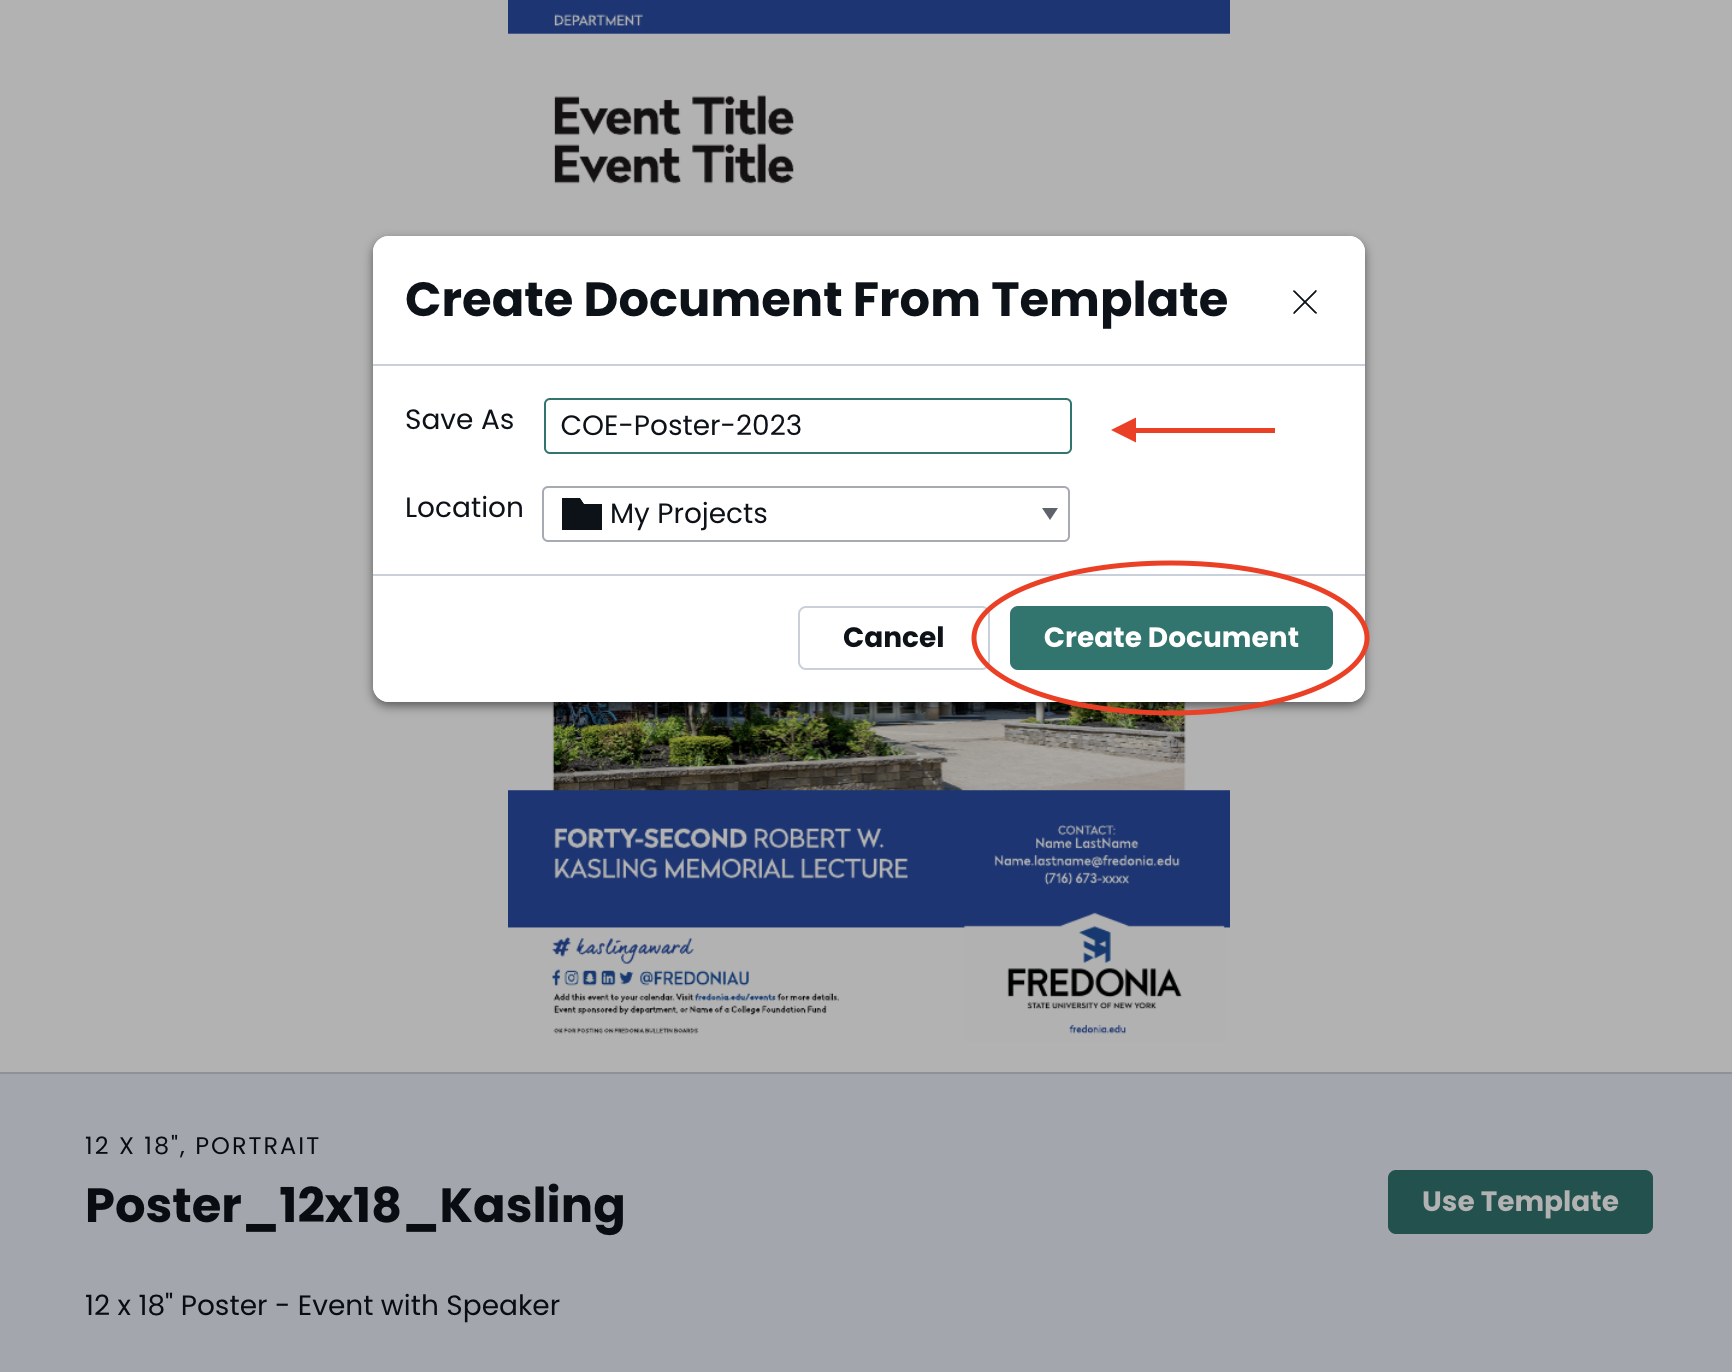
A pop up window will open: “Create Document from Template”
Give your document a name.
It is important to name your document a unique name that will identify:
Department the document is being created for
Type of document it is (brochure, flyer, poster, ad, etc.)
Date (For example a brochure for the President’s Office might be named “PRES-Office-Brochure-2023” or a flyer for the College of Education might be named “ COE-recruitment-flyer-2023”)
Click “Create Document”
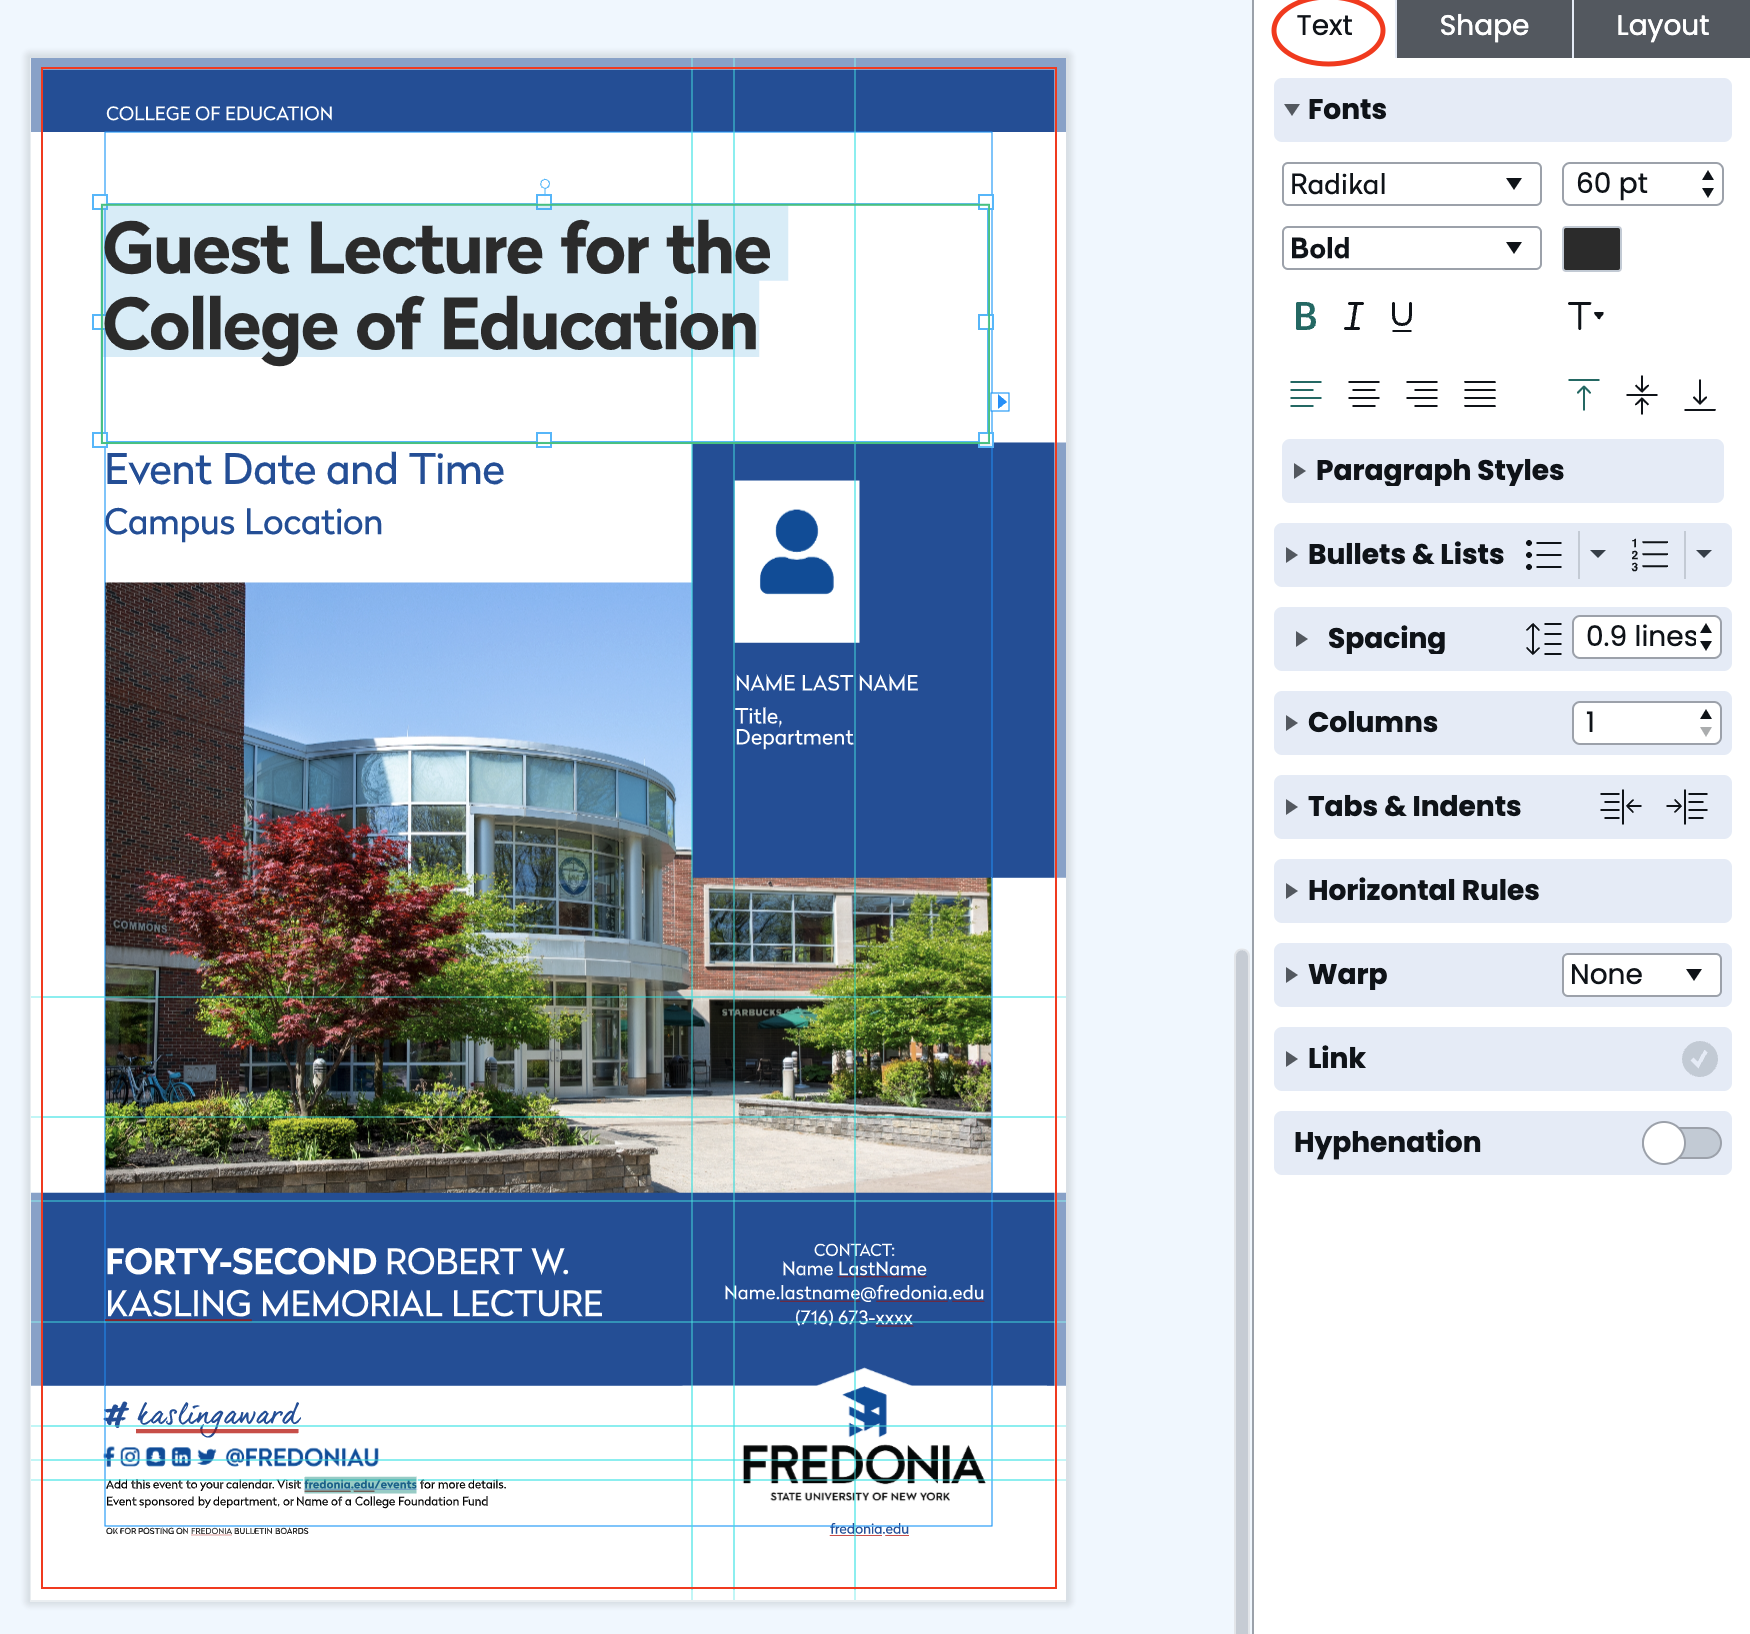
The project window will load the document template. You may begin editing the document by double-clicking on text boxes to enter your content. When you click on a text box, the right column menu will show the editing options for the text block.
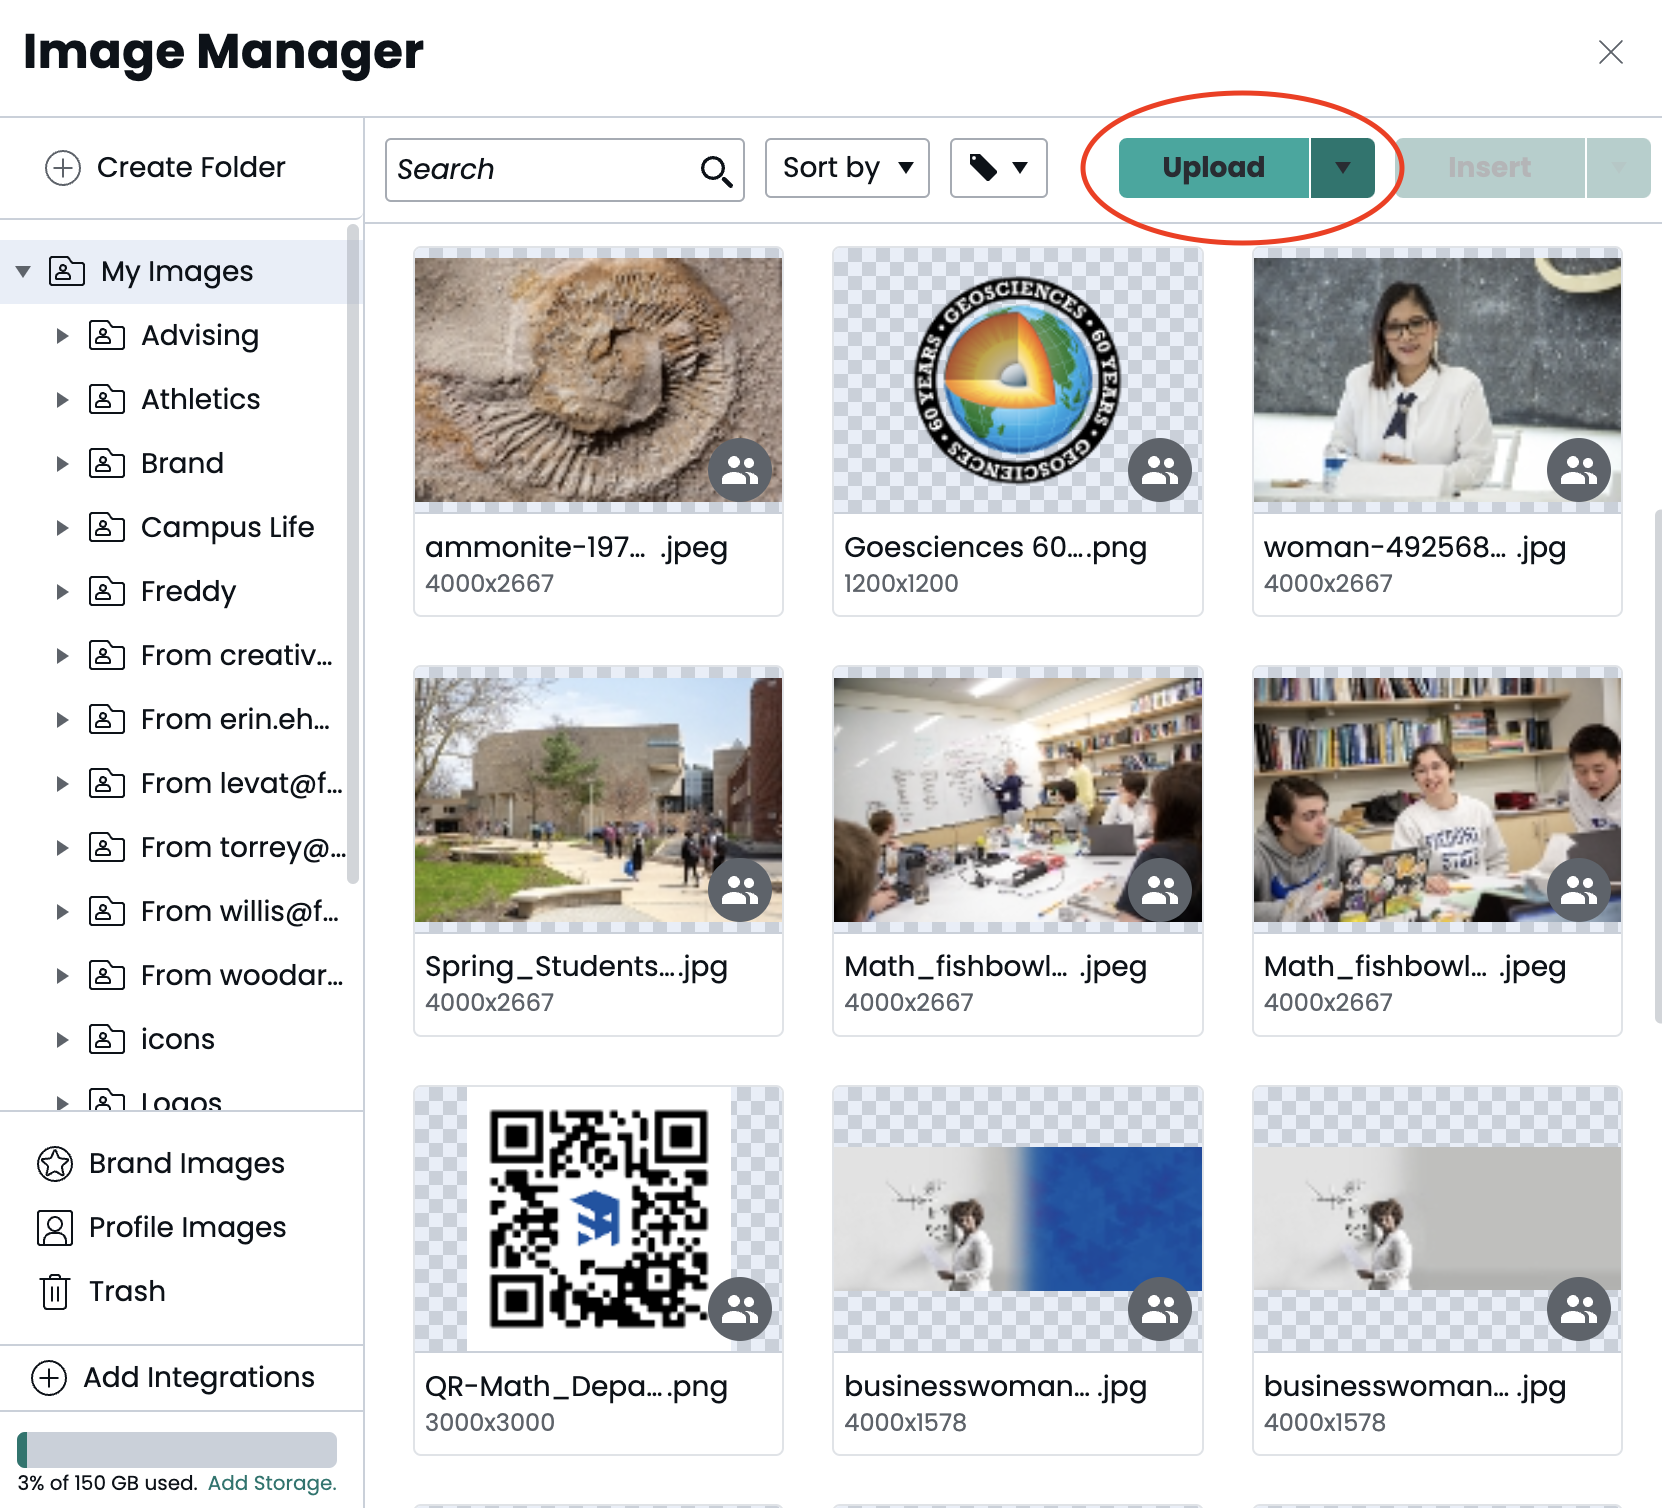
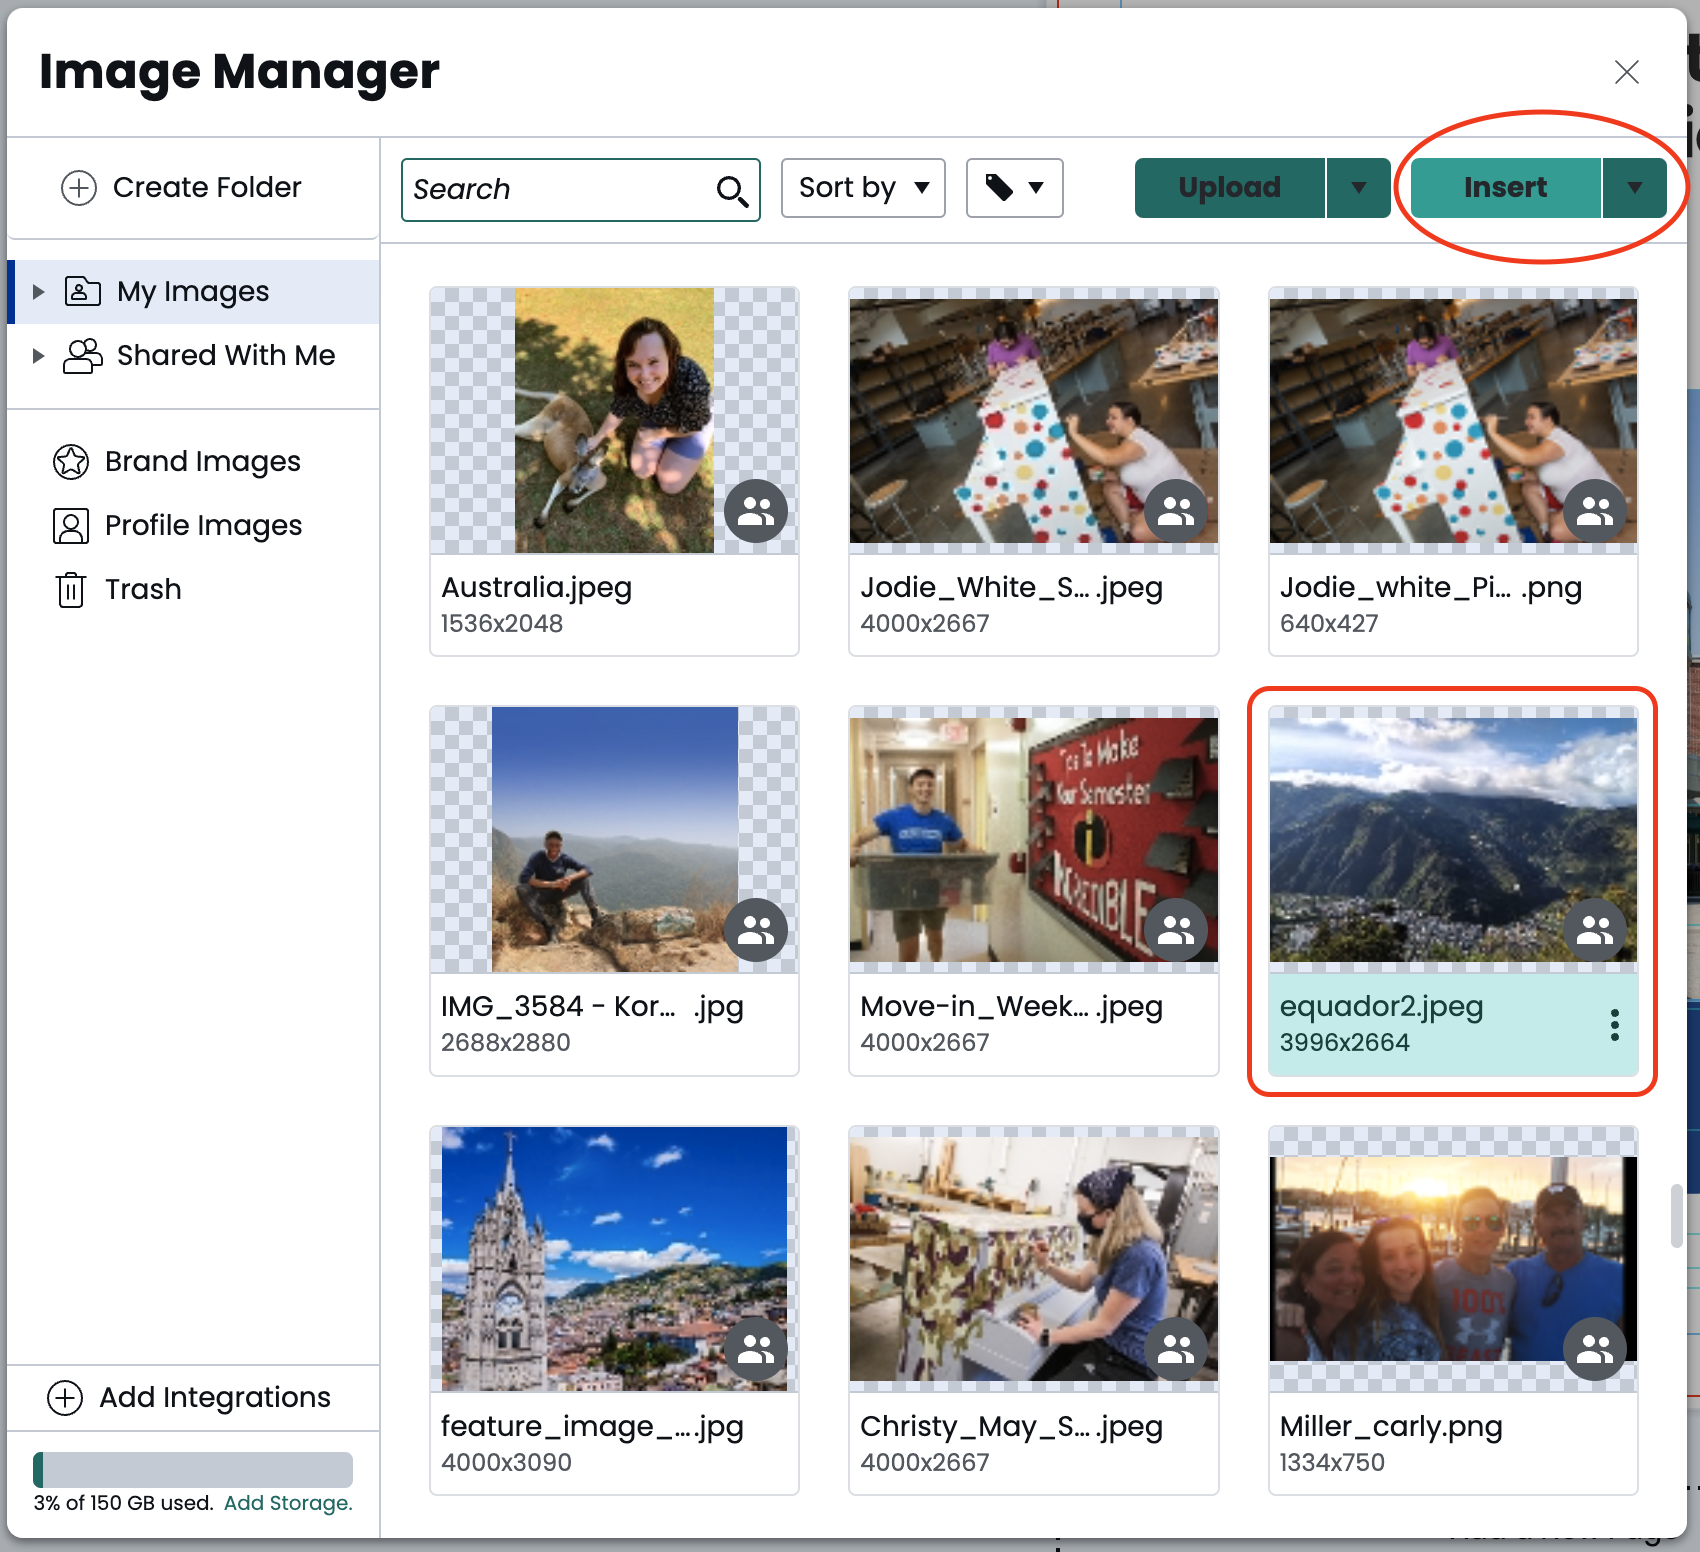
Double-click on an image to open the image manager window. Upload the image you want to use from your computer. Once the image is uploaded, choose “select” and the image will be placed into your document. (Print quality images should be 300 dpi resolution, CMYK color space.)
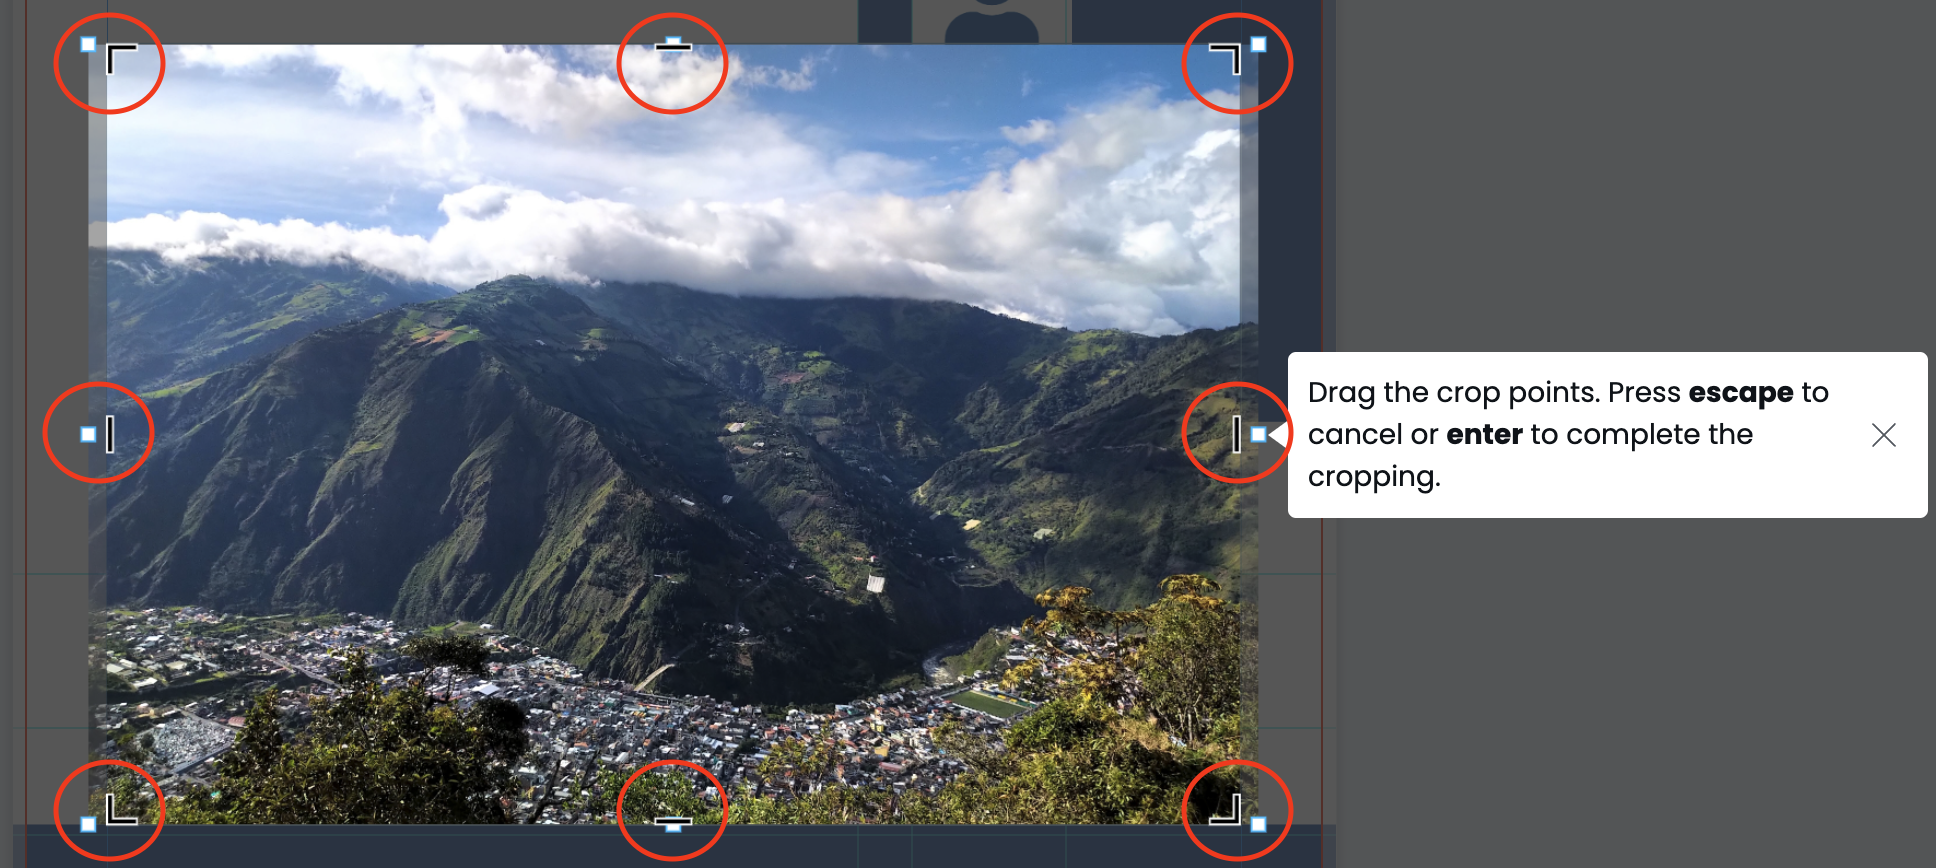
If you need to scale or crop an image, right click on the image to access the short menu and choose “crop photo”. A pop up window will appear that will allow you to scale and crop the image.
If you need access to Fredonia’s Image Library, please visit fredonia.edu/photos. If you have not logged into the Photo Library before, you will need to request access and a member of the design team will email you a login. A help page with instructions can be found at www.fredonia.edu/photos/help.
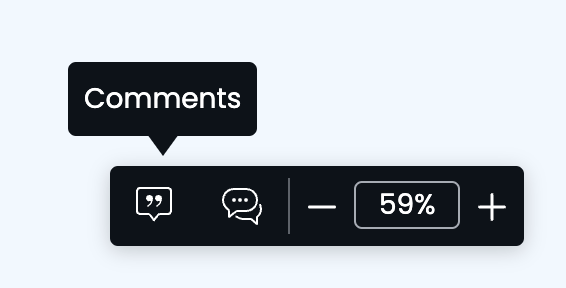
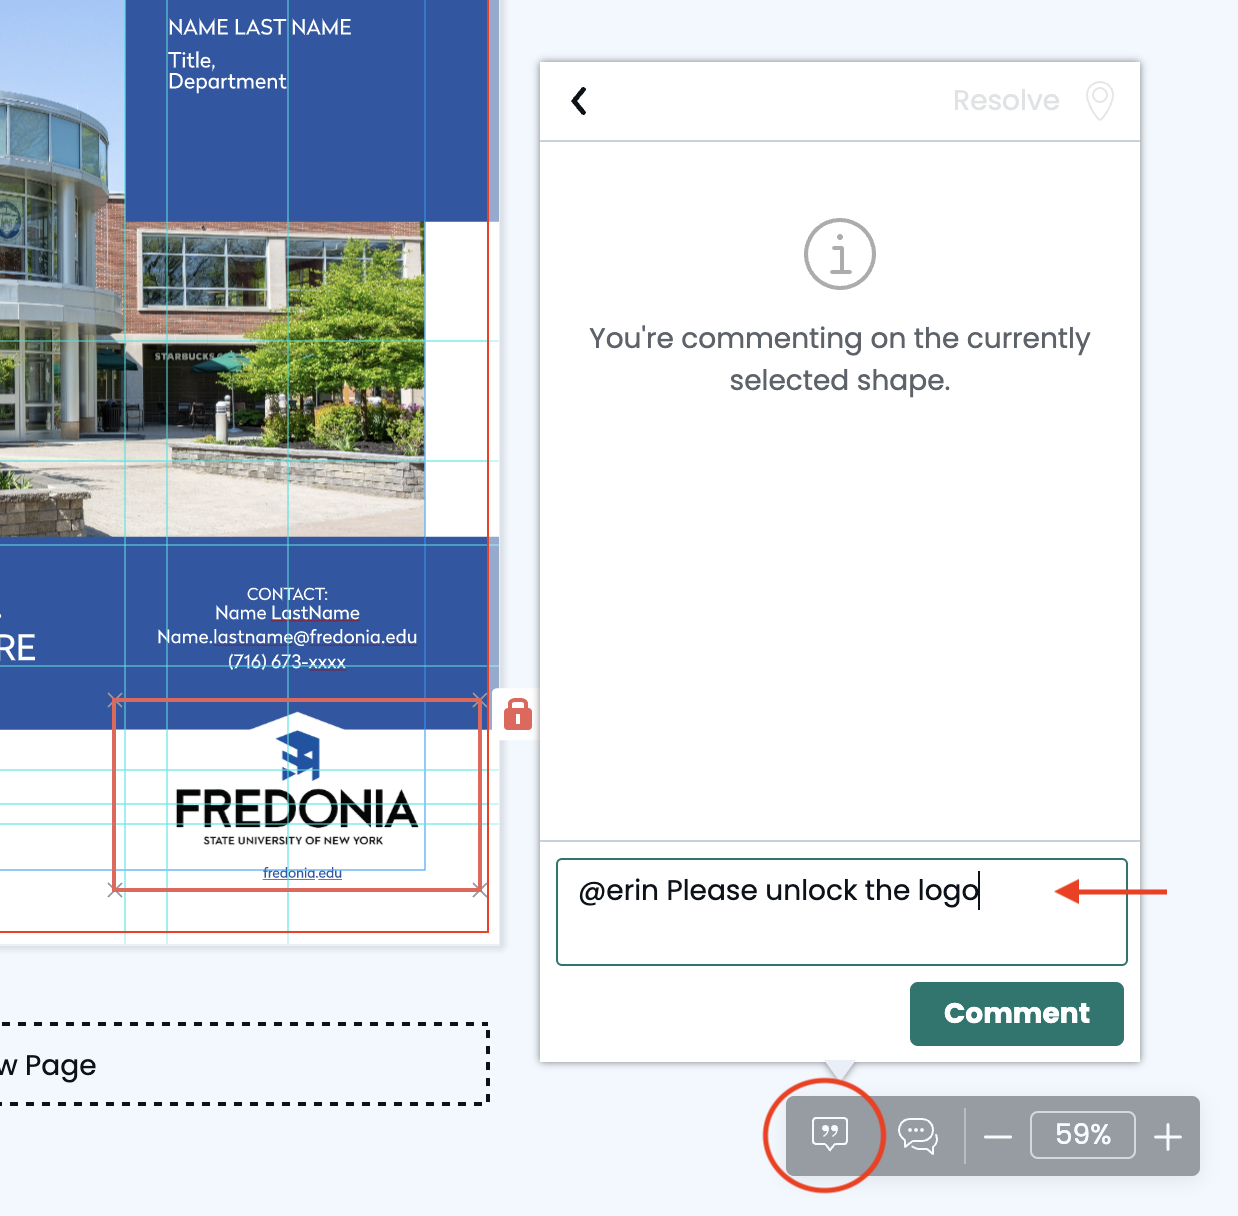
Any item that appears outlined with a RED box when clicked is locked and can not be edited. (If you need to make changes to any locked item, send a comment to your Design Team member by using the comment feature.)
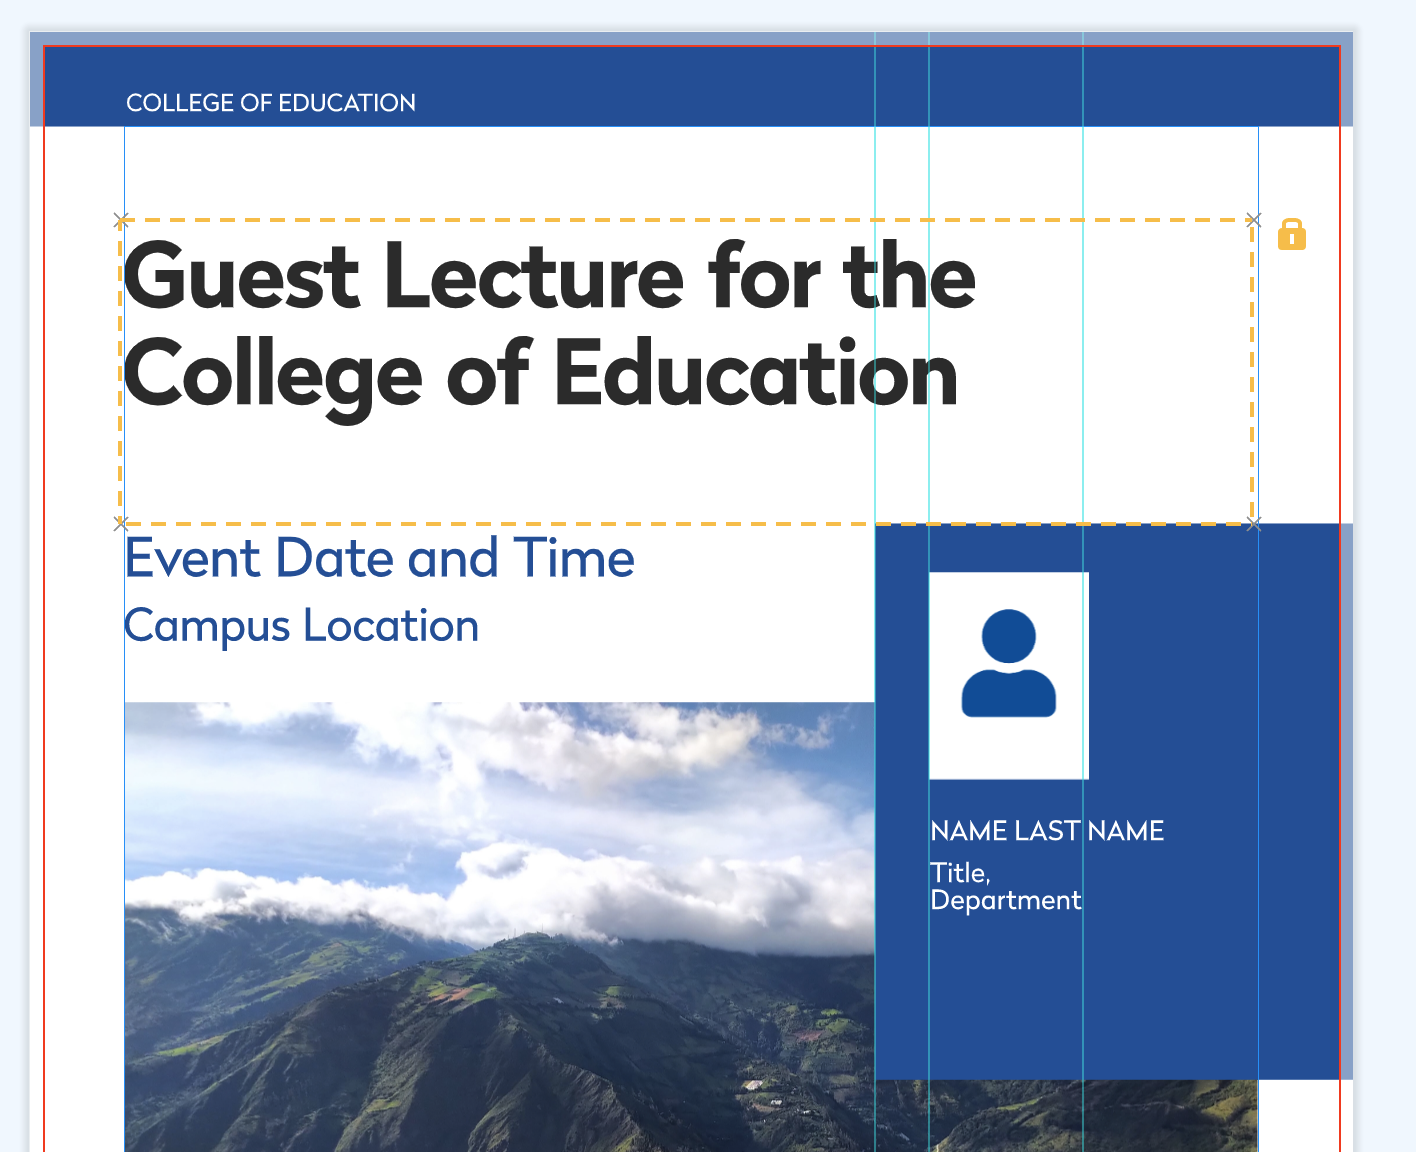
Any item that appears outlined with a YELLOW dashed box is semi-locked, usually a text box, that allows the user to edit the text but not the style. (If you need to make changes to any locked item, send a comment to your Design Team member by using the comment feature.)
Be sure to review all the content in the document to make sure you have made it your own.
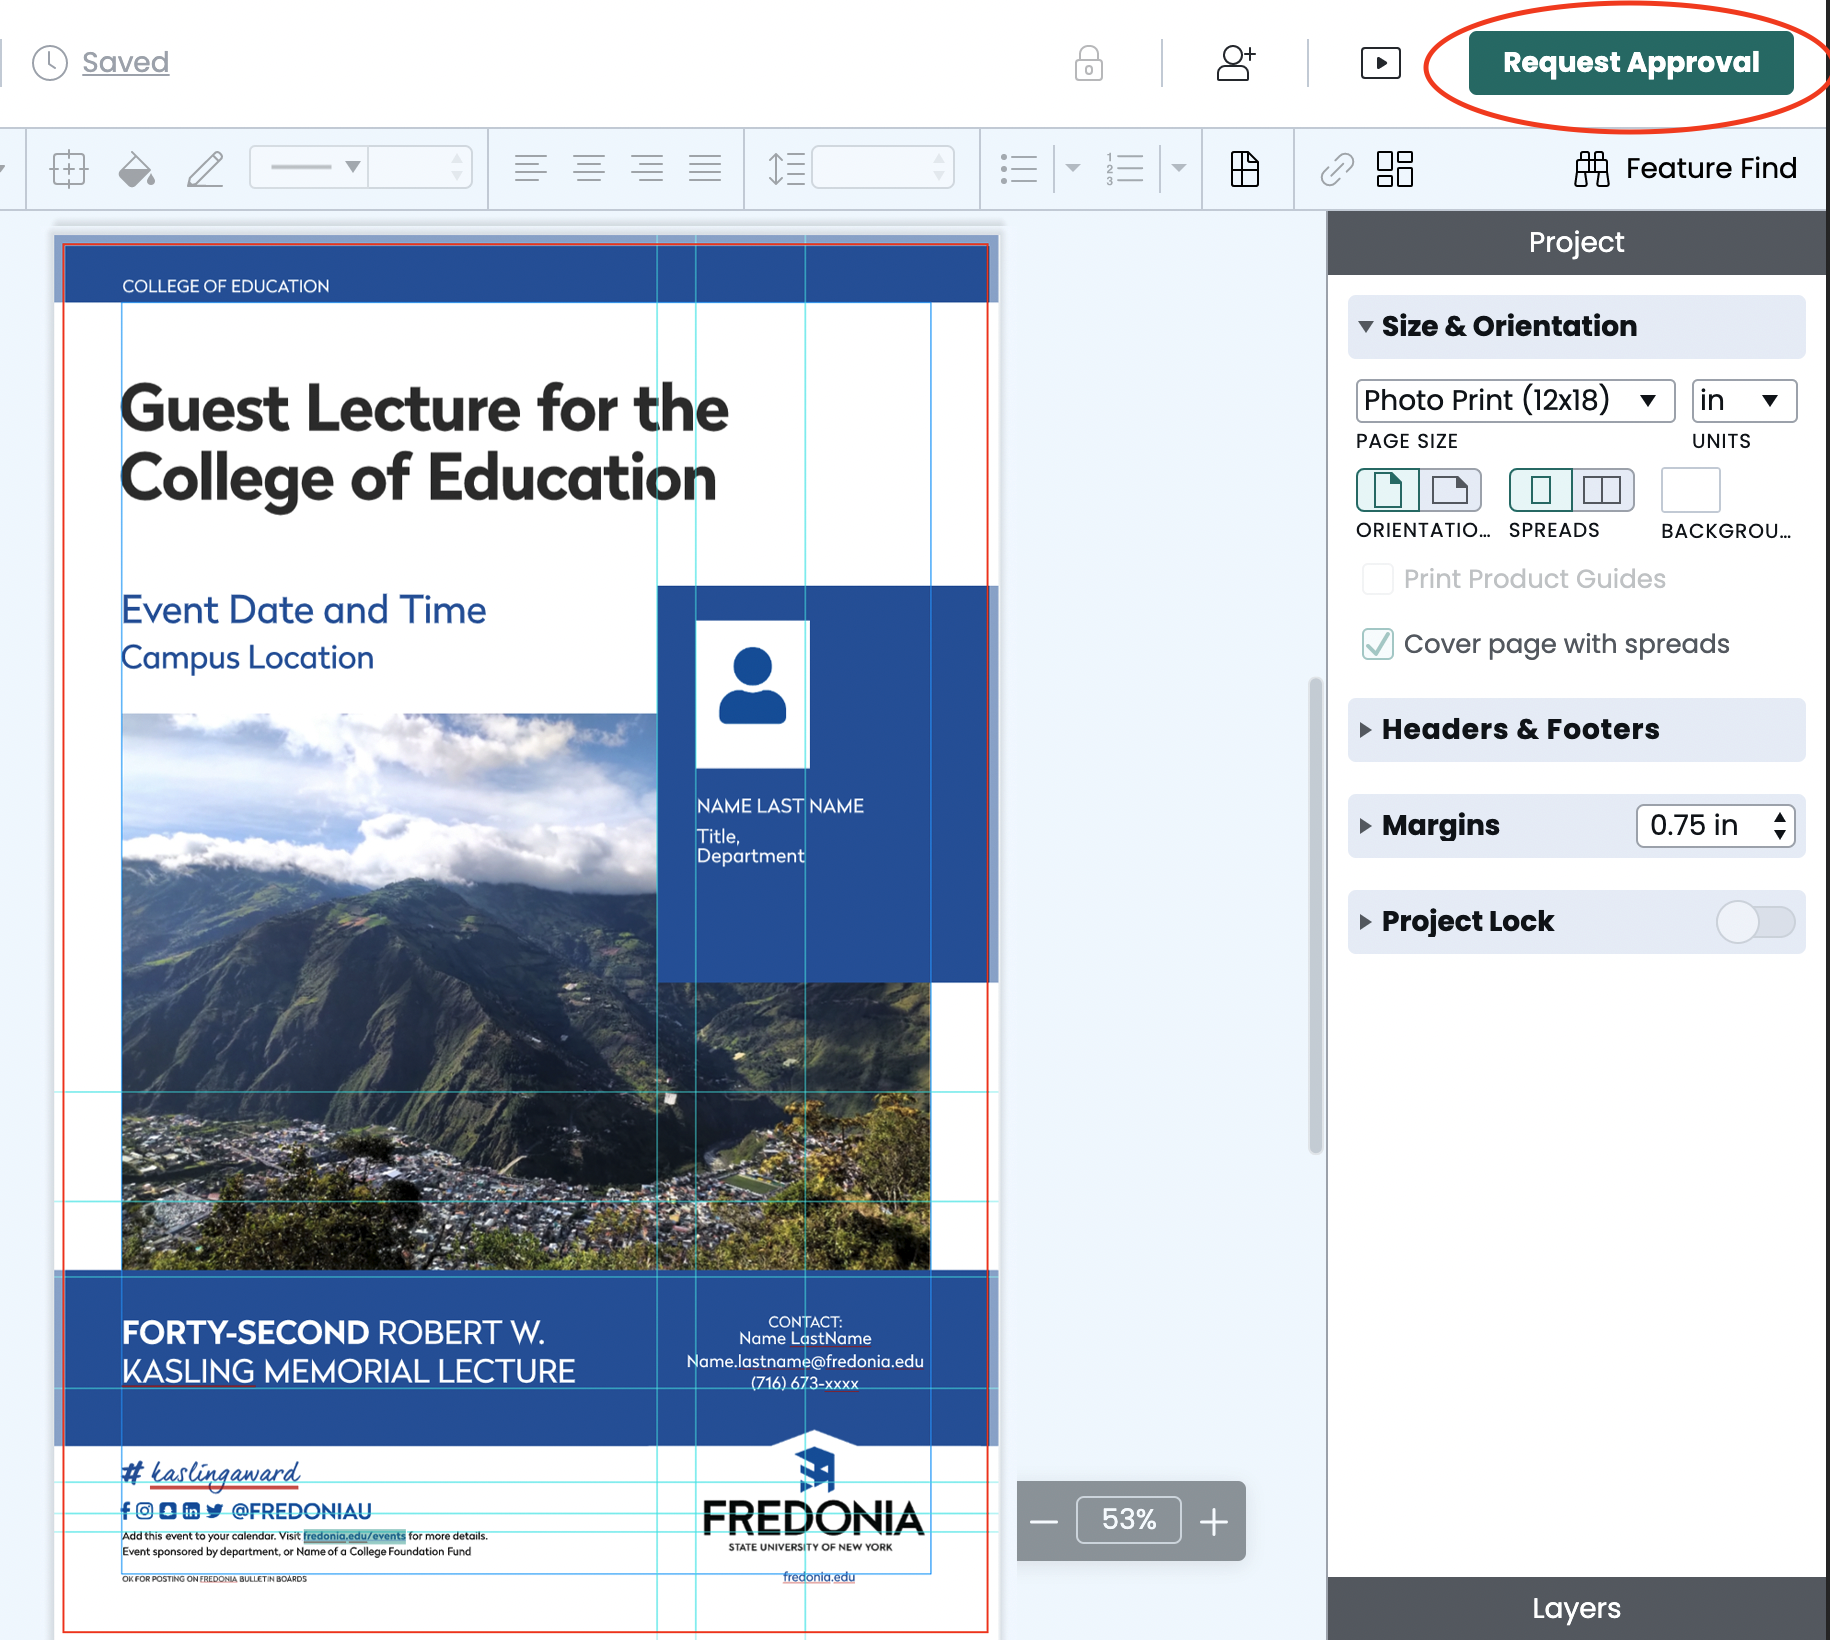
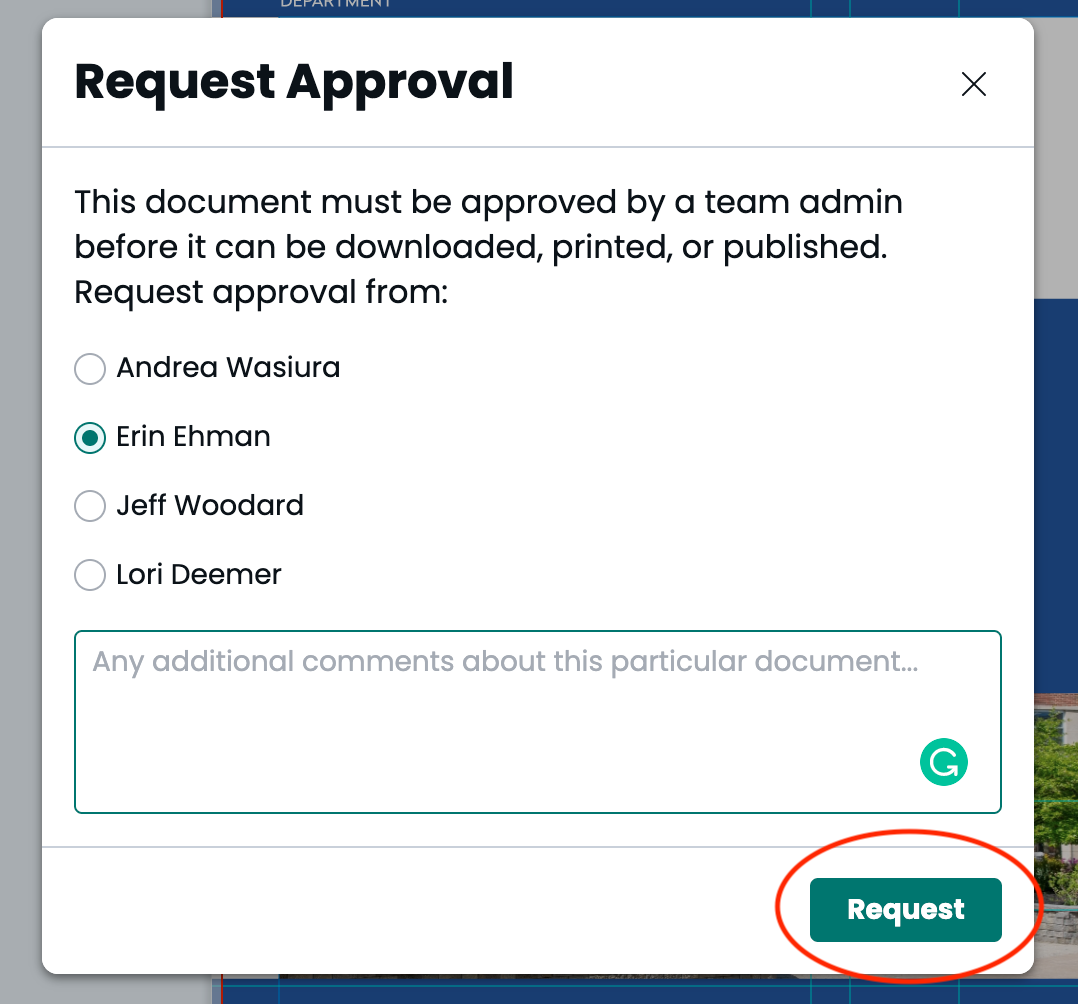
After you have completed your document, use the upper right “Request Approval” button to unlock the document for printing and downloading.
Choose the name of the Design Team member you would like to send the approval request. You may add a message if needed.
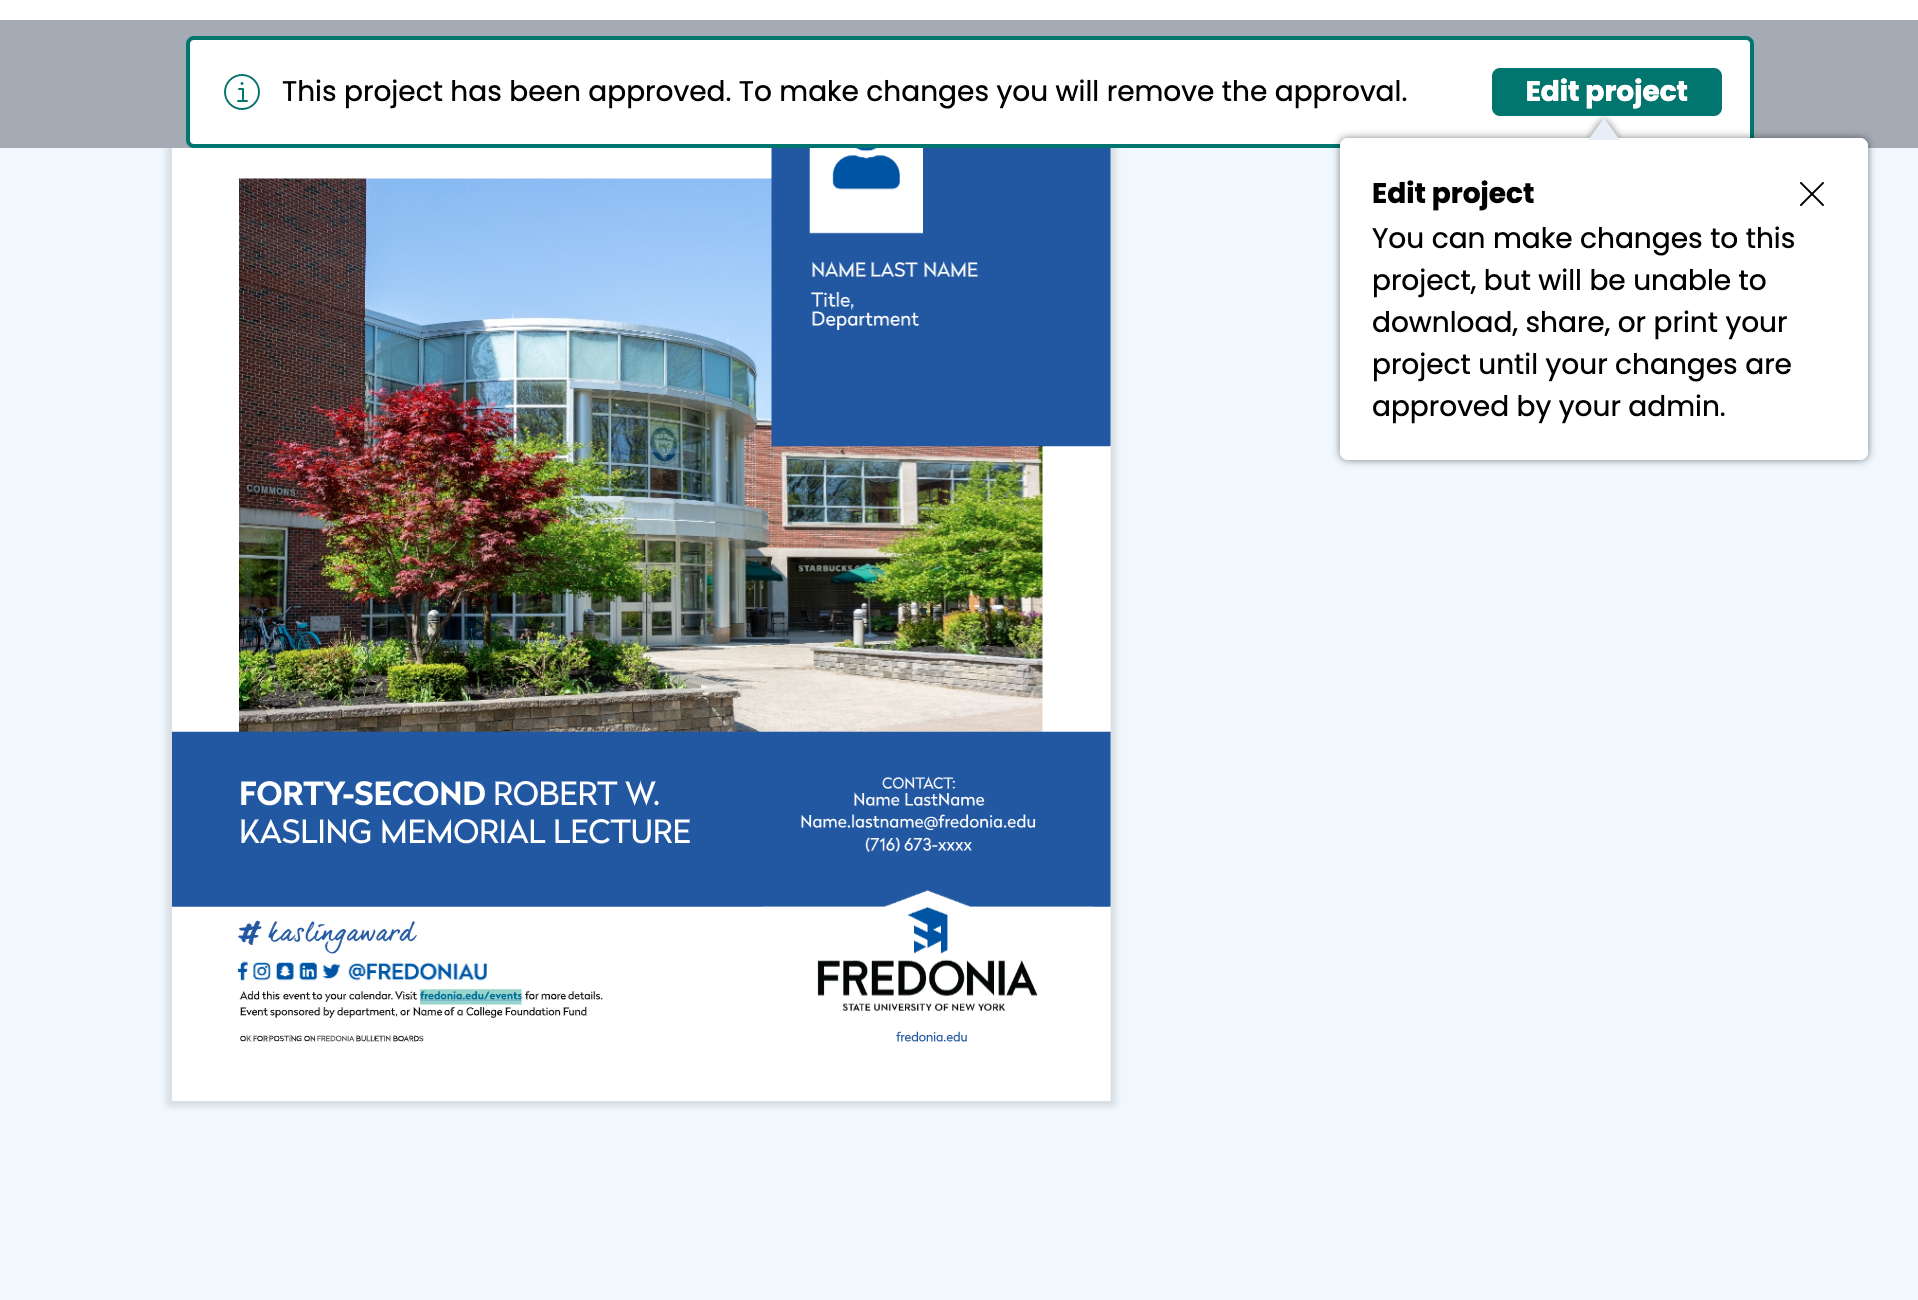
A member of the Design Team will review, assist with any adjustments and approve your document. You will receive an email notification when your document has been approved. Once the document has been approved, you may download the artwork. You may also continue to edit the document. However, once new changes have been made, another approval request must be sent before downloading is enabled.
Download a document for print
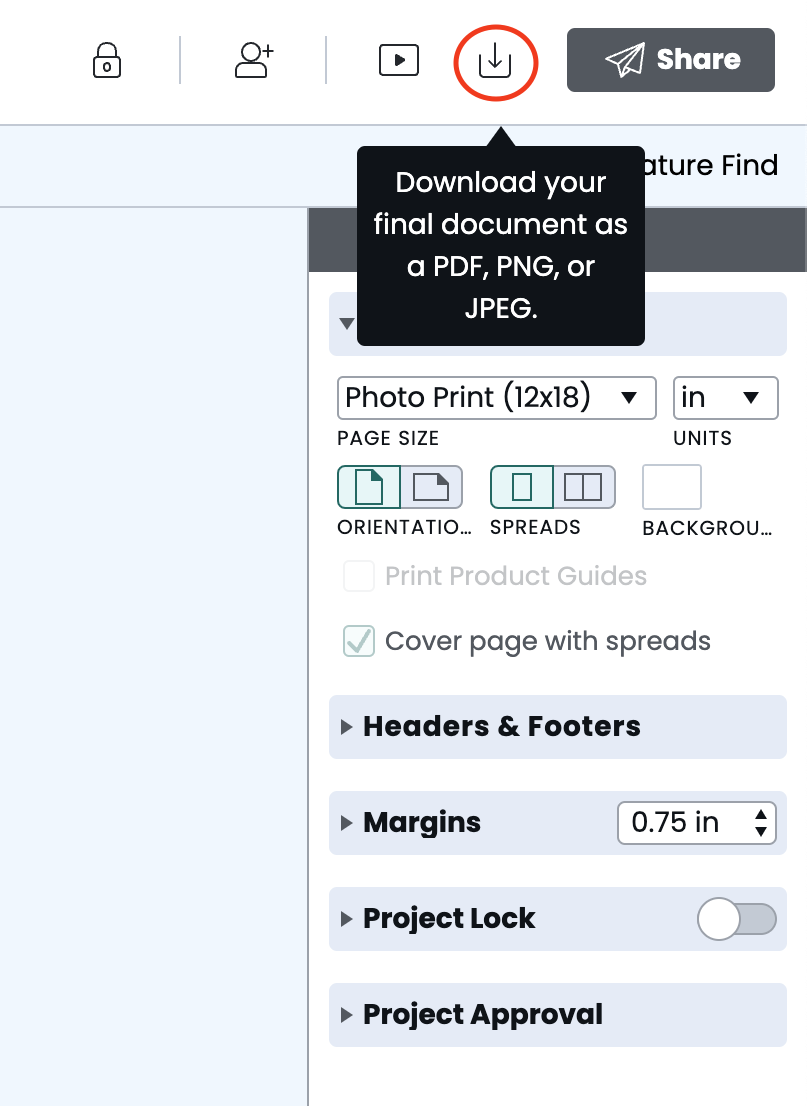
Once your document has been approved, you may download a PDF, PNG or JPG. Select the download button. The PDF format is the preferred format for print documents.
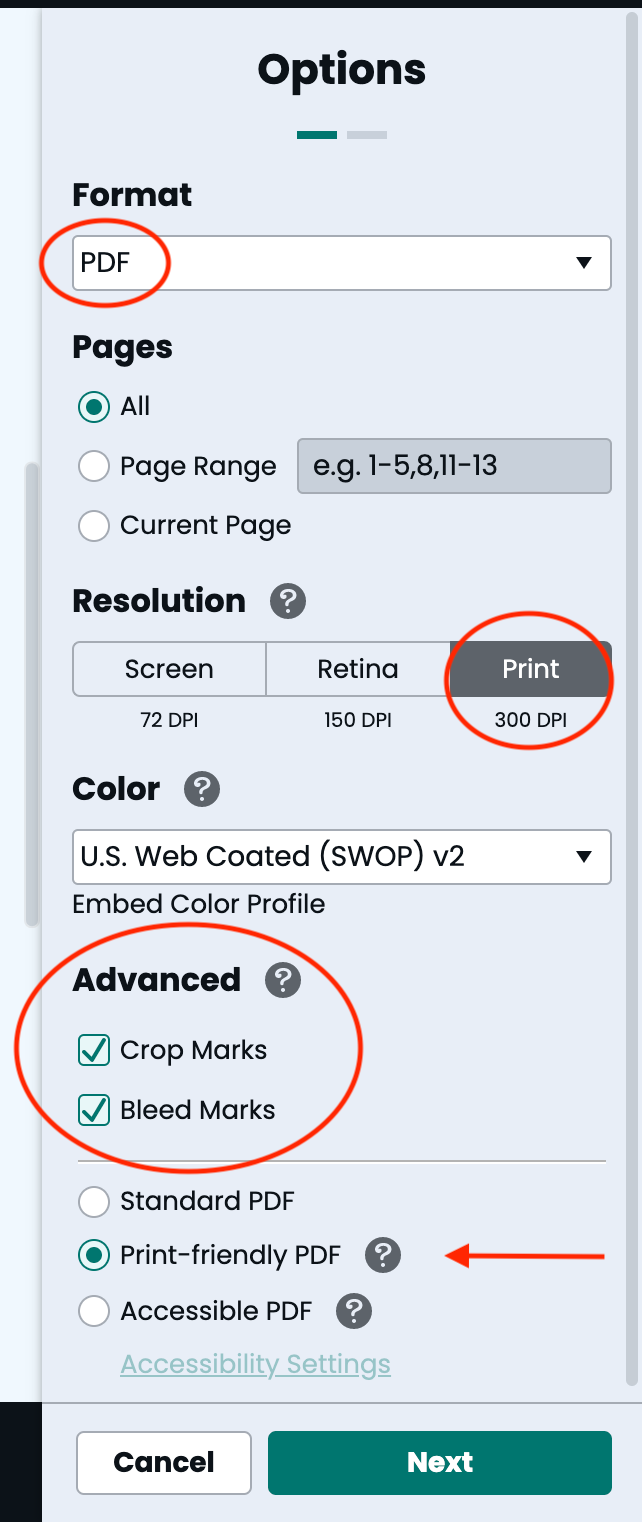
If this is your final download to send the document to a printer, choose print quality resolution of 300 dpi, check the boxes for Crop Marks and Bleed marks, the color setting should default correctly to U.S. Web Coated (SWOP) v2, and select the Print-friendly PDF option.
You can select “Check my document” to review for press-quality image resolution and color space accuracy. For more information please visit https://help.marq.com/color-settings-cymk/rgb
To download a digital document as JPG or PNG, simply choose that file type in the download menu, choose screen resolution of 72dpi or 150dpi, and download.
Download a document for use with assistive technologies like screen readers. (web posting, email, social media)
If you plan to share your document digitally (posting to our website, social media, or sharing via email),
it must be accessible.
Important note:
Emailing a poster, flyer, or brochure announcement without all of the relevant screen-reader-compatible text inside of the body of the email is not ADA accessible, and creates a liability for the university and the email sender. More specifically, Section 508 of the Rehabilitation Act defines that universities and colleges must ensure that electronic communications and information technologies (websites, email, web documents, video media) must all be fully accessible to all individuals regardless of disability. For more information please visit our Answers accessibility documentation.
Harvard also has a good resource for more information on accessibility.
Required Information to make an ADA accessible document:
Document Title
Alt Text for Images
Logical Reading Order
Accurate Hyperlinks
Adequate Color Contrast
Accessibility Settings
There are two different places you can find accessibility settings:
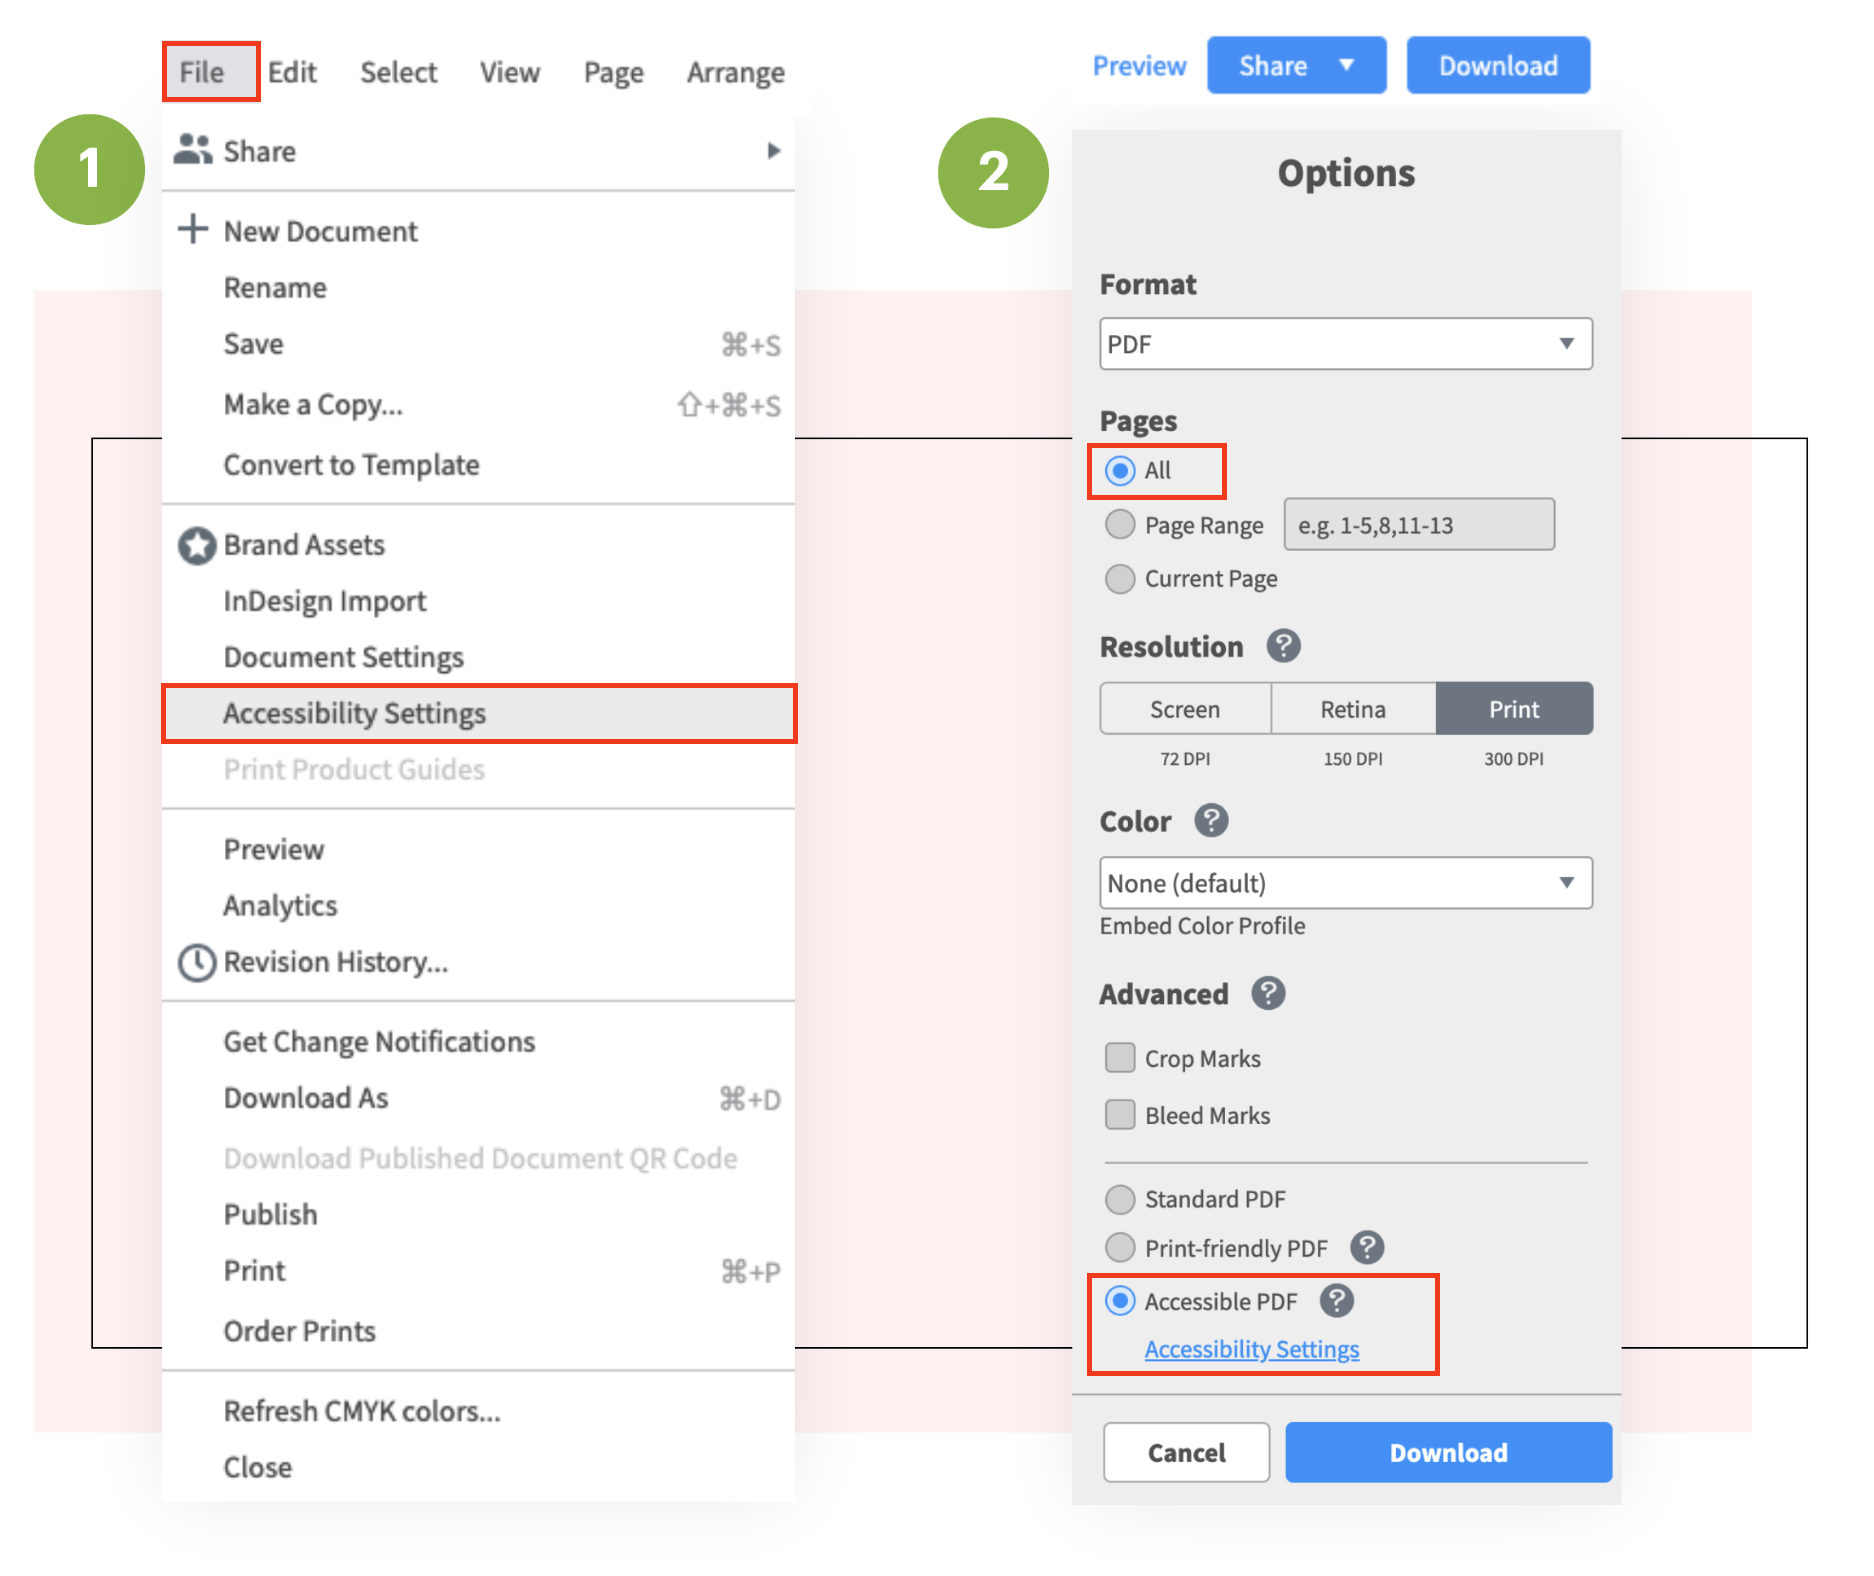
1.) Select the “Accessibility Settings” option from the file menu in the editor.
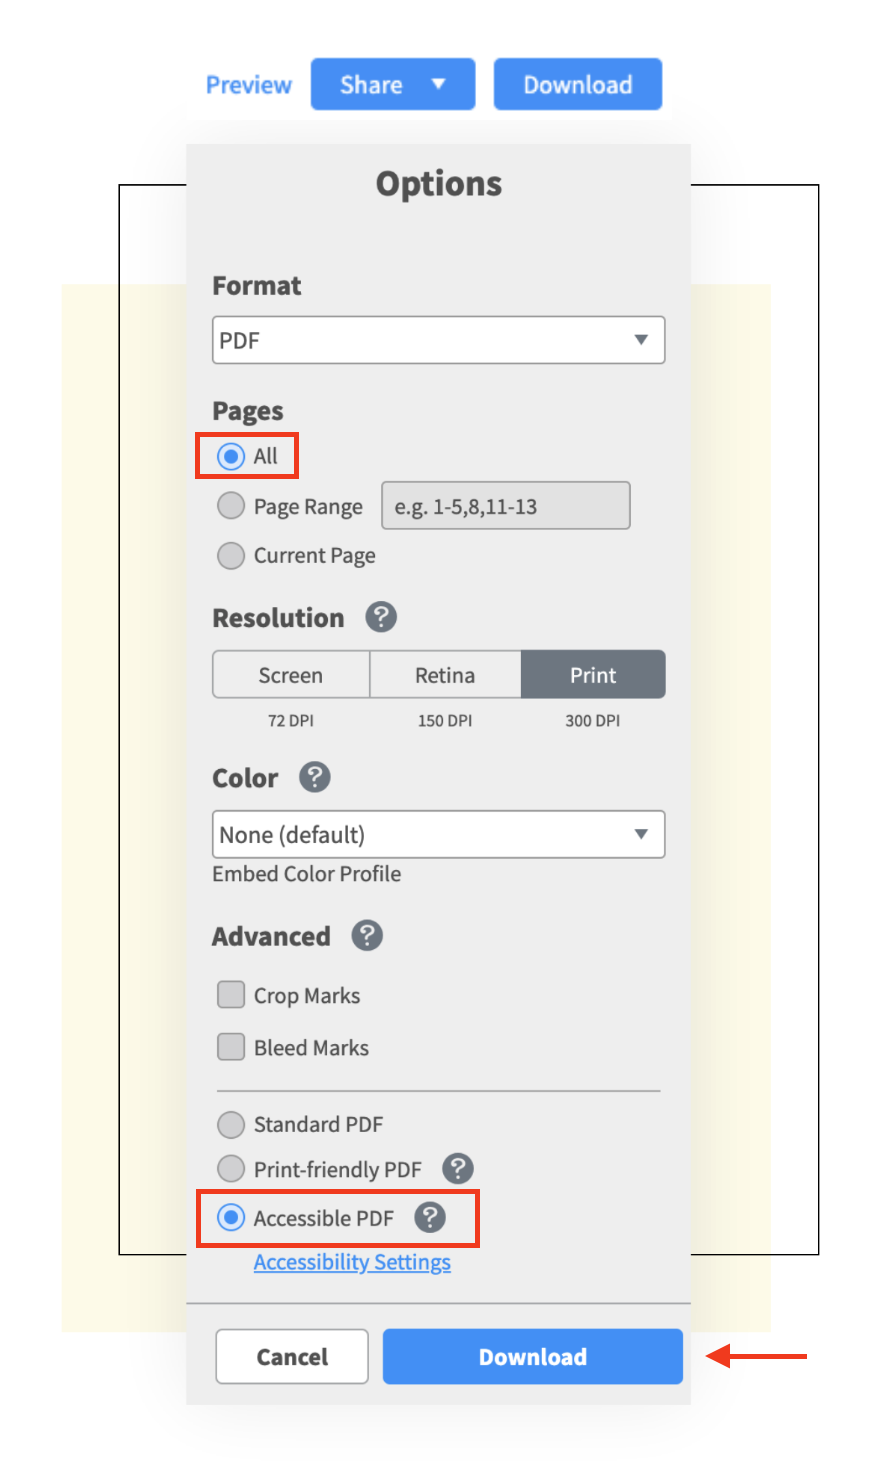
2.) Alternatively, you can access accessibility settings directly through the download flow by selecting the “Accessible PDF” option button and then selecting the “Accessibility Settings” link.
Adding Alt Text
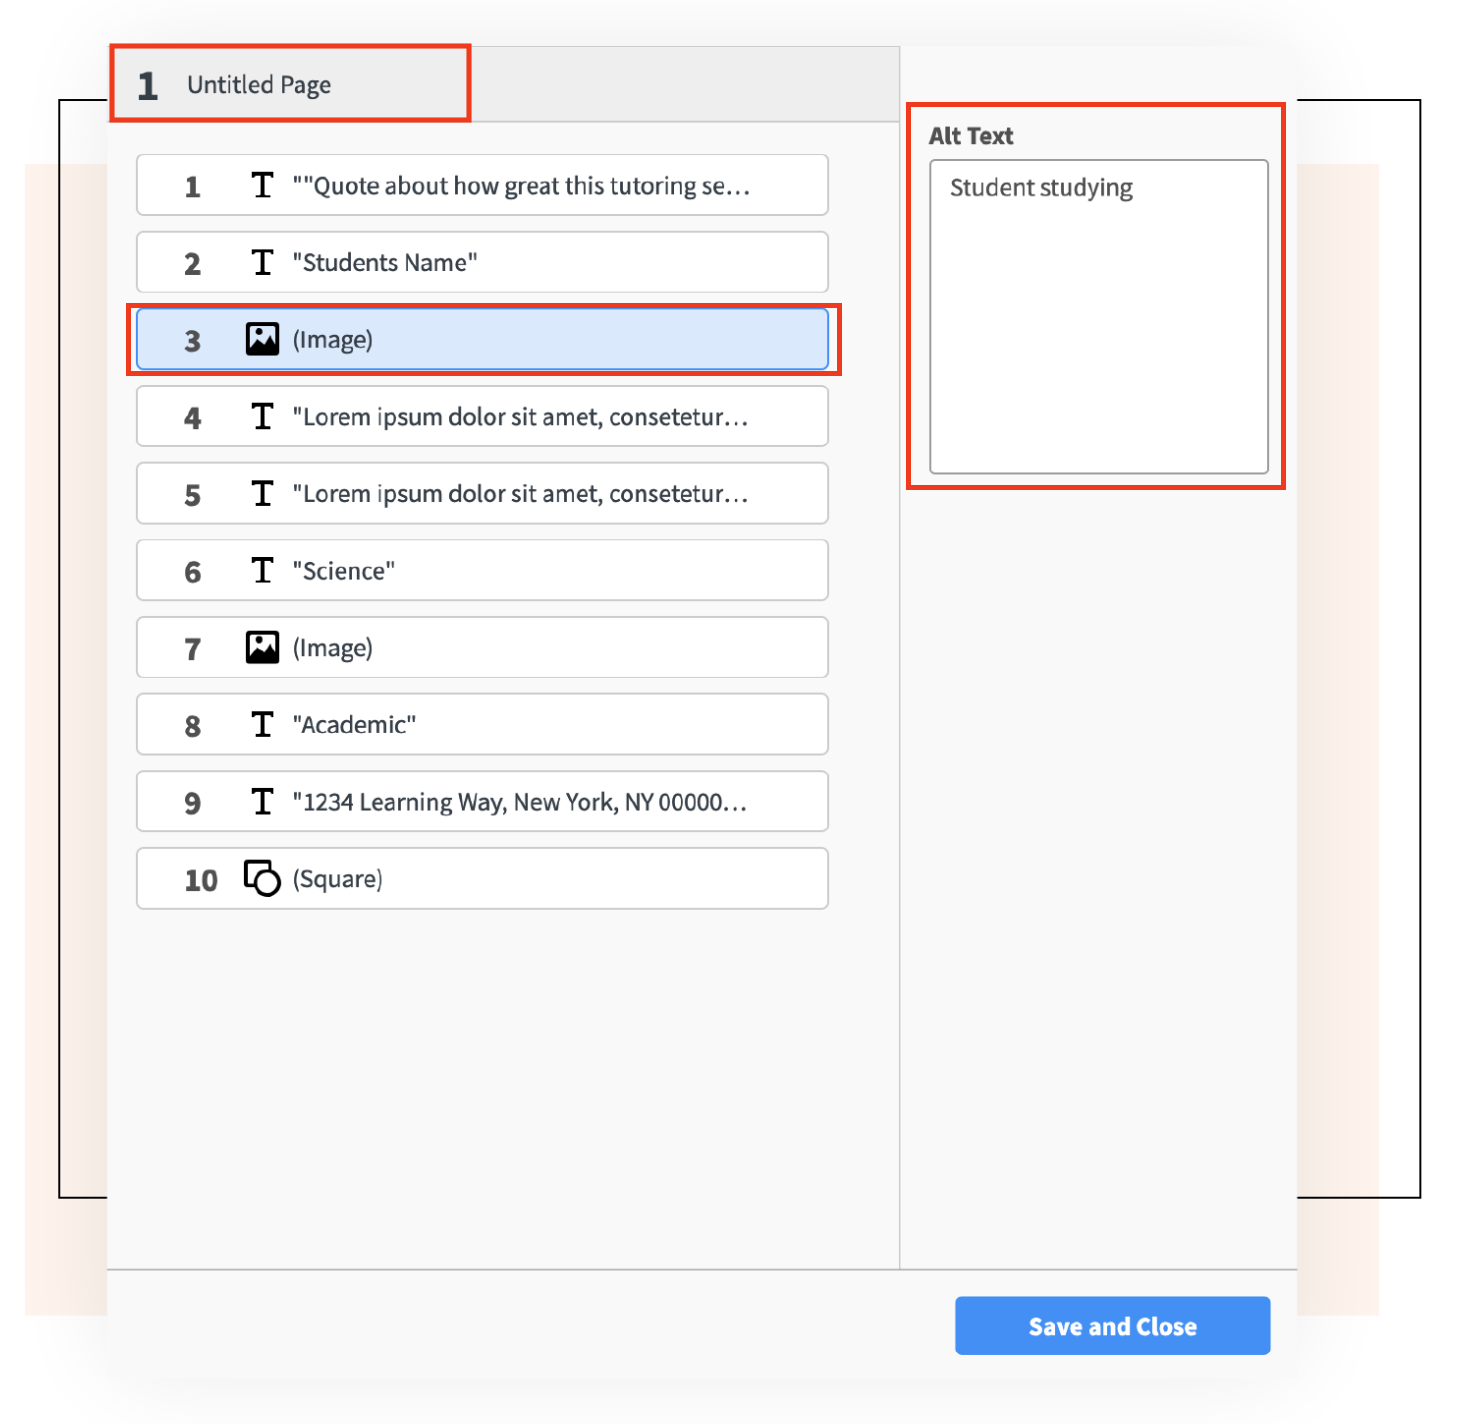
To add alternative text to images and graphics, go to the accessibility settings, select the tile of the element where you want to add alt text, and then type the alternative text in the “Alt Text” box.
You can use this method to add replacement text to any type of element, including text elements.
Give the document a title by entering the title in the top 1 “Untitled Page” field.
Logical Reading Order
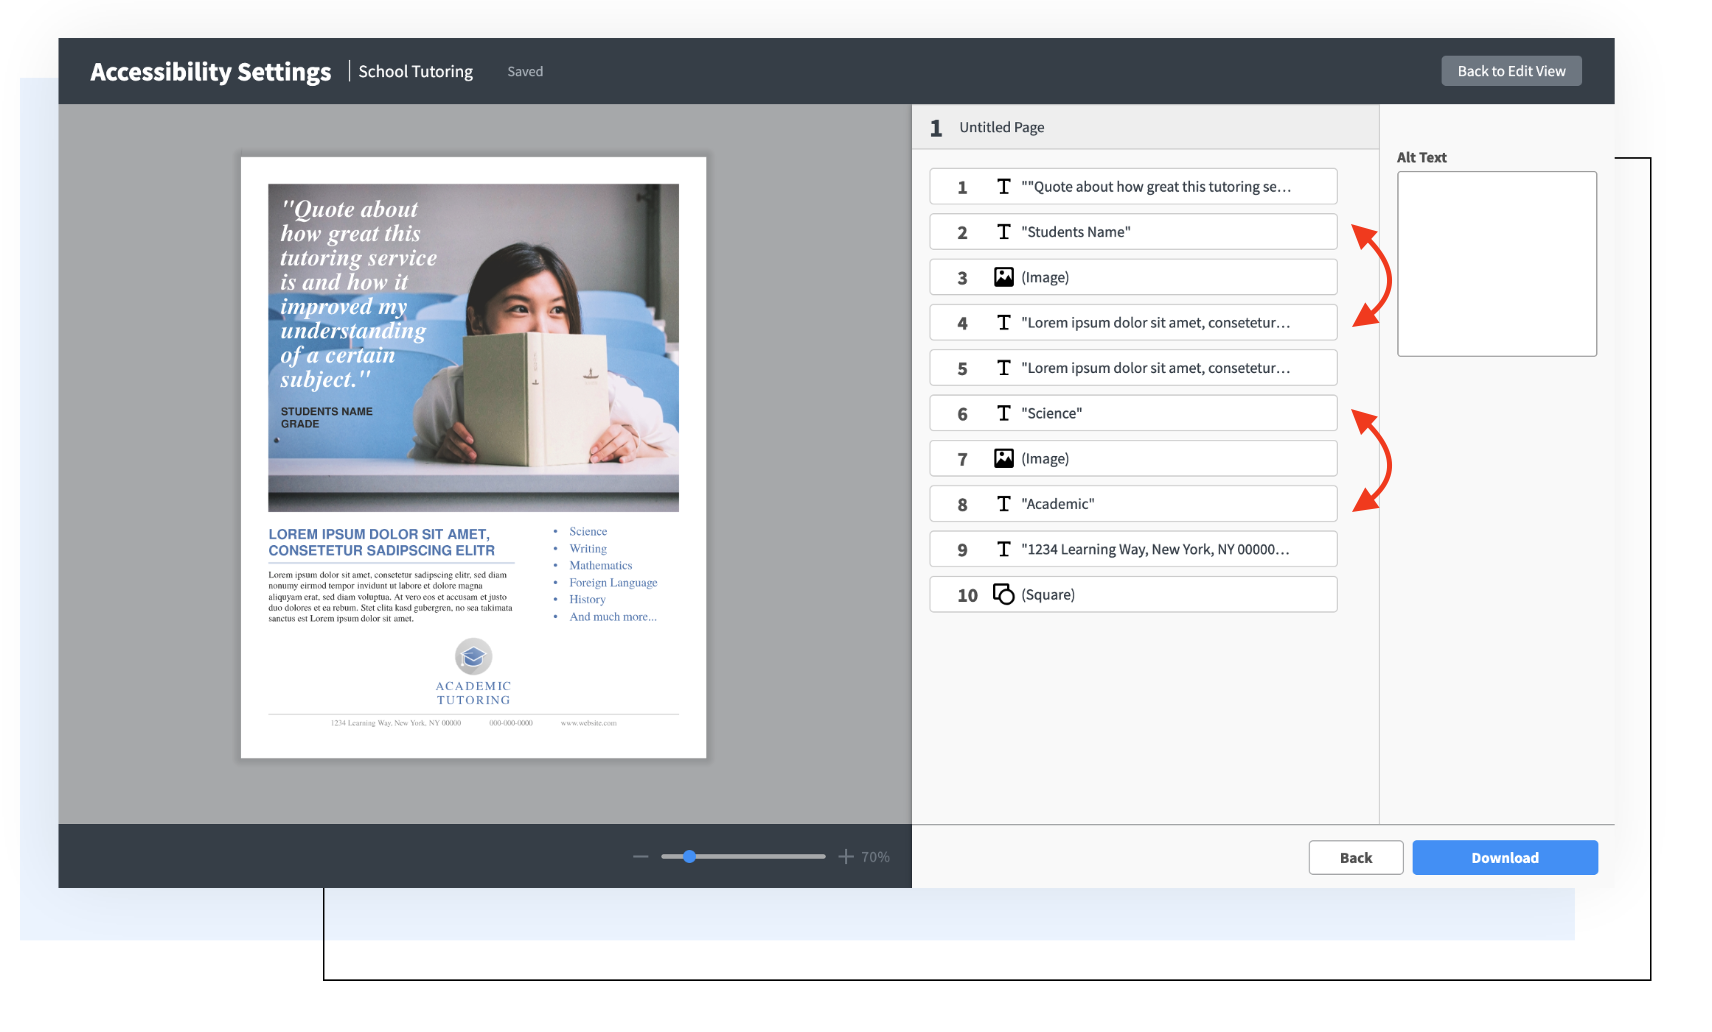
Reading order is initially based on the order in which text, images, and other elements are added to the canvas.
To modify reading order, go to the accessibility settings and drag and drop the tiles in the correct order in the reordering pane. This reading order will be preserved upon download.
Managing Hyperlinks
When linking an image or shape, you can specify the purpose of the link and the destination using alt text.
When linking text, ensure the text itself conveys the purpose of the link. Use concise, human-readable text instead of a URL. For example, Weather in New York City is more user-friendly and descriptive than the associated URL link path: https://weather.com/weather/today/l/USNY0996:1:US (Answers automatically improves URL link paths to the title of the link shown here.)
Adequate Color Contrast
Color contrast is the difference in brightness between foreground and background colors. For accessibility purposes, aim for a 4.5:1 ratio between the foreground color (e.g. text, links, etc.) and the background color. This ratio ensures people with moderately low vision can tell the colors apart and see your content.
How to Check Color Contrast
There are many tools available online to check color contrast. Check out these for more guidance:
You must meet WCAG AA criteria for color contrast.
Download an Accessible PDF
To download an accessible PDF, select the “Download” button in the top-right corner of the editor or select “Download As” in the file menu. In the download flow, select the “Accessible PDF” option button and then “Download”.
Please contact creative.design@fredonia.edu with further questions about using Marq or refer to Marq’s Help Center found at the bottom left corner of your marq homepage.
