My instructor is using online proctoring for my exams, how do I take an exam this way?
Step-by-step guide
**NOTE: Tablets, Hybrid Devices (ie Chromebooks), and Mobile Devices are not supported.**
- Log in to OnCourse and open the course the exam is in.
- Locate the exam starting point. This link will have a green puzzle piece in front of the name.

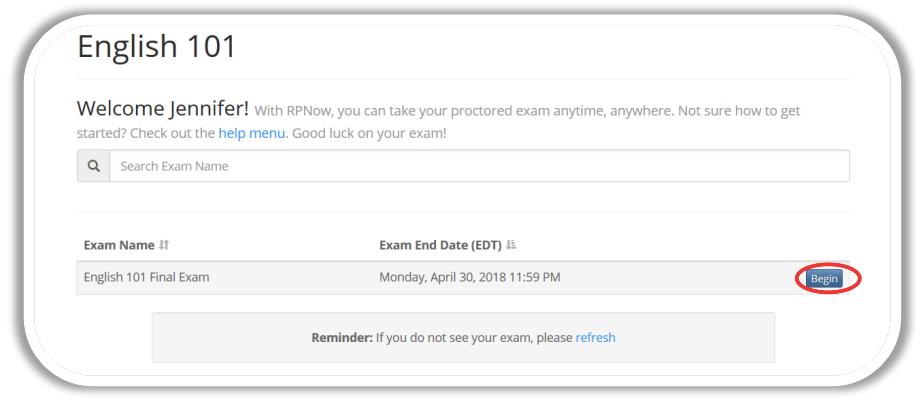
- Choose “Begin.” It should be noted that the exam’s end date may or may not be listed, depending on your instructor's preference.
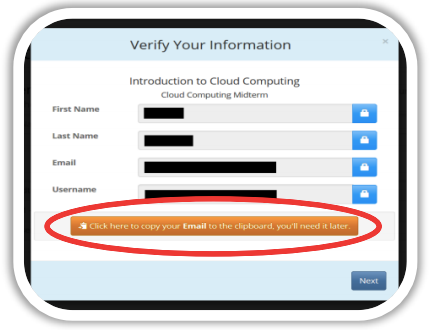
- Verify your name and email/username in the appropriate boxes. Copy your username/email to save time later by clicking the orange box.
- . You will be taken to the RPNow Installation page where you will be given the choice to watch a brief tutorial video or download the software. Choose “Download Software.”
- Locate your download, then save and run the software. You will need to do this each time you use RPNow, as updates to the software may become available.
- Please Note: If you need assistance, you can always choose the “Contact Support” button located at the top right of the screen.

- Please Note: If you need assistance, you can always choose the “Contact Support” button located at the top right of the screen.
- The system will start a “Microphone Check” to test your computer’s sound. You will need to speak out loud in order to pass this test.
- If you do not pass the test, you will be given a list of troubleshooting options and will have the option to re-test the microphone
- After you have passed the microphone test, click “Continue.”
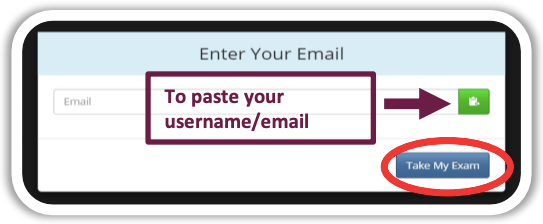
- Click the green paste button to paste the username/email you copied it earlier using the orange button. Select “Take My Exam.”
- Confirm the exam you are taking and select “Next.”
- Next you will be prompted for payment. This secure site will allow you to pay by one of the following methods:
- PayPal – You will automatically be directed to log-in at PayPal.com.
- Credit Card - The system will provide you a quick warning asking if you are prepared to submit your payment and take your exam. If you are, check the box provided and click “Proceed to Authorize.Net”
- Please Note: You always have the opportunity restart the payment process by selecting “Start Over Payment.” If you have any questions about payment, please email rppurchase@softwaresecure.com.
- Please Note: If you receive a “User Not Found” message, make sure your information is correct and select “Try Again.” If you receive the same message, click “Manual Entry.”
- Choose your course and exams from the drop downs. Then enter your name, email and telephone number. Your telephone number is optional and is only used so support can contact you in the event of a problem with the software.
- First time users will need to register their name, ID and email. You will not be prompted to do this for future exams. Please ensure that the name entered matches the name on your Photo ID exactly.
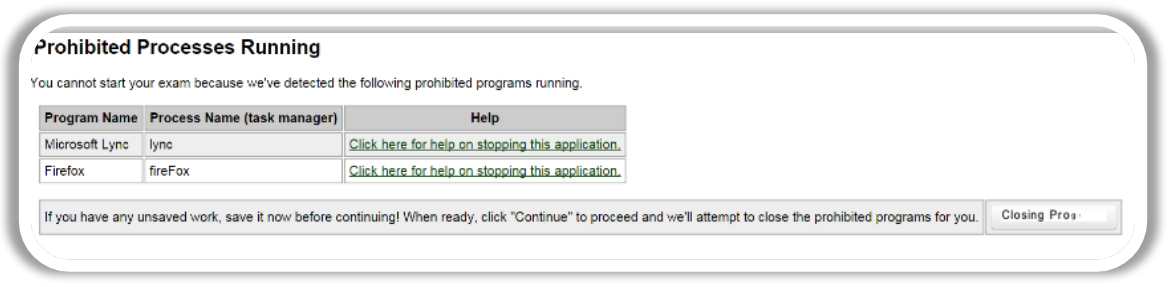
- If you have any prohibited programs running, such as Word/Excel, RPNow will automatically attempt to close them.
- The RPNow User Agreement and Advisory screens will then launch. Please make sure to read these carefully, as they detail the rules and requirements for the exam and software.
- You will then be asked to take a picture of your photo ID. Make sure the name and picture on the photo are clear and click “Take ID Photo.” Review the photo, and if this is unclear for any reason, you have the option to retake the photo.

- You’ll then need to do a room scan to show us your work area. Make sure you clearly pan your desk, walls, and floor.
- You’ll have to watch the whole room scan before clicking “Confirm Room/Desk Scan.”
- Please note: Any materials that your teacher allows during the test, such as calculators, books and notes, should be shown to the camera during the room scan.
- Take a clear photo to be compared with your Photo ID. Again, if this photo is unclear, you have the option to retake it.
- Once this is completed, you’ll have several minutes to log into your course management system and take the exam. A prompt will alert you to this.
- You now have 10 minutes to start your exam, otherwise, you will need to start the process over again.
- Navigate to your exam start page an if your exam requires a password, you must click on the "Insert Exam Password" button at the top of your screen when prompted to enter the exam password.
- Take your exam.
- Remember to follow your institution's exam policy to avoid being flagged for violations.
- Press the OK button
- *DO NOT CLICK* “Take RPNow Exams” again- locate your exam within your course and select it. You will be prompted for a password for the exam, you will not be given this password ahead of time.
- Click the “Insert Password” or “Insert Access Code” button at the top of the screen and the password will automatically populate. Click “Submit” to enter the exam.

- Once you have finished your exam, click the button to “Save and Submit” your answers in the bottom right corner.

- Please remember: RPNow will continue to record until you click either the “Close” or the “X” button at the top right hand of the screen to close out the software.

- In most cases, you will know you have successfully closed the software when you see a thank you page similar to the below.
- Finally, you may be guided to a survey about RPNow. We would love feedback on your experience with the product. The survey is entirely anonymous and none of the questions are required.
...
| Info |
|---|
RPNow provides a list of system requirements for using the proctoring software. **NOTE: Tablets, Hybrid Devices (ie Chromebooks), and Mobile Devices are not supported.** The directions on this page were adapted from RPNows "Step-by-step: How to take an Exam." Student help in both text and video can be found on "RPNow Test Taker University." Tips for a Clean Exam
|
Short URL to this page:
...
| Live Search | ||||||||
|---|---|---|---|---|---|---|---|---|
|
...