Creating Groups When Merging
How do I create groups representing the students from each section being merged?
Step-by-step guide
The following steps will create a group of the students in the first course, the course that the second course will be merged into. This step must be done prior to merging.
- Login to OnCourse and open the course you will merge all the students into.
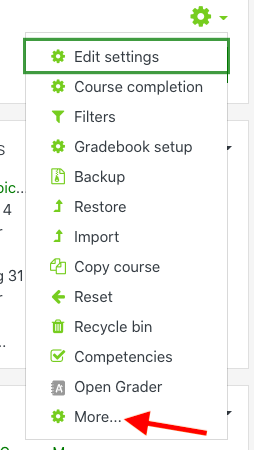
- Locate the green gear icon on the upper right hand side of the page. Click on the drop-down menu and select More.
- Click on the Users tab and then click on the Groups link.

- Scroll down and press the Create group button.
- Name the group and press Save changes.
- Suggestion: Name the group after the course or section that the students are enrolled in.
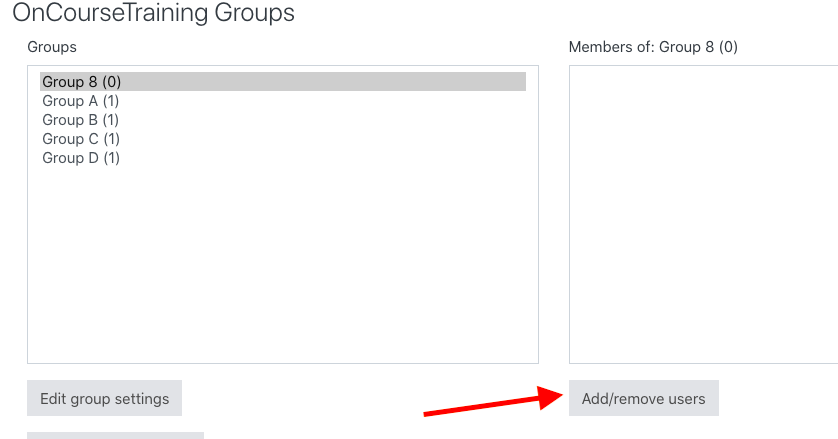
- Under the "Members of 'Course Name'" press the Add/remove users button.
- Click on the users you would like to add and press the Add button
- Tip: To select all of the users, select one and then press CTRL + A to select them all
- To select multiple users click on the first user, hold down the CTRL key and then click on the other users to be added
- When you are finished adding users press the Back to groups button
- When finished creating this group, the merge process can be completed. Directions for merging are found here: Merging Courses in OnCourse
Hints:
Group membership can be edited by returning to the Groups page, selecting the group, and pressing the Add/remove users button. Any student that enrolls after the group is created will need to be manually added into this group.
The group created during the merge process will update the members as drop and add happens in that course.
Related articles