Using Rubrics in OnCourse
Follow this guide to learn how to create rubrics in OnCourse.
Step-by-step guide
Please also see the video tutorial for Adding a Rubric to OnCourse.
- Turn editing on. Navigate to the upper right side of the main course page and press the Turn editing on button.
2. Scroll down to the section in your course where you wish to add either the Forum tool or the Assignment tool. For this tutorial we’ll focus on using the Forum tool. Press Add an activity or resource.
3. From the activities menu, select Forum. The page refreshes and brings you to the settings of the Forum.
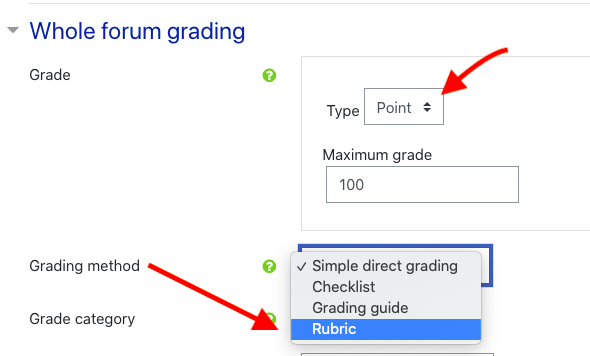
4. Be sure to give the Forum a Name, add the Description and schedule its Availability. Expand the Whole Forum Grading menu. For grade Type select Point and set the Maximum grade. The default is set to 100. For Grading method select Rubric.
5. Scroll down and press Save and Display. The page refreshes and brings you to inside of the Forum.
Creating your Rubric
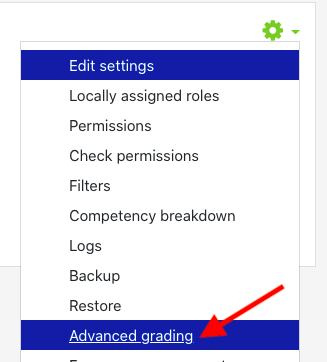
- Locate the green gear icon in the upper right, and click on the drop down arrow. Select Advanced grading.
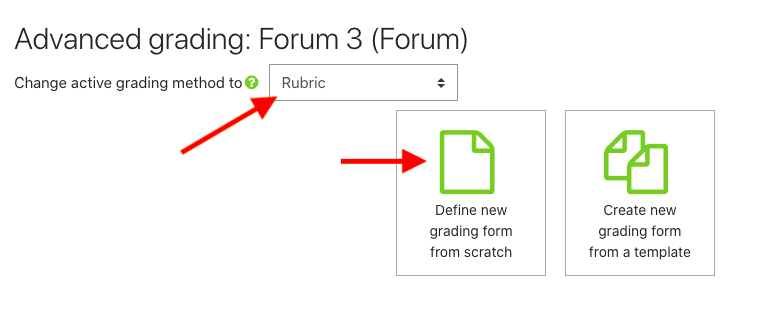
2. The page refreshes. Be sure to change the active grading method to Rubric. Next, press on Define new grading form from scratch.
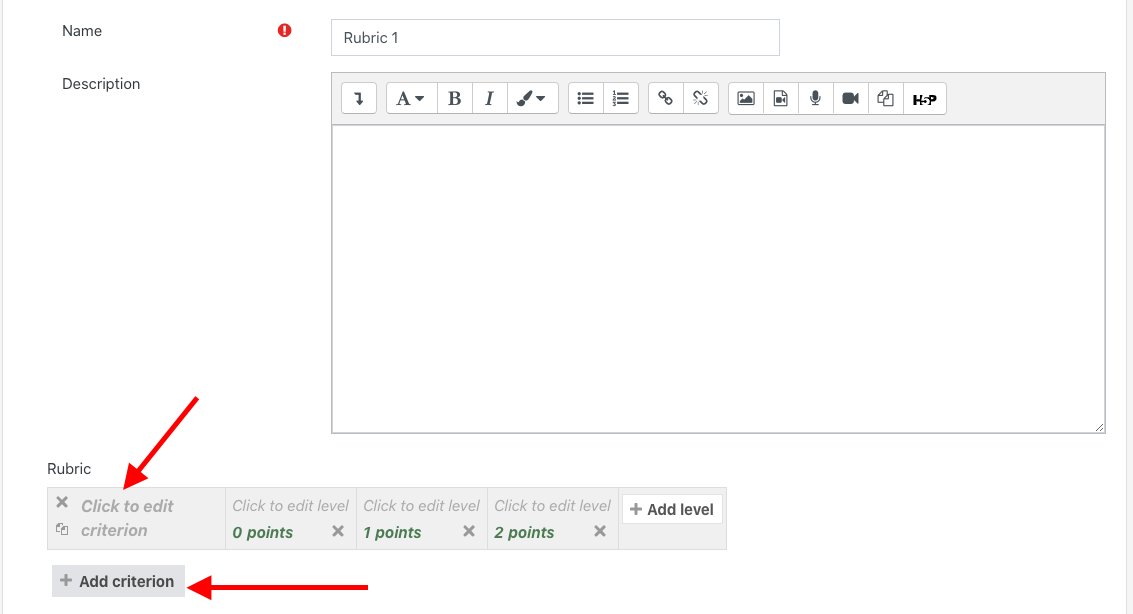
3. Give your rubric a name and description.
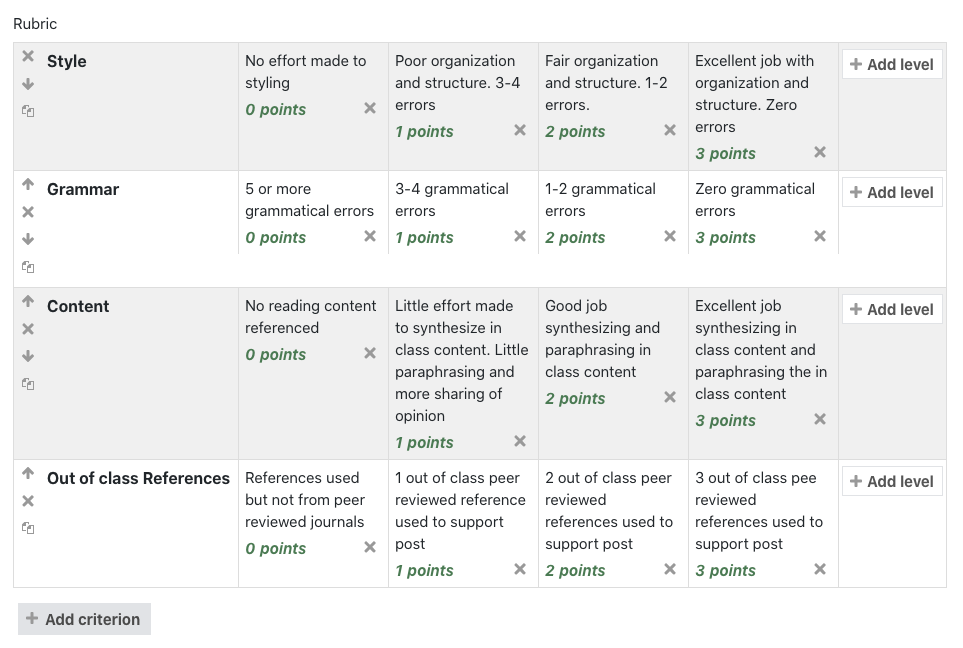
4. Build your rubric. Use the Add criterion and Add level buttons to expand your rubric as needed.
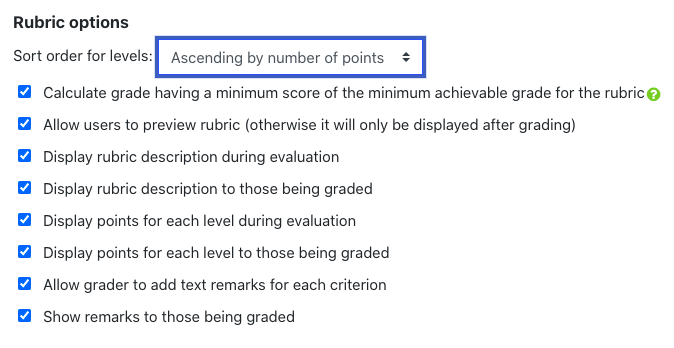
5. When you are finished building your rubric, check out the rubric options.
a. All of the options are selected by default and we recommend leaving all the options checked.
b. In particular, it is important to leave Allow users to preview rubric checked so that your students can access the rubric before they are evaluated. Accessing the rubric will support your students in creating a strong submission that meets the criteria for the assignment.
6. When you are finished, scroll down and press Save rubric and make it ready.
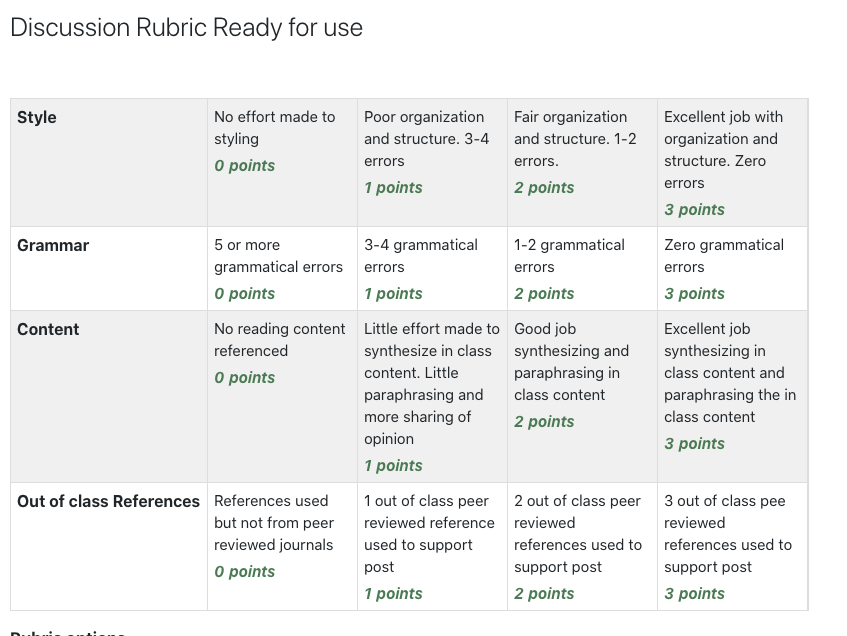
7. The page refreshes and you will see that your rubric is ready to use.
Grading with a Rubric
- Locate the activity that needs grading. In this example, a Forum. Press the Forum link to enter the Forum.
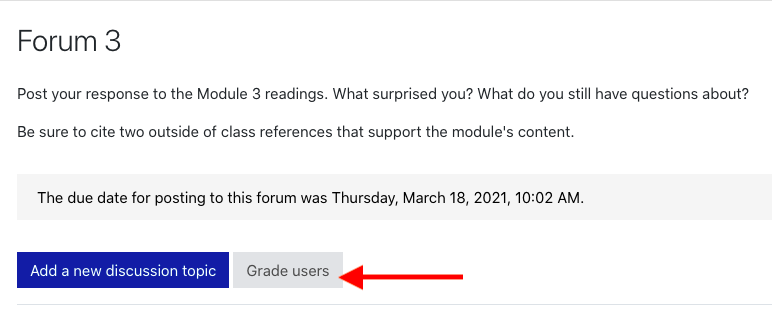
2. Press the Grade users button.
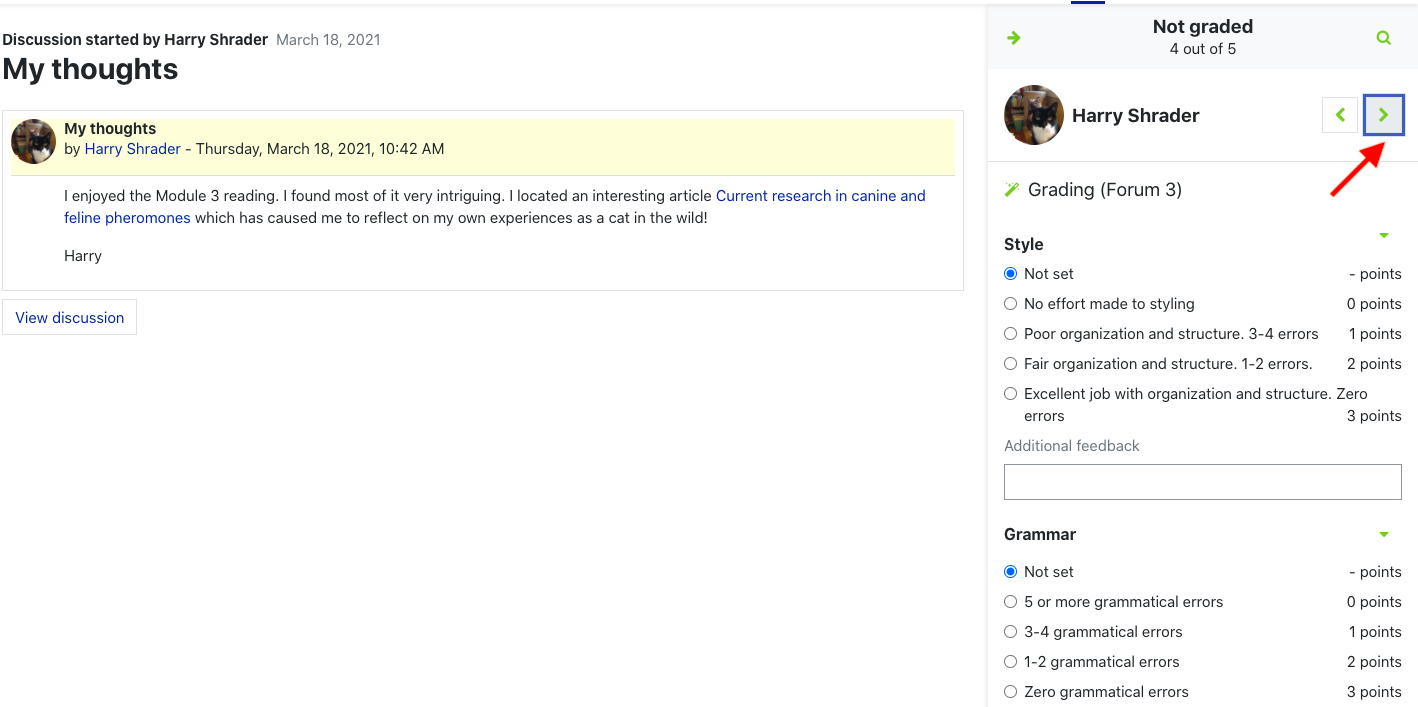
3. The page refreshes and brings you inside the Whole Forum Grader. You’ll see your rubric on the right side of the page.
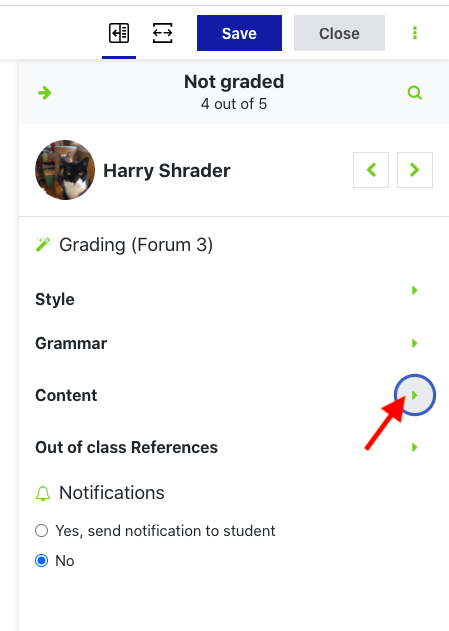
a. If the criteria for the rubric are collapsed, use the small arrows to expand the criteria for grading.
4. Fill in the bubbles next to the rubric criteria to select a specific criteria. You can also add additional feedback in the Additional Feedback field.
a. Use the arrows in the top right corner to advance the pages and select students to grade.
Related articles
Filter by label
There are no items with the selected labels at this time.


