Creating and Downloading a Course Backup from OnCourse
How do I create a backup of my course that I can download onto my computer?
Step-by-step guide
Log on to OnCourse using your eServices username and password.
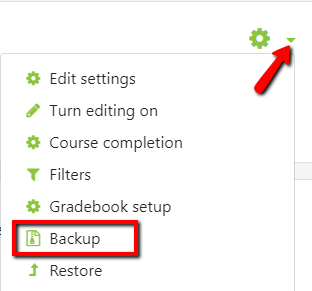
Locate the green gear icon on the upper right hand side of the page. From the drop-down menu, click the Backup link.
There are two choices, backing up including enrolled users or backing up without enrolled users.
If you are backing up the course to migrate to FREDLearn you will back up the course ** without enrolled users **
To exclude student data, and only include course content, uncheck “Include enrolled users.”
To include enrolled users, check the “Include enrolled users” option, second in the list of Backup Settings.
Scroll to the bottom and press the “Jump to final step” button.
Once the backup is complete a message will appear that says “The backup file was successfully created.” Press the Continue button.
- To download the backup locate the Course Backup area and click the Download link next to the download you would like to save.
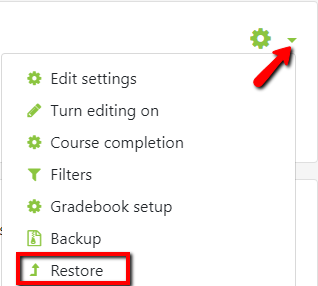
- If you navigated away from the Course Backup area after creating a backup, you can find it again by locating the green gear icon on the upper right side of the page and clicking on the Restore link in the drop-down menu.
- If you navigated away from the Course Backup area after creating a backup, you can find it again by locating the green gear icon on the upper right side of the page and clicking on the Restore link in the drop-down menu.
Hints:
- Save the backup file in a secure location, like your U drive. Information on using the U drive can be found here: Personal Data Storage
- If you used the gradebook it may be helpful to back that up separately to make it easier to access.
Resources:
- More information on course backups can be found at Moodle Course Backup
Related articles
Filter by label
There are no items with the selected labels at this time.

