Follow this guide to learn how to create rubrics in FREDLearn.
Step-by-step guide
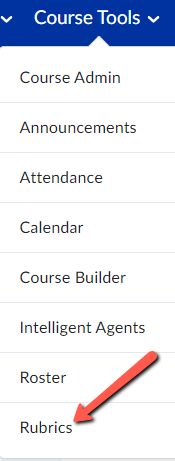
- Navigate to Course Tools, click on the drop down arrow and click on Rubrics.
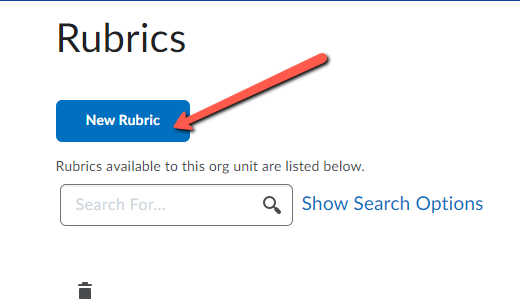
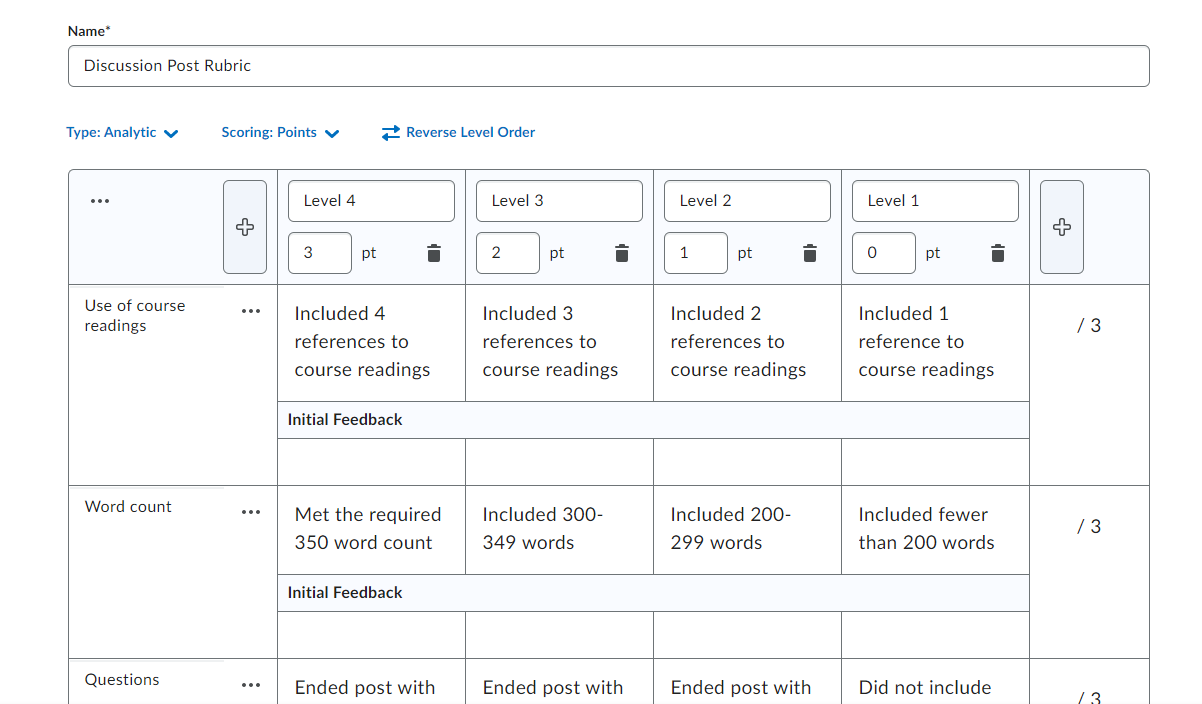
2. Press the New Rubric button.
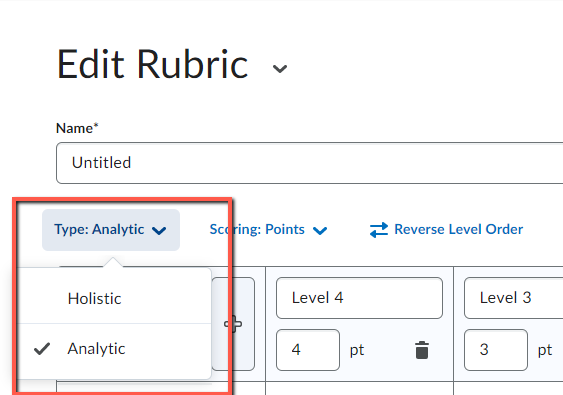
3. Choose the type of rubric you wish to create: Holistic or Analytic. You can read more about these rubric types on the Vanderbilt University website.
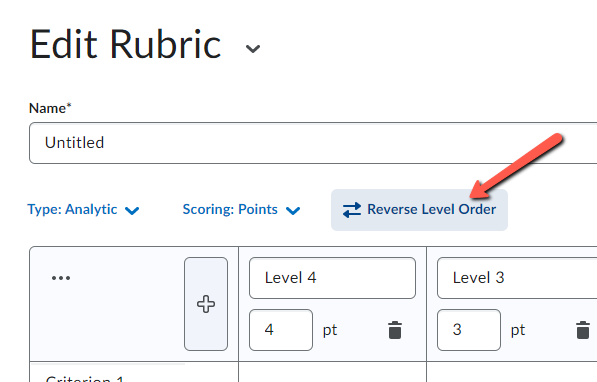
4. If you prefer to begin at Level 1, and not Level 4, you can reverse level order by pressing Reverse Level Order.
5. Create your Rubric. Begin by giving it a Name.
Please note: there is no Save button. As you fill in your Rubric criterion, Levels and Points, it autosaves.
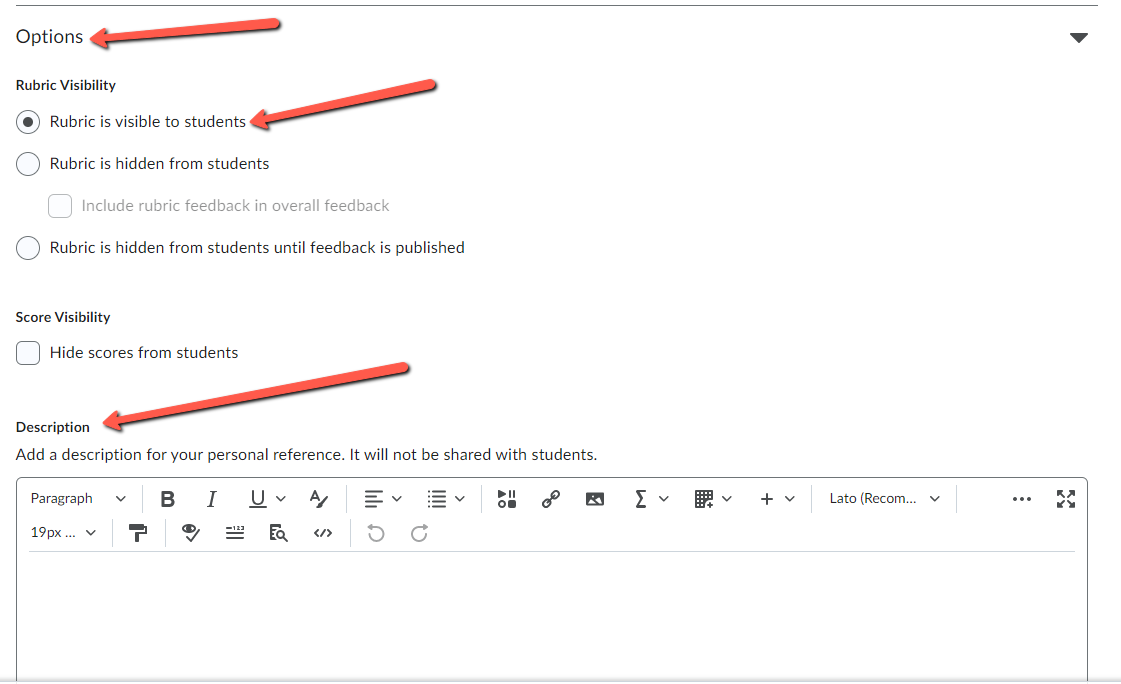
6. Scroll down and expand the Options menu. The default setting makes the Rubric visible to students. Add a Description for personal reference, if you wish.
7. When you're ready, scroll down and press the Close button. The screen refreshes and brings users to the Rubrics library. You should see your newly created Rubric listed, in alphabetical order.
Connecting Your Rubric to an Assignment
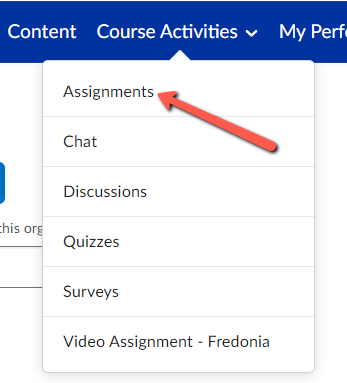
- Navigate to Course Activities and choose Assignments from the drop down menu.
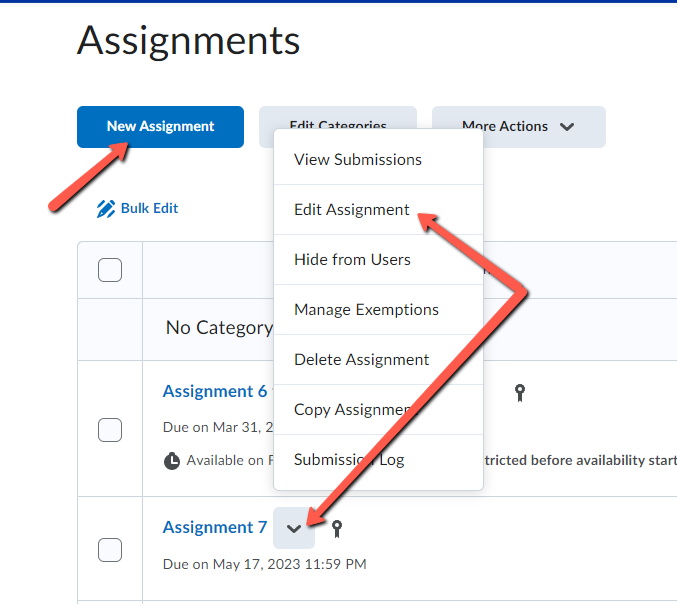
2. Users can create a New Assignment, or go into the settings of an existing Assignment by clicking the Edit Assignment link.
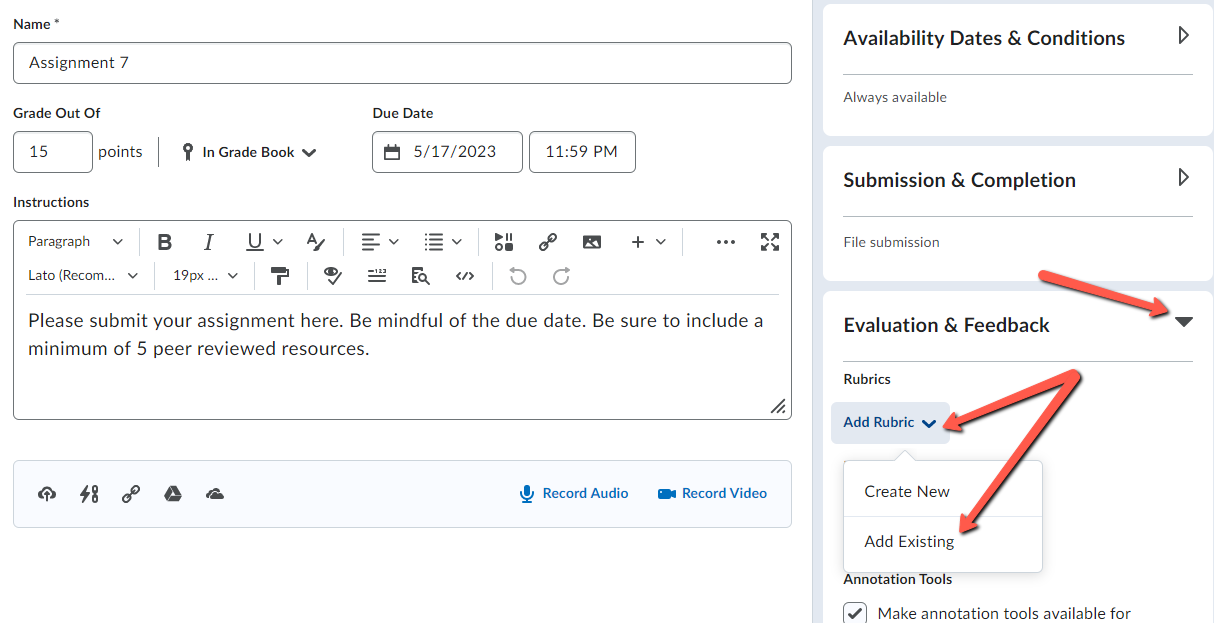
3. Within the settings of the Assignment, expand the Evaluation & Feedback menu. Then click on the dropdown menu for Add Rubric. Choose Add Existing to attach your Rubric, if your Rubric already exists.
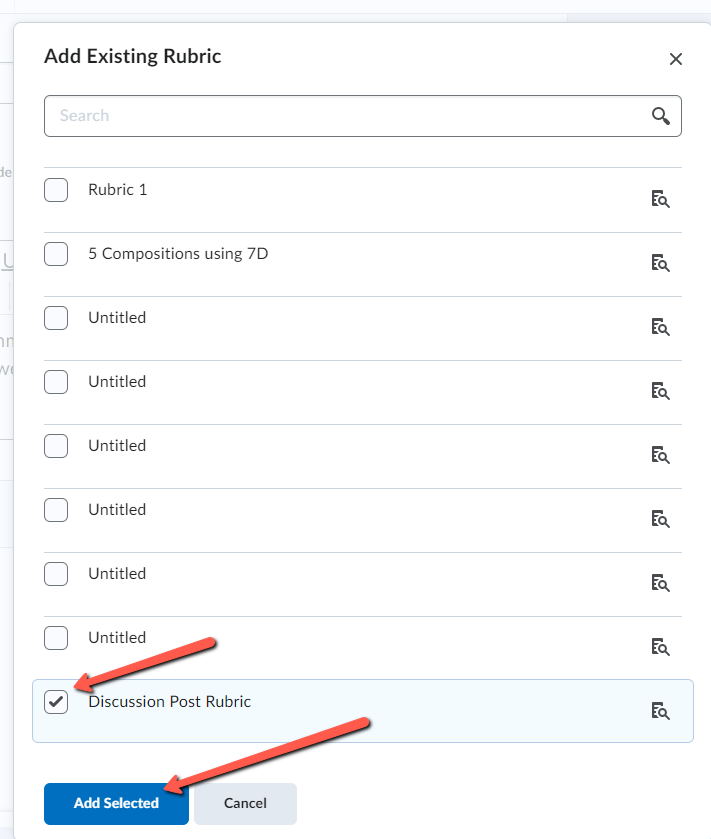
4. Check the box next to the Rubric you want to attach, and press Add Selected.
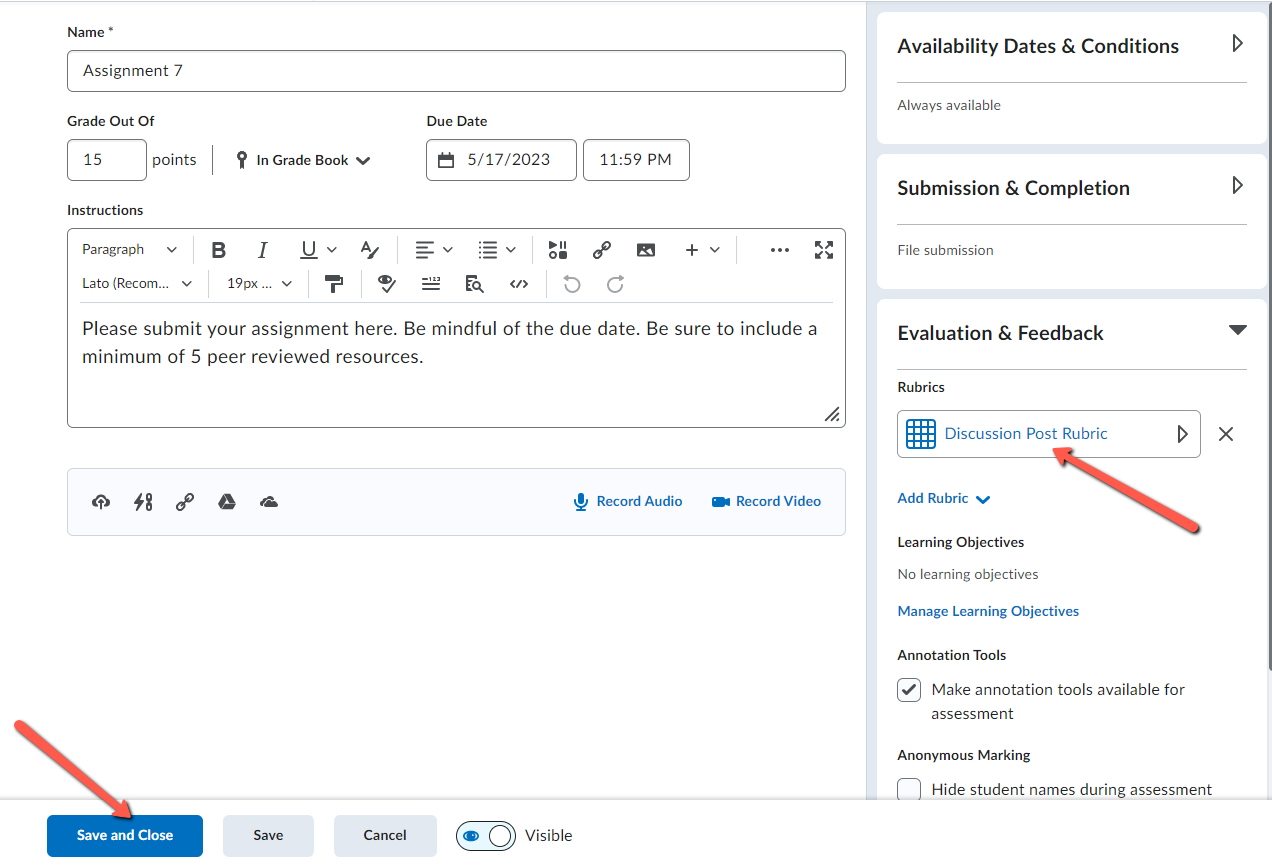
5. If your Rubric is attached, you should see it under Rubrics, within the settings of your Assignment. When you are finished configuring your settings, press the Save and Close button.
Grading with a Rubric
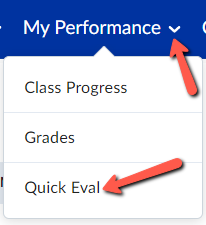
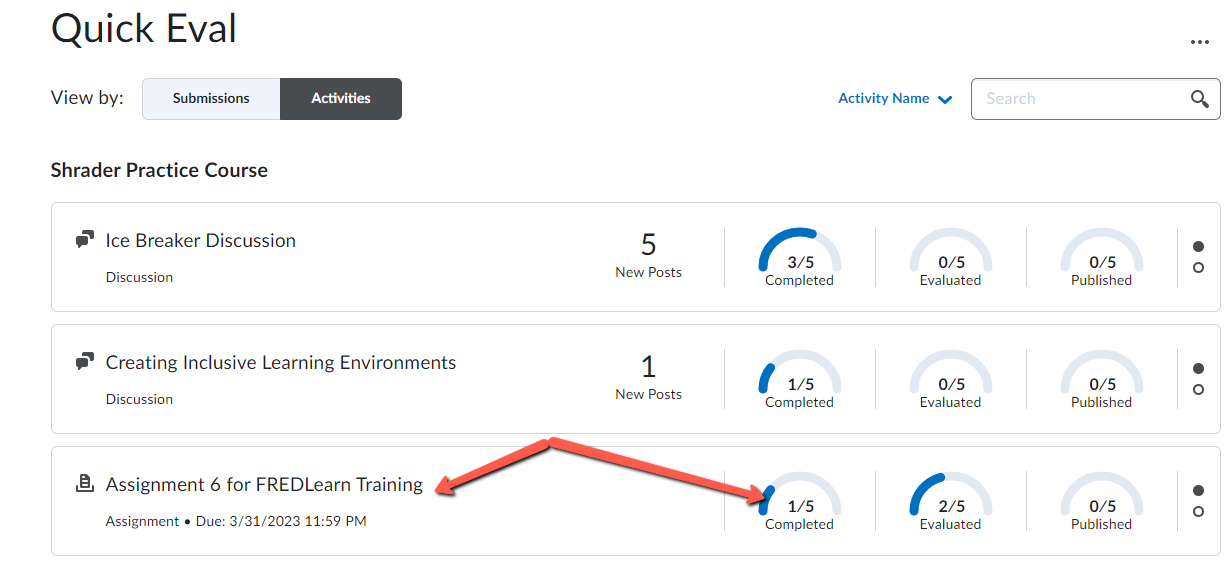
- Navigate to the My Performance tab, press the drop down menu and select Quick Eval.
2. Select the Assignment you want to grade. Hover over the word Completed with your mouse, and it will change to Evaluate All. Press Evaluate All.
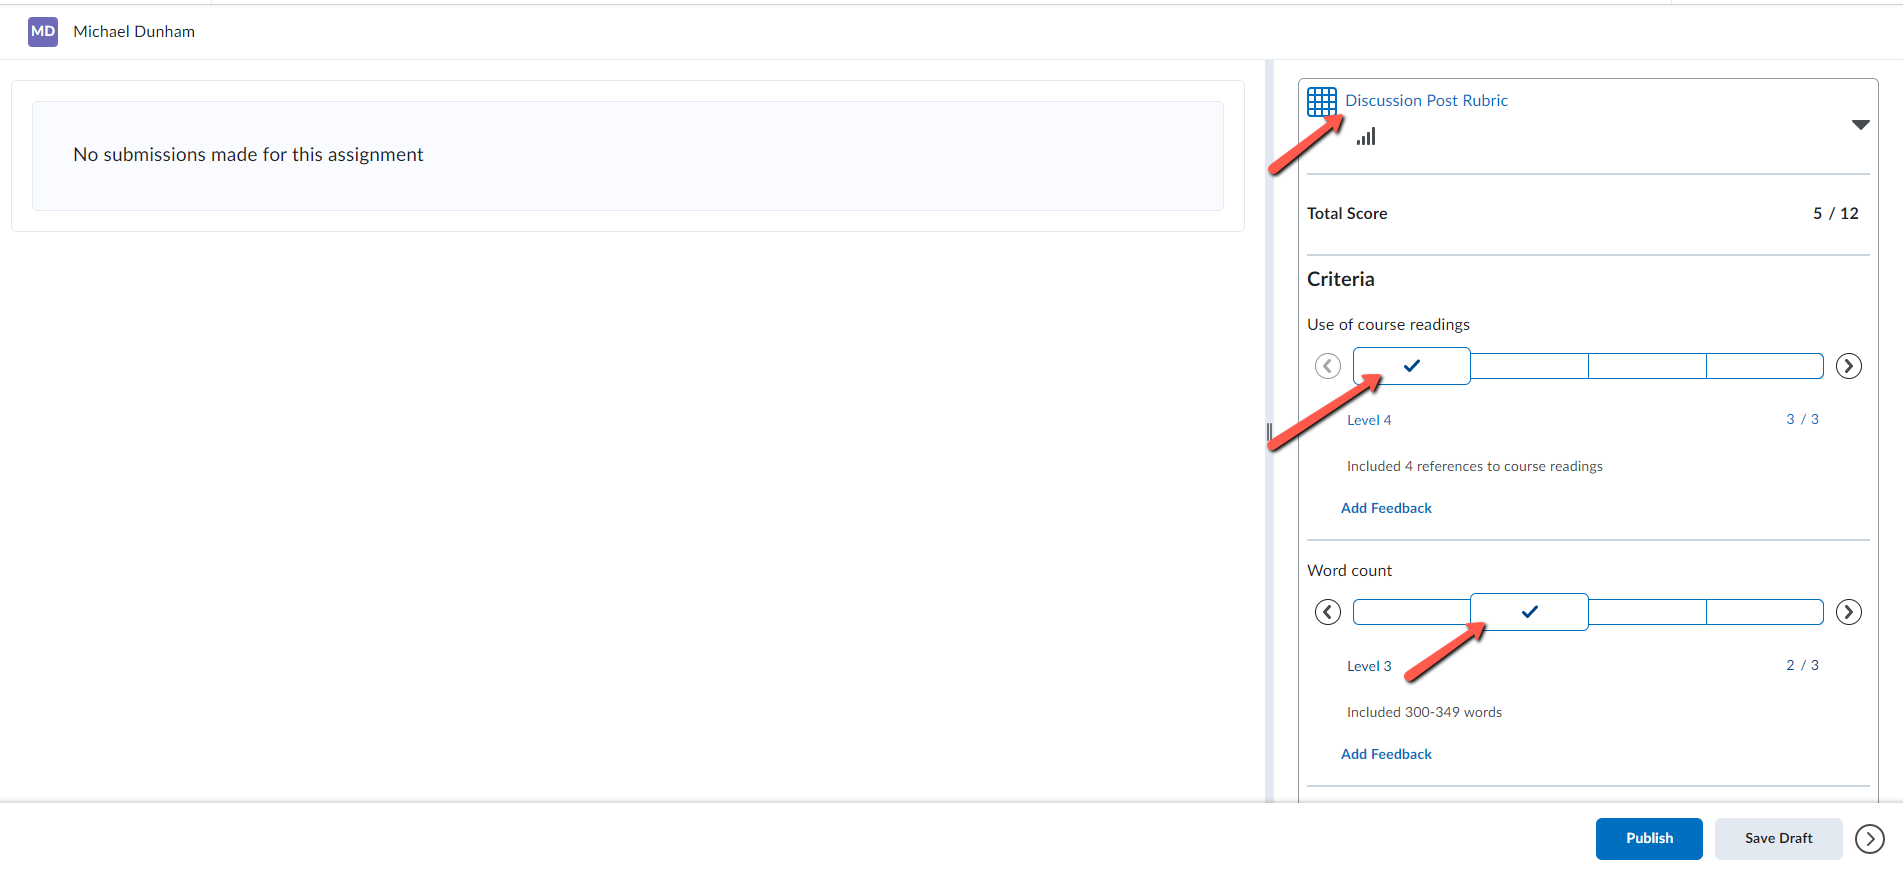
3. Within the submission, press the name of the Rubric to expand it. The Rubric will display. Click on the Levels under each Criteria, to grade using the Rubric.
4. When you are ready, press either Publish or Save Draft. Save Draft allows you to save the grades as a draft and publish at a later date and time.
Related articles
Filter by label
There are no items with the selected labels at this time.
