Upload a recorded enhanced (multiple) video from your computer to Pantopto video.
This method requires use of either Internet Explorer (Windows) or Safari (Mac) with Silverlight installed.
Step-by-step guide
In order to use Panopto as a SUNY Fredonia service:
- Go to: https://fredonia.hosted.panopto.com
- Sign in using the "Fredonia eServices" drop-down option
- Click "Sign in"
- Enter your eServices Username and Password
- Click "Sign in"
After you have logged into the Panopto system and have been granted Creator access:
- Select My Folder from the sidebar.

- Select the subfolder where you wish to upload your file, or Add folder.

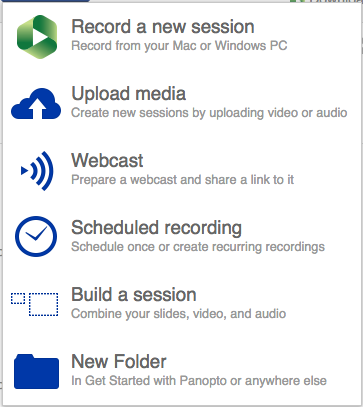
- Select the Create drop-down menu.

- Select Build a session from the drop-down options.
- Fill in the information on screen and then select Create and Edit button.

- Select Choose video or audio file in the top left quadrant.
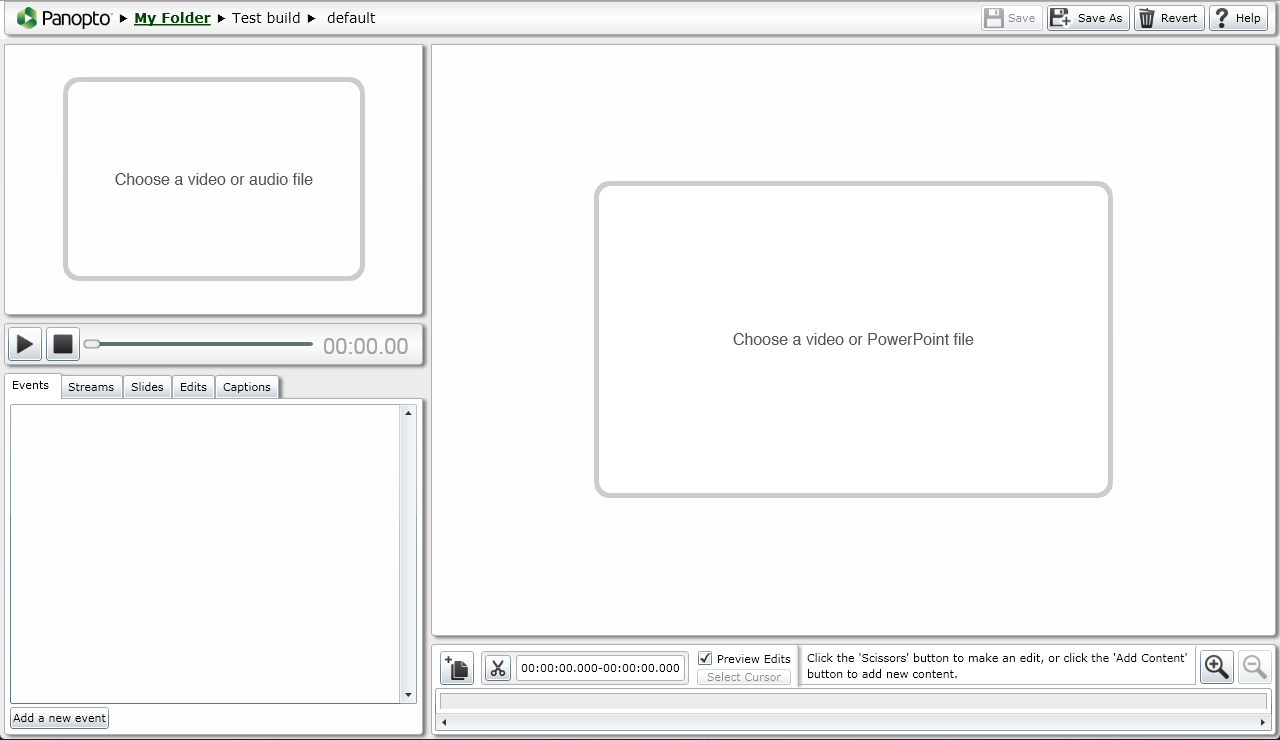
- Browse your computer filesystem to find the audio or video (with audio) to upload, and select Open.
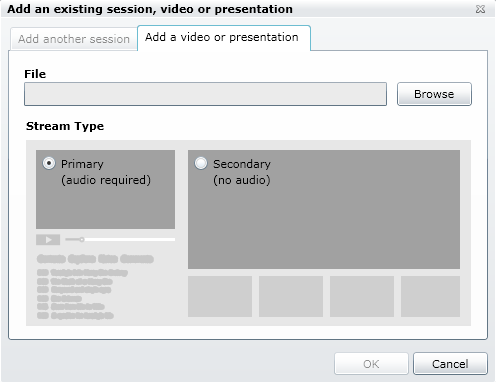
Select OK to start the upload. - You will see the progress of your upload (do not close window).
- Select Choose a video or Powerpoint file to browse and select your video (without audio) to upload. Select Open then OK to start the upload.
- Once uploads are complete, you will be able to edit the name and change sharing permissions.
- Permissions should be set under Share for others to view video. Be sure to select button named Save changes.
- You can then copy the Link to share.
After processing is complete, you can edit the video.
Related articles