/
Windows 10 Setup Directions
Windows 10 Setup Directions
- Mark Mackey
- mackeym
- Admin JBB (Deactivated)
Owned by Mark Mackey
Manually Setup your Wired Network for Windows 10
Please contact the ResNet Office at anytime if you feel you need help with this.
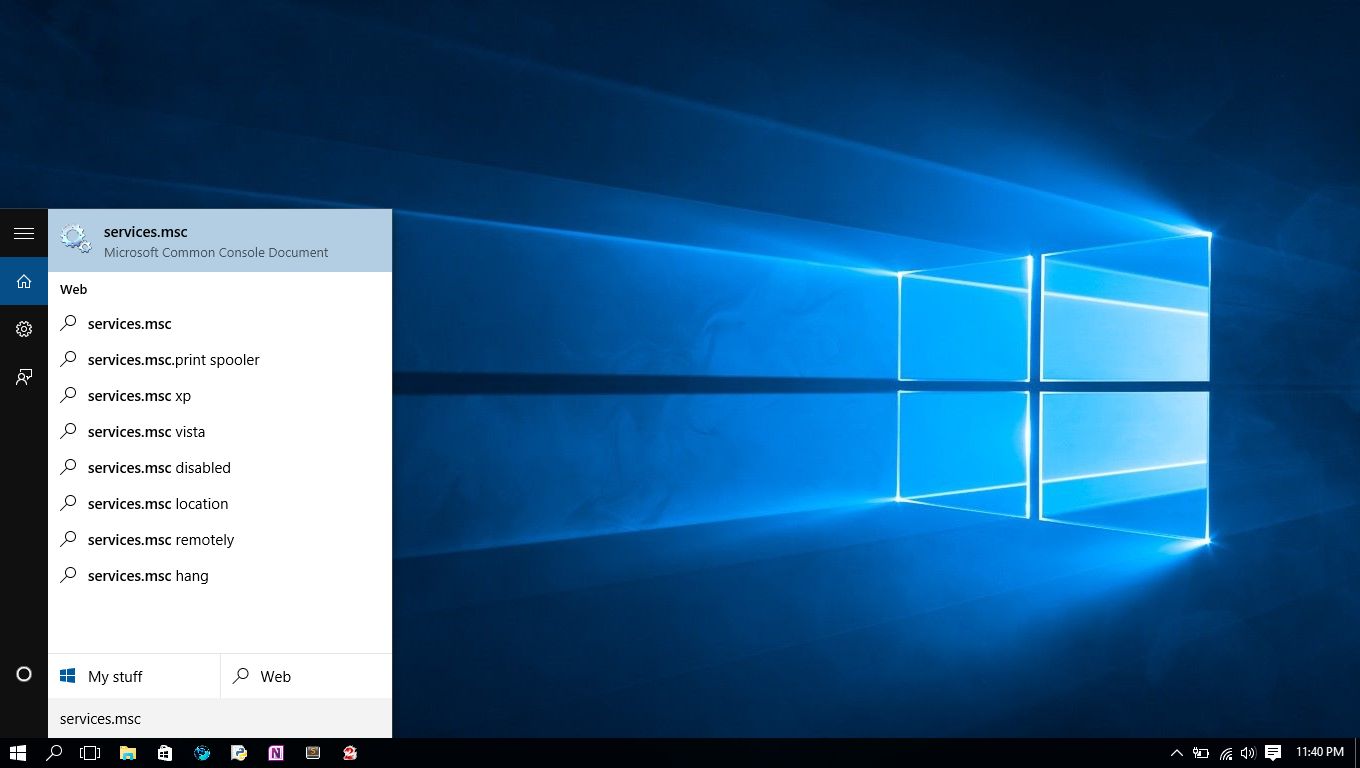
- In the search field type "services.msc" and hit enter
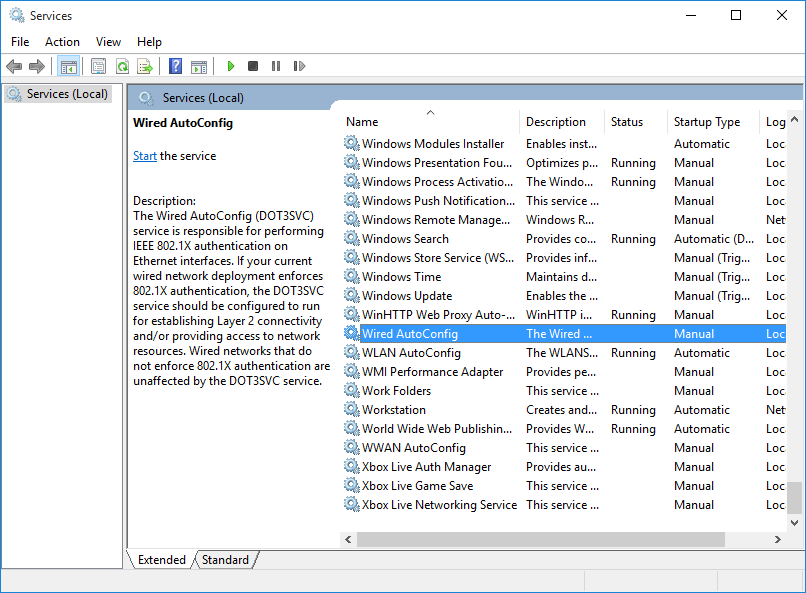
- Scroll down until you see "Wired AutoConfig", RIGHT click on it and select "Properties"
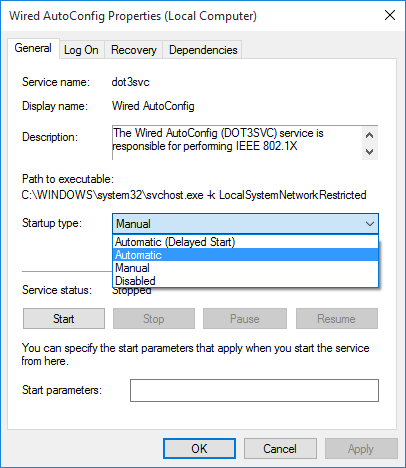
- Set the "Startup Type" to "Automatic"
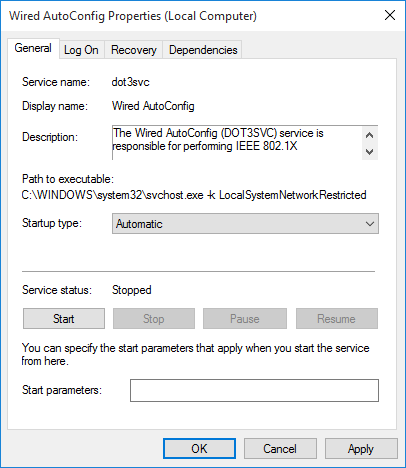
- Click on the "Start" and then "OK"
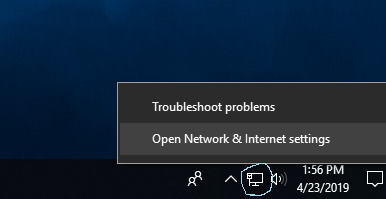
- Right click on internet connections on taskbar, Open Network & Internet Settings.
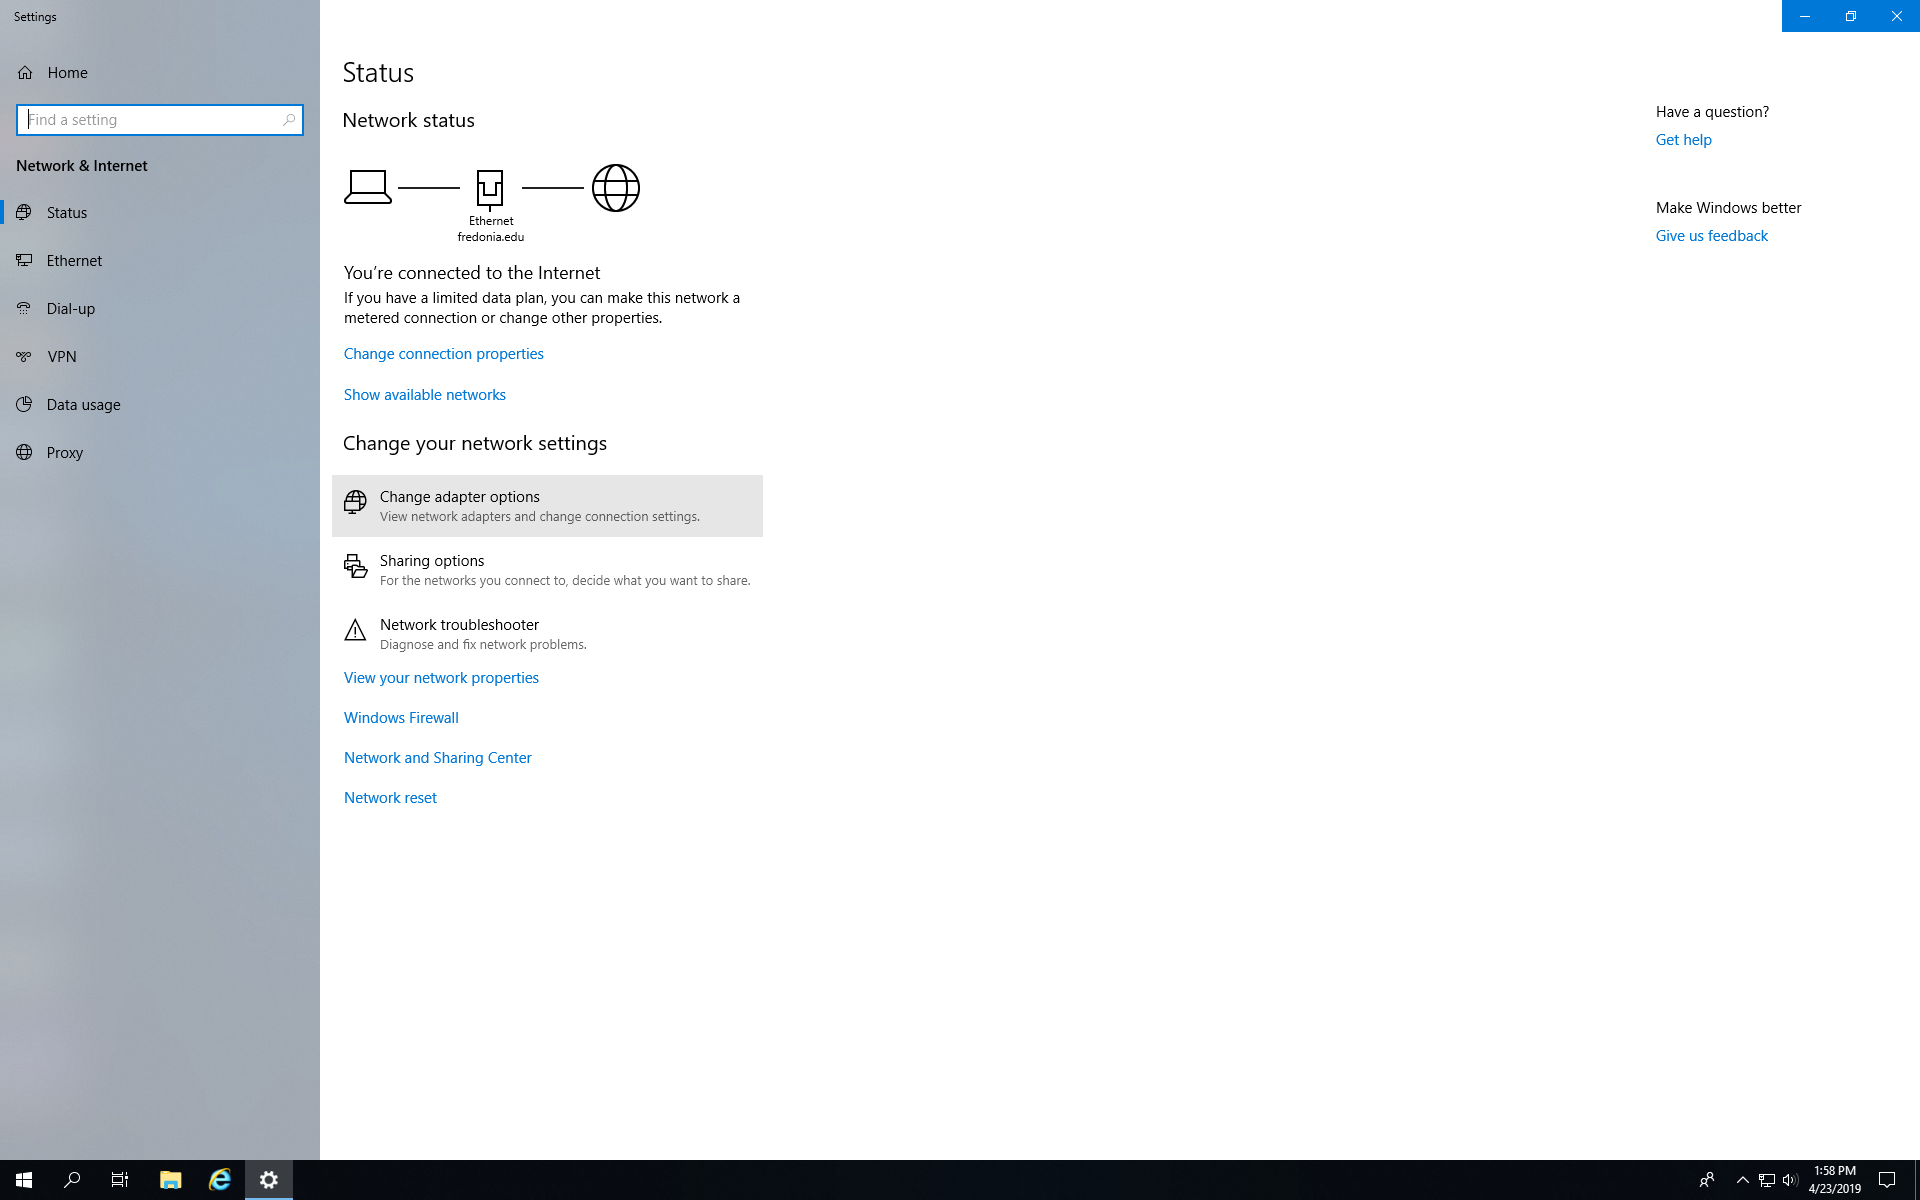
- Select change adapter options.
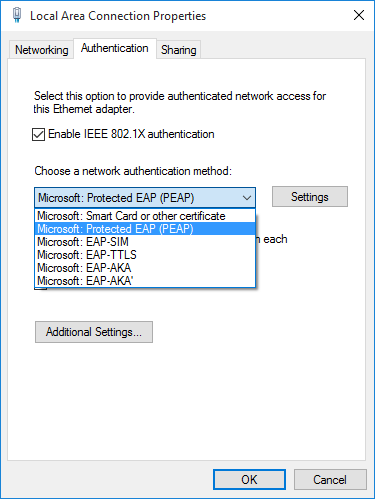
- Right click on "Local Area Connection" and then left click on "Properties"

- Check "Enable IEEE 802.1x authentication" and select "Microsoft: Protected EAP (PEAP)" from the drop down box
- Click on "Settings"
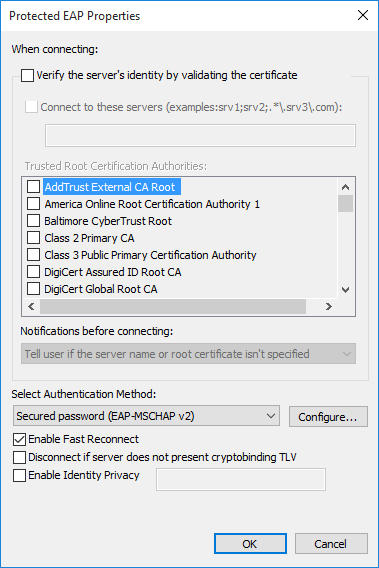
- Uncheck "Verify the server's identity" and select "Secured password (EAP-MSCHAP v2) from drop down and click on "Configure"
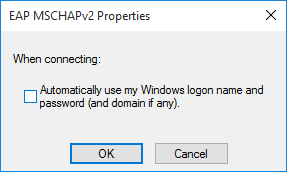
- Uncheck "Automatically use my Windows logon name and password" and click "OK"
- Click "OK" again, you may be prompted to enter your computer password
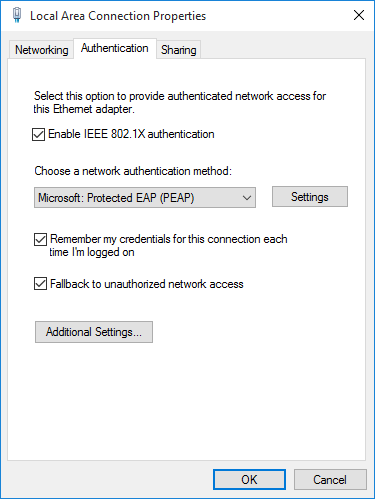
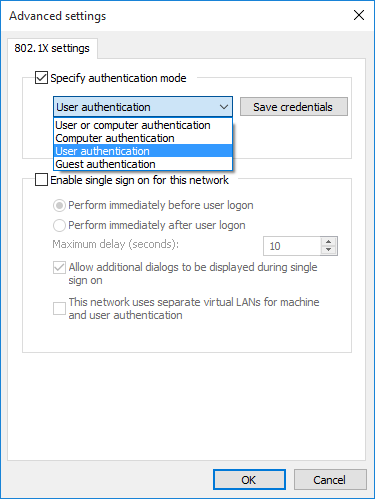
- Click "Additional Settings" and then Check "specify authentication mode" and Select "User authentication" from the drop down. Then click "OK"
- Click on "OK"
- You should now be prompted with a "Network Authentication" window. Enter your Fredonia e-Services ID and password and click "OK"
- After a few seconds, your internet connection should work! CONGRATULATIONS!
- In the search field type "services.msc" and hit enter
Related articles
Filter by label
There are no items with the selected labels at this time.
Related content
Windows 11 Setup Directions
Windows 11 Setup Directions
More like this
Linux Setup Directions
Linux Setup Directions
More like this
Connect a Wired Device
Connect a Wired Device
More like this
Windows 7 and 8 Setup Directions
Windows 7 and 8 Setup Directions
More like this
Connecting to eduroam with Windows 8 & 10
Connecting to eduroam with Windows 8 & 10
More like this
Utilizing Campus Network Resources on WiFi
Utilizing Campus Network Resources on WiFi
More like this