/
BLUEview Network Management: Create/Update an announcement
BLUEview Network Management: Create/Update an announcement
To add an announcement, click on the button on the left side of the "BLUEview Management" workbench labeled "Announcement."
To edit an announcement, click on the "Edit" button next to the announcement in "BLUEview Management" workbench.
- PLEASE NOTE: only the creator of the announcement will be able to edit. If you do not see an edit button next to an announcement, you do not have the permissions to edit that announcement.
Announcement fields
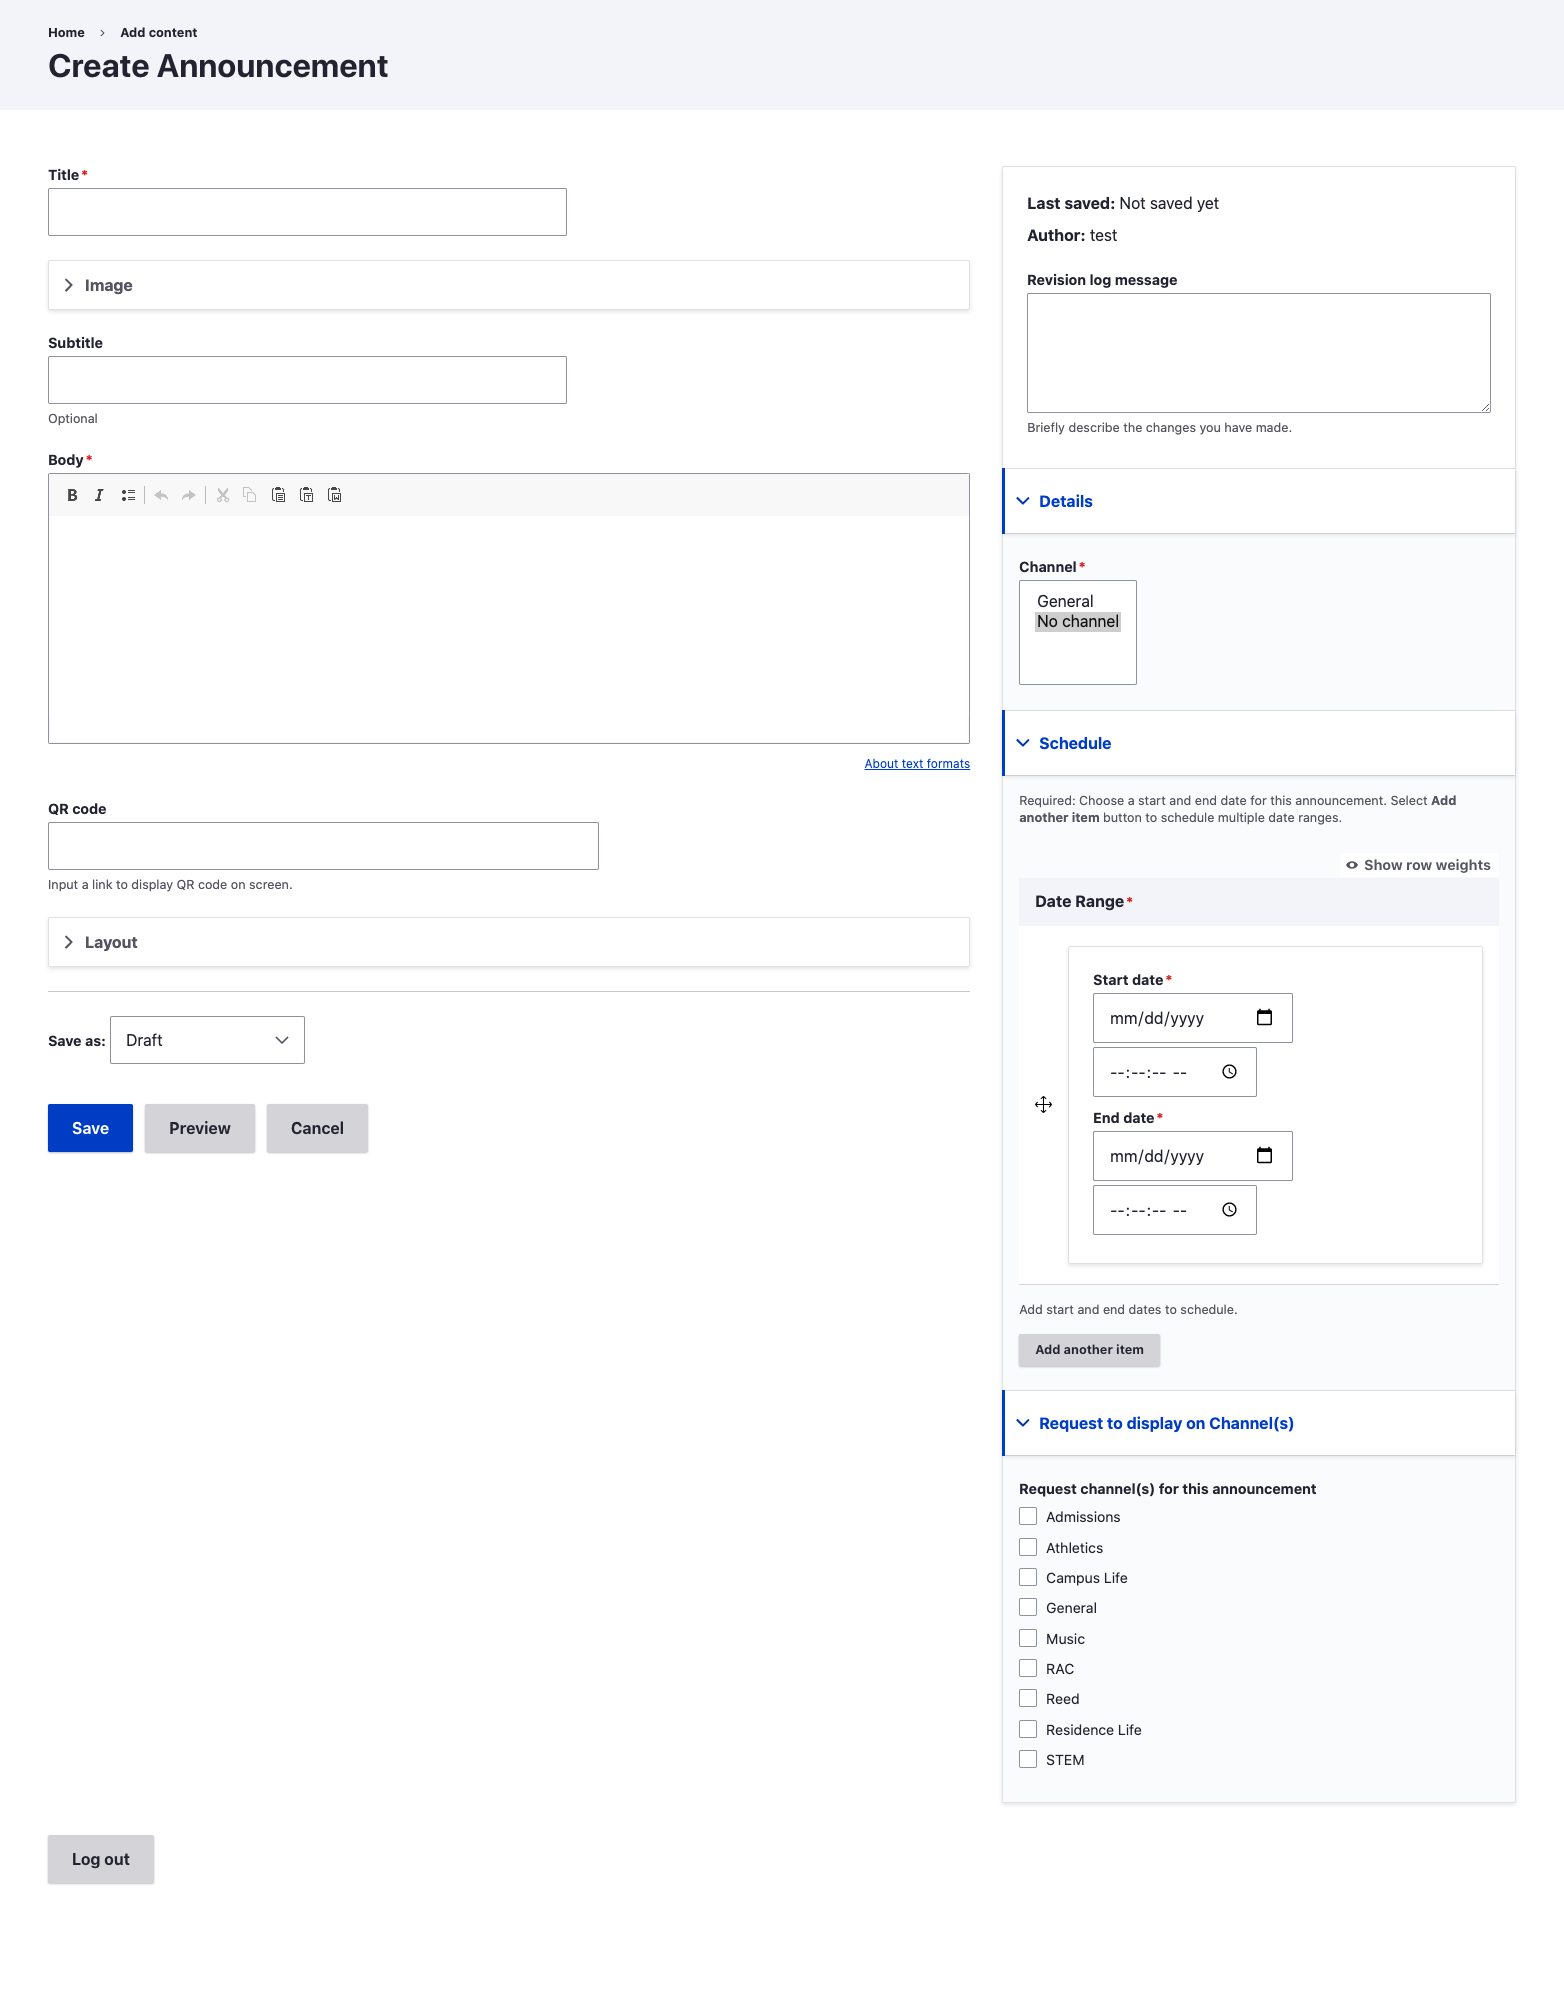
- *Title: must be a descriptive title.
- Image: choose an image to be displayed on the announcement.
- Remove the current placeholder image
- Select media
- Upload a new image, or select an image from the media library
Image must be at least 2400px wide.
You may find images of campus at fredonia.edu/photos
- Subtitle (optional)
- *Body: descriptive text about the announcement
- All available options are in the WYSIWYG editor
- The table feature requires that you input a width of "100%" and select the "First Row" Headers option when you create the table in order for it to display properly
- QR code: insert a link to a campus web page (optional)
- Layout: choose a layout for this announcement (if no image, the default will be chosen)
- *Channel: choose your channel
- *Date Range: insert dates for the announcement to be visible - a start date/time and an end date/time must be chosen
- Request to display on Channel(s) (optional): choose additional channels for this announcement. See map to determine channel locations on campus.
- Review your submission for accuracy
- You may use the "Preview" button to see your announcement (best viewed on an HD or larger screen). Select "Back to content editing" to return to the form.
- Select desired "Save as" moderation mode
- Select "Save" button.
, multiple selections available,
Related content
How to submit an announcement to BLUEview Network digital signage
How to submit an announcement to BLUEview Network digital signage
More like this
BLUEview Network Campus Digital Signage
BLUEview Network Campus Digital Signage
More like this
Digital Signage Management
Digital Signage Management
More like this
Request new BLUEview Network digital signage display
Request new BLUEview Network digital signage display
More like this
BLUEview Network Management: Workbench
BLUEview Network Management: Workbench
More like this
BLUEview Network Management: Events (Localist) channel assignment
BLUEview Network Management: Events (Localist) channel assignment
More like this


