/
How to Configure the Houghton Toshiba Printer on Mac
How to Configure the Houghton Toshiba Printer on Mac
- Matt Wilson
- wilsonm
- Admin JBB (Deactivated)
Owned by Matt Wilson
Step-by-step guide
Printing on the Houghton Hall Toshiba printer requires utilizing a . The manner in which you can have the printer deployed and then configure to print with the department code in an efficient manner is discussed below.
- Submit a request to have the printer deployed with the following information:
- Your eServices username
- That you have a Mac computer
- Your computer's name
- Once the request has been completed by the printer being added to your computer, reboot your computer.
- You will know that the printer has been deployed by checking in System Preferences > Printers & Scanners and looking for Color Toshiba Houghton 116A
- To then print with the Departmental Code, begin printing your file like normal. When you reach the system print window, click the drop down for Presets and select "Toshiba-" followed by your department. This will need to be selected each time you print. This preset should be deployed with the printer. If it is not, use the rest of the steps below.
- To configure the departmental code, open a program that you can print from, for example Microsoft Word, open a new document and go to File > Print
- Select the Color Toshiba Houghton 116A from the Printer drop down at the top of the window
- If you do not see the expanded window from Figure 1 below, click on Show Details (the location of this is slightly different between applications and versions of macOS)
- On the drop down menu that might say Copies & Pages or might say the name of the application being printer from, select Print Mode.
- Print Mode will not be visible unless you have the proper printer selected
- In the Print Mode section, check the box next to Department Code and then enter the code that has been given to you for printing and copying from your academic department. (Figure 2)
- To save this for ease when printing, click on the Presets drop down and select Save Current Settings as Preset... (Figure 3)
- Enter the name that you would like for the custom settings and choose Only This Printer
- Each time that you go to print, you will just need to select the new Preset that you just created from the Presets drop down menu, after making sure that the Color Toshiba Houghton 116A is selected.
Related articles
Filter by label
There are no items with the selected labels at this time.
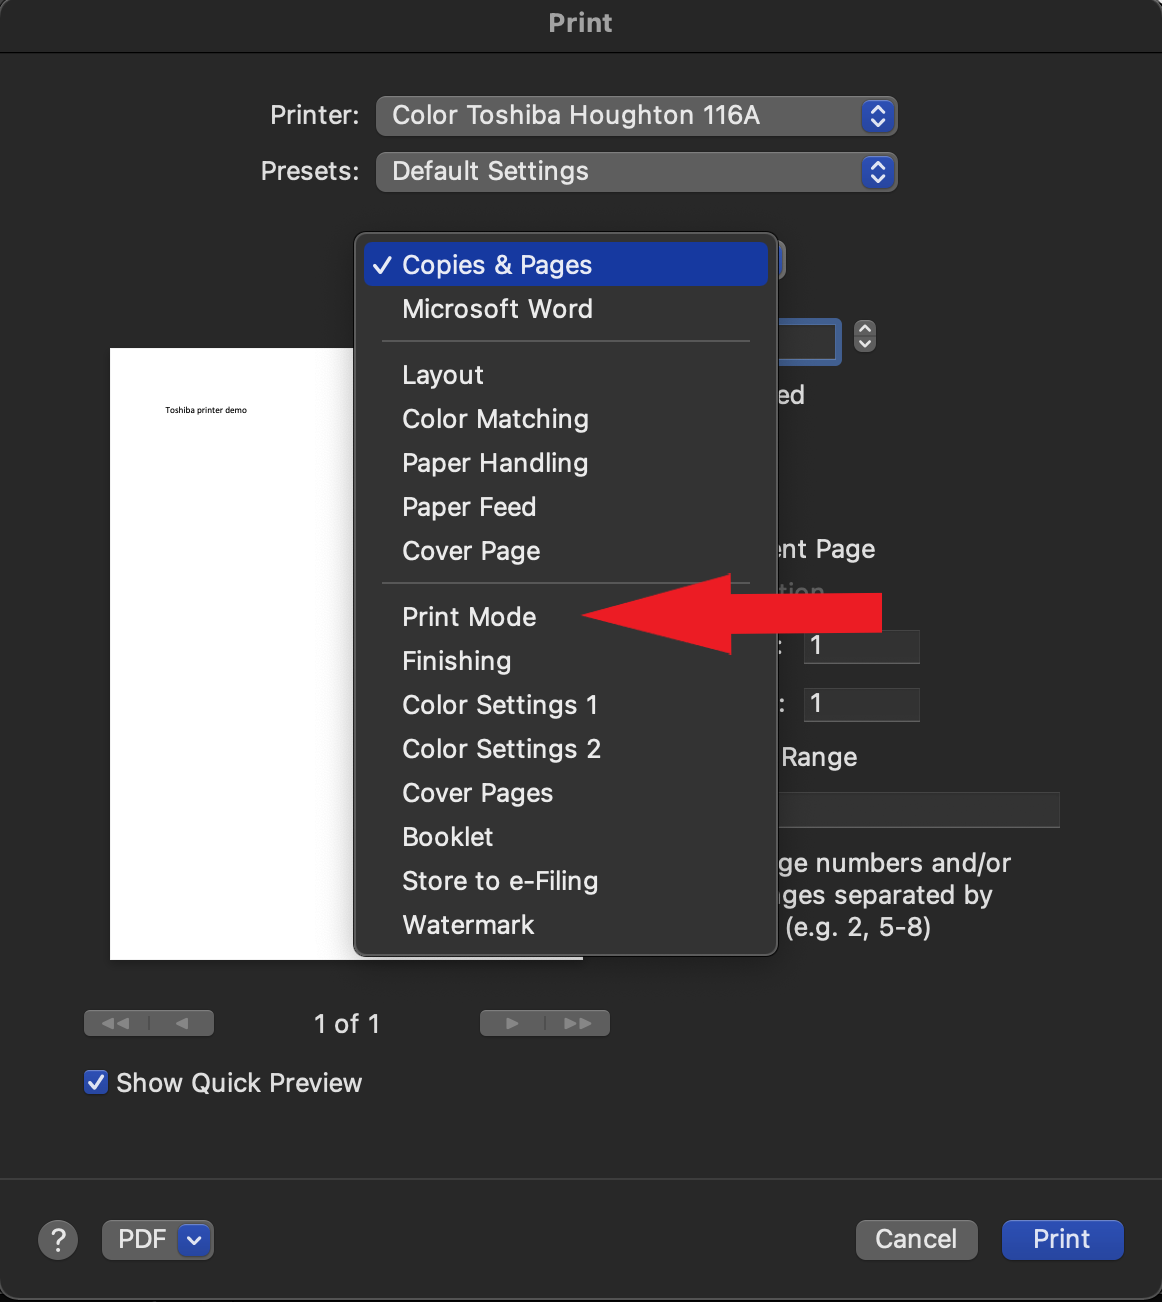
Figure 1

Figure 2
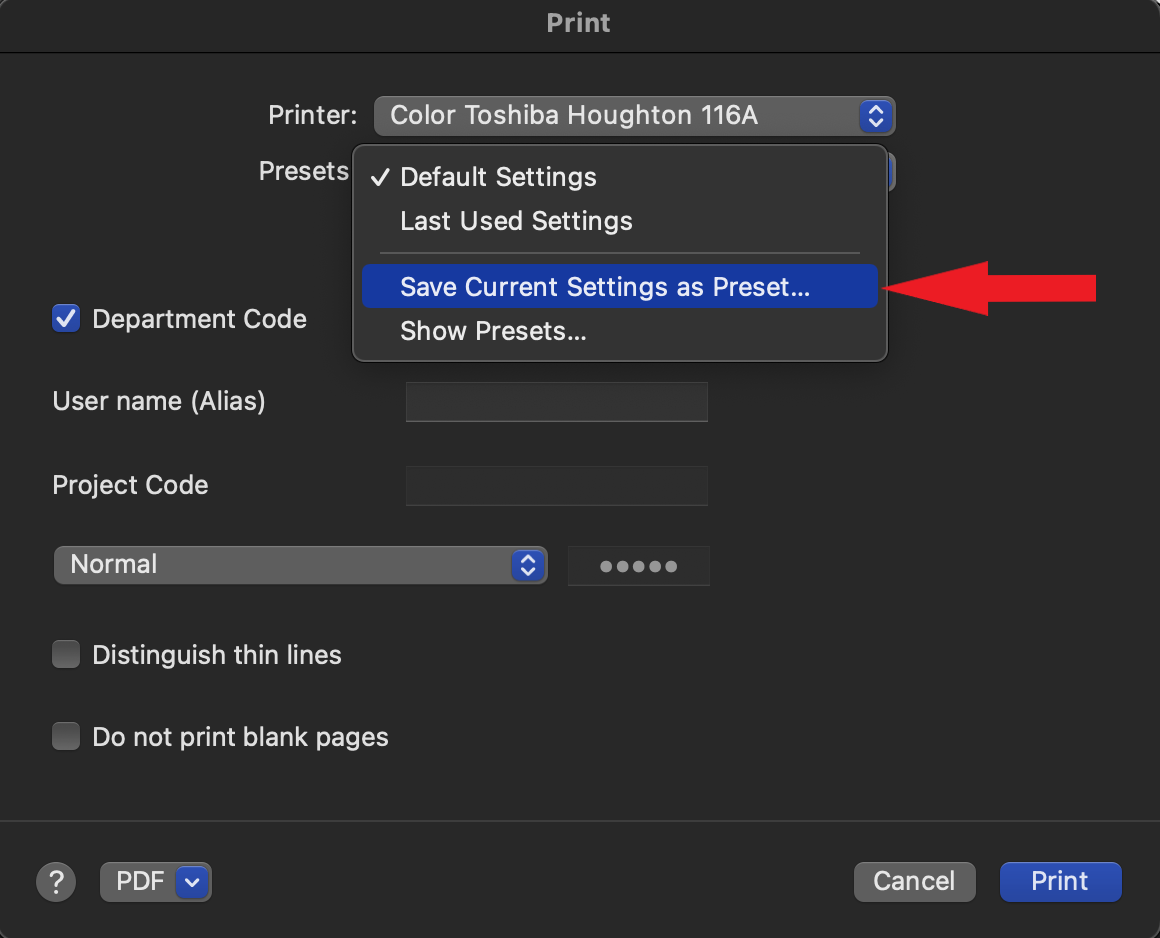
Figure 3
, multiple selections available,
Related content
Step-by-Step MFA Setup Instructions
Step-by-Step MFA Setup Instructions
Read with this
Wireless Printing
Wireless Printing
More like this
Adding Multiple Sign-in Methods to Microsoft MFA
Adding Multiple Sign-in Methods to Microsoft MFA
Read with this
Quick Start Guide to FREDprint
Quick Start Guide to FREDprint
More like this